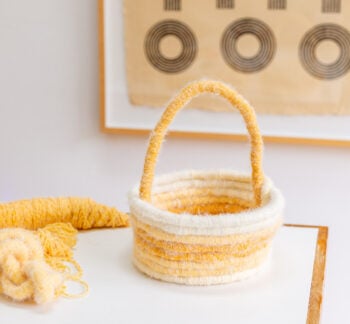
DIY Easter Basket
This DIY Easter basket is soft as can be, but sturdy enough to hold all the eggs from the Easter egg hunt. It took a little while to make, but it was very, VERY easy. And has held up really well, so I thought I would share the tutorial ahead of Easter this year, in case you want to make your own. No sewing required!
Yield: 1 basket
Equipment
- hot glue gun and hot glue
- needle and thread (optional)
- Scissors
Materials
- yarn
- 10 yards cotton piping cord (I used 11/16 inch in size)
Instructions
Knot and wrap.
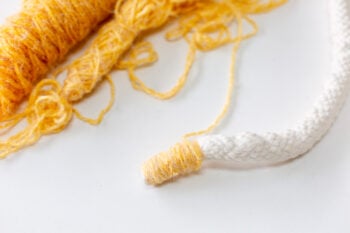
- Start by double knotting a piece of yarn at the end of the cotton piping.
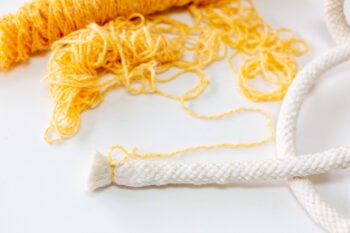
- Then begin wrapping the yarn around and around the piping, pulling it securely / tightly as you go to make it strong.
More wrapping.
- As you wrap the yarn, you'll find that it becomes more difficult to manage if you don't wrap the completed piping into a ball of some kind.
- You'll have to continue wrapping the completed piping into a ball as you go, which takes a little time. But then the wrapping process will go faster again.
- Continue this process of wrapping and then situating the wrapped piping into a ball, until you've reached the desired length.
Tie off.
- Tie off the end of the yarn with several knots. My basket is 11 inches wide and took 10 yards of piping to complete (which includes the handle).
- It's helpful to leave roughly 2-3 yards of piping unwrapped to save time. The unwrapped portion will be used for the base of the basket and the handle (which will be wrapped separately).
Roll and glue.
- Now it's time to start hot glueing. Begin with the unwrapped side of the piping. Roll it up and add a line of hot glue (3-6 inches in length). Then apply pressure until it's secure. Make sure the glue is secure before continuing on.
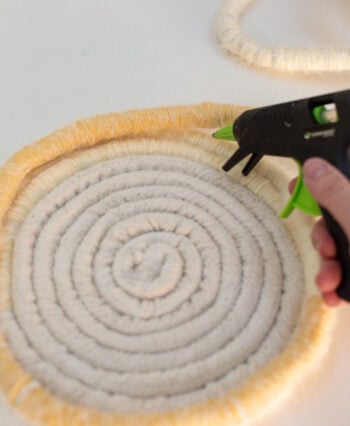
- Repeat this process every few inches.
- Once you've reached the desired base size, it's time to start glueing the piping up into a wall. Again, you'll want to take your time when glueing the layers together.
- To create a strong bond, go slow and apply pressure for 20-30 seconds per 3-6 inch section.
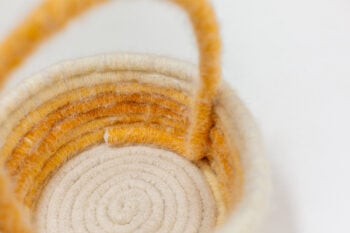
Make the handle.
- When the basket base is complete, make the handle with roughly a yard of piping (could be more or less depending on desired handle size).
- Wrap the piece of piping with yarn as you did before, but this time add a long piece of wire that will run the length of the handle. This will help keep it stiff and strong.
Attach handle to base.
- Once the handle is complete, attach it to the base (interior) of the basket with hot glue, to keep it in position.
Use a needle and thread.
- Now that the handle and base of the basket are complete, use a needle and thread to go through the handle and in parts of the wall and base that might need some additional reinforcement.
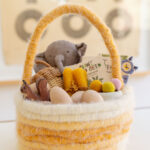
- Then it's ready to use. Fill it with completed DIY egg ideas on Easter, plastic eggs from the egg hunt, or as a basket for Easter treats and gifts for kids.