How to make a Wooden Desk Organizer
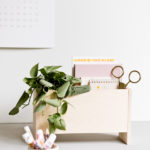
This wooden desk organizer is a great beginner to intermediate weekend project. You can use it as a catchall for everything you want to be able to access quickly and easily, as a desk paper organizer, or even turn it into a planter!
Equipment
- compact circular saw (I use this one)
- measuring tape or ruler
- table clamps
Materials
- wood pieces exact dimensions below in step 1
- pencil
- wood glue
- damp cloth or paper towels
- sandpaper or electric sander optional
Instructions
Cut down the wood.
- Start by cutting down all of the wood you need for the project.
- I was able to find a few of the pieces at my local art supply store in the exact dimensions I needed, so I only had to make a few cuts for the extra pieces that I needed.
- As you can make straight cuts, it's super easy to do yourself. Especially if you're using a smaller power tool, like this one (which is what I use). Once you have the pieces cut, sand if necessary for a super smooth finish.
Here are the dimensions....
- 2 wood pieces that are 4.75 x 7.5 inches (these are the side legs)
- 2 wood pieces that are 6 x 12 inches (these are the long side pieces)
- 1 wood piece that is 5.5 x 4 inches (this is the inside divider)
- 1 wood piece that is 4 x 12 inches (this is the bottom piece)
Add wood glue.
- Next, add wood glue to the two long sides of the bottom piece of wood (the bottom piece is 4 x 12 inches).
- The piece that I'm holding in my hand in the photo is actually the bottom piece and the one that's on the table is one of the side pieces that will soon be attached.
Attach the sides.
- Attach the two long side pieces (the 6 x 12 inch pieces) to the bottom piece.
- These two long side pieces will cover up the sides of the bottom piece to create a seamless look.
Attach bottom to sides.
- Next, add wood glue to bottom and two sides that will touch the other wood pieces for the middle divider (which is the 5.5 x 4 inch piece) anywhere you'd like to the inside.
- I did mine off center, so I'd have one large side for notebooks, etc and a smaller side for pens, pencils or even a plant.
Clamp everything and wipe excess glue.
- Use two table clamps to clamp everything together while drying, as shown in the photo.
- Then, use a slightly damp cloth or paper towels to wipe away any excess wood glue that you can see coming out from the joints.
- Let the entire piece dry overnight (or according to drying instructions on your wood glue packaging) with the clamps still attached.
Remove clamps and add more glue.
- Remove the clamps, make sure that the entire piece is secure / solid and then move onto the raised sides.
- Add wood glue to both of the remaining sides that are still open.
- Then, flip over (so the very bottom of the piece is facing upward) and attach the two remaining wood pieces (these are the 4.75 x 7.5 inch pieces).
- You want the ends of each of those two pieces to be up in the air, like you see in the photo.
- Those excess ends will become the legs of the organizer when you turn it back over to use.
Clamp everything and let it dry overnight.
- Clamp everything together one more time.
- Use a slightly damp cloth or paper towel again to wipe away any excess wood glue that you can see coming out from the joints.
- And let the entire piece dry overnight (or according to drying instructions on your wood glue packaging) with the clamps still attached.
Remove the clamps.
- Remove the clamps, flip the organizer over and it's ready to use.
- If there are any areas that seem un-level, you can easily fix it with an electric sander or sand by hand (which will take more time but still totally works).
- Just be sure to dust off all of the sanded areas before using.
- Note: If you want one side (or both sides for that matter) to be used for housing plants, be sure to insert a plastic liner or something similar before adding your plant. The liner will catch the water and keep your wood from getting wet.