
How to Make a Canvas Lunch Bag from Scratch
Whether you have kiddos at home or are just looking for an excuse for a new lunch bag, I have you covered with a DIY canvas and leather version that works for adults and kids.They're sewn from hand painted water-resistant canvas, so you can mess with the dimensions, designs, etc to get it just right for you (or your kid).Here's how to make your own!
Equipment
- leather / fabric hole punch
- measuring tape and marking chalk
- sewing machine
Materials
- medium to heavyweight canvas 11.5 in x 29 in makes one lunch bag
- fabric paint and paint brush if creating your own design
- fabric wax sealant - optional I use Otter Wax, which you can get on Amazon
- leather strap or scrap see dimensions needed in step 7
- gold button and screw back
Instructions
Prepare the canvas fabric.
- Start by measuring and cutting a 11.5 in x 29 in piece of canvas.
- If you're painting your own design on the canvas or dyeing the canvas a solid color, now is the time to complete that process.
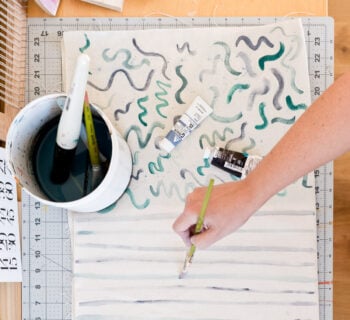
- You can use fabric paint, a little water to thin out the paint if desired, and a paint brush.
- OR you can dye the entire piece of canvas using this technique: how to dye natural fibers. Wait for it to completely dry before moving onto the next step.
Cut and fold.
- Once cut, fold the canvas in half and pin, as shown in photo.
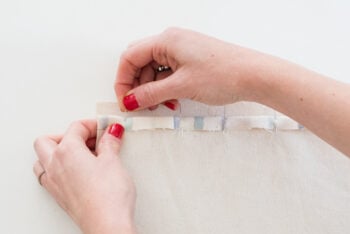
Fold and sew.
- Next, fold the top edges down 1/2 inch and sew a straight line (1/4 inch from the edge).
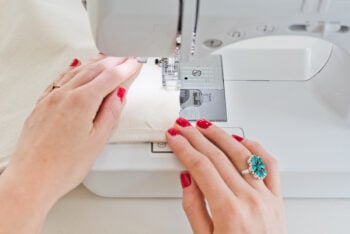
- Backstitch at the beginning and end of each side.
Sew the sides.
- Then sew a straight line on both sides (1/4 inch from the edge), leaving the top open.
- Backstitch at the beginning and end of each side.
Fold and sew.
- Next, match up the bottom corners of the bag to each other (as shown in the photo) and fold, forming a diamond shape.
- On both corners, mark a line 2 in away from the corner and then draw a horizontal line 4 in across.
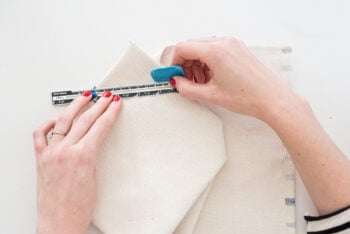
- Sew over the lines and cut off the corners, leaving a 1/2 in edge.
Turn right side out and iron.
- Turn the bag right side out and press out all four corners.
- Then, form the bag into a lunch bag shape and iron all four vertical creases from the bottom corner to the top of the bag.
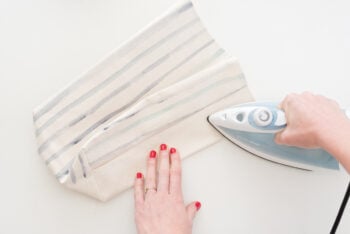
- Also, iron a horizontal crease from each corner on the bottom allowing the bag to stand on its own.
Cut leather strips.
- To add finishing touches, you'll add the leather strap and button closure.
- Cut one strip of leather 5 inches long and 1/2 inch wide. And one very small piece of leather that is 1/2 inch wide by 1/2 inch long.
Attach the button to the leather.
- Next, attach the button, screw back, and 1/2 inch square piece of leather you just cut, 4 inches down from the top of the bag (on the front).
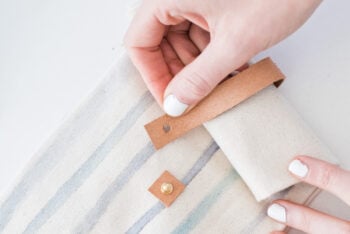
- You'll have to use a hole punch for all the pieces. See photo for how assembly should look.
Sew the leather strip.
- Finally, sew one side of the leather strip to the back of the lunch bag and punch a hole toward the bottom of the loose end.
- You should now be able to roll the top of the lunch bag down and close it by hooking the other side of the leather onto the button closure.