Check print clay bowls that you can make in your oven.
I recently made some clay bowls in a neutral check pattern to play around with the check print trend in home decor. And I put together a detailed tutorial for the whole thing, if you wanna check it out. Lol.
Jokes aside, I’ve really been wanting to get back into some smaller DIY projects that I can finish in an afternoon. So I partnered with Sculpey and their line of innovative lightweight Soufflé clay to make these clay bowls for around the house.
They turned out so well! I’m already thinking about making more as DIY holiday gifts when it gets a little close to Christmas. Here’s everything you need to make your own…
Supplies and Equipment
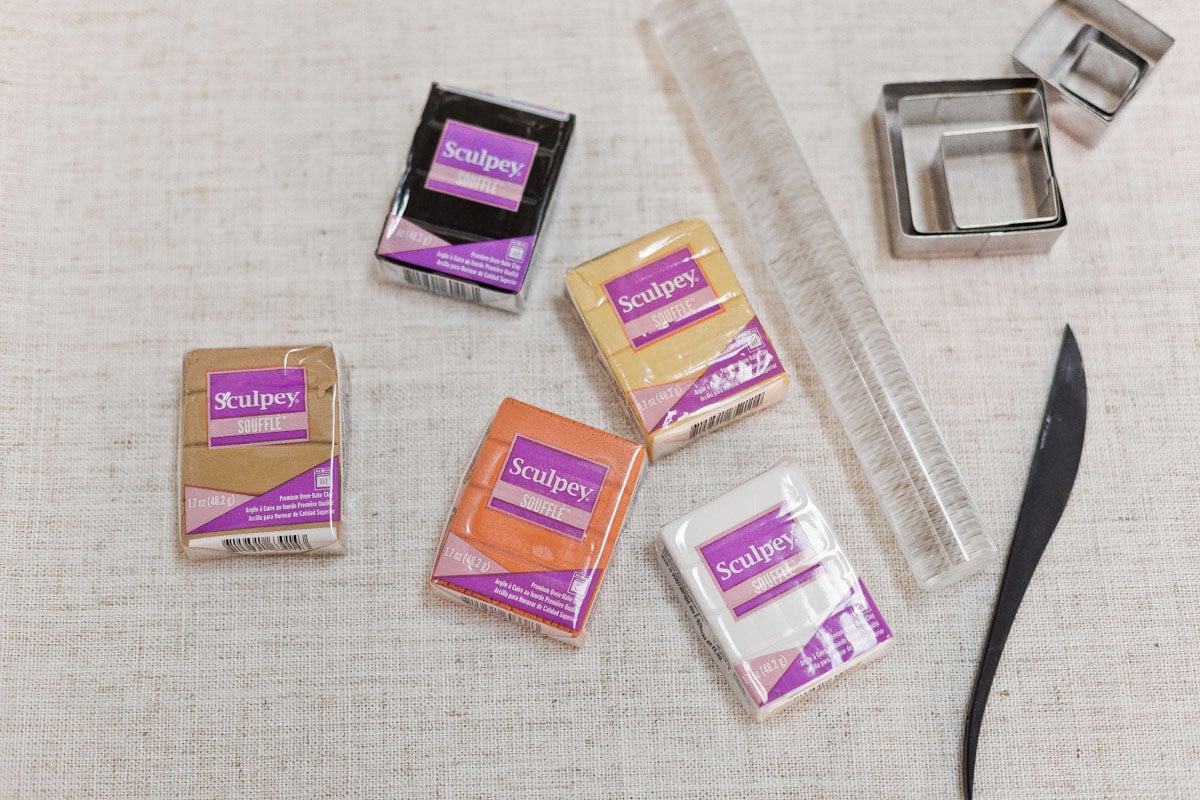
- Sculpey Soufflé clay in contrasting colors
- Sculpey Tools metal square clay cutters
- Sculpey clay roller
- Sculpey clay tool starter set
- bowls of varying sizes to guide the final shape
- small ruler
- oven
Why use Sculpey Soufflé clay specifically?
I’ll touch on some of this in the tutorial, but here are some reasons why I specifically love Sculpey Soufflé’ clay for this project (and others)…
- Its lightweight – making it versatile in the types of projects you can create.
- Once oven baked it has a really pretty matte (suede) finish, which makes the final piece look really professional.
- Soufflé is strong and holds detail well. Which makes it perfect for advanced techniques like caning.
- It can be cut and sewn after baking, which is very unique and incredibly helpful! You can tweak any design mistakes or add pin holes for tags or even sew the clay onto things. So cool!
- Stays soft until you bake in an oven. So it won’t dry out before you’re ready to bake. Also, makes it easy to store/ come back to another day, if needed.
- Non-toxic!
How to Make Check Print Clay Bowls
1. Start by picking two contrasting colors to use for the check pattern of your clay bowls.
I used latte and igloo for the step by step photos. And then I tried latte and ivory for a slightly bigger bowl, which you can see in some of the styled final photos.
2. Open the packaging on each Soufflé clay color and use the largest metal square clay cutter to cut on the indented lines of the clay.
These are already sectioned out into even pieces. So it helps to get a quick set of even blocks without doing a lot of measuring.
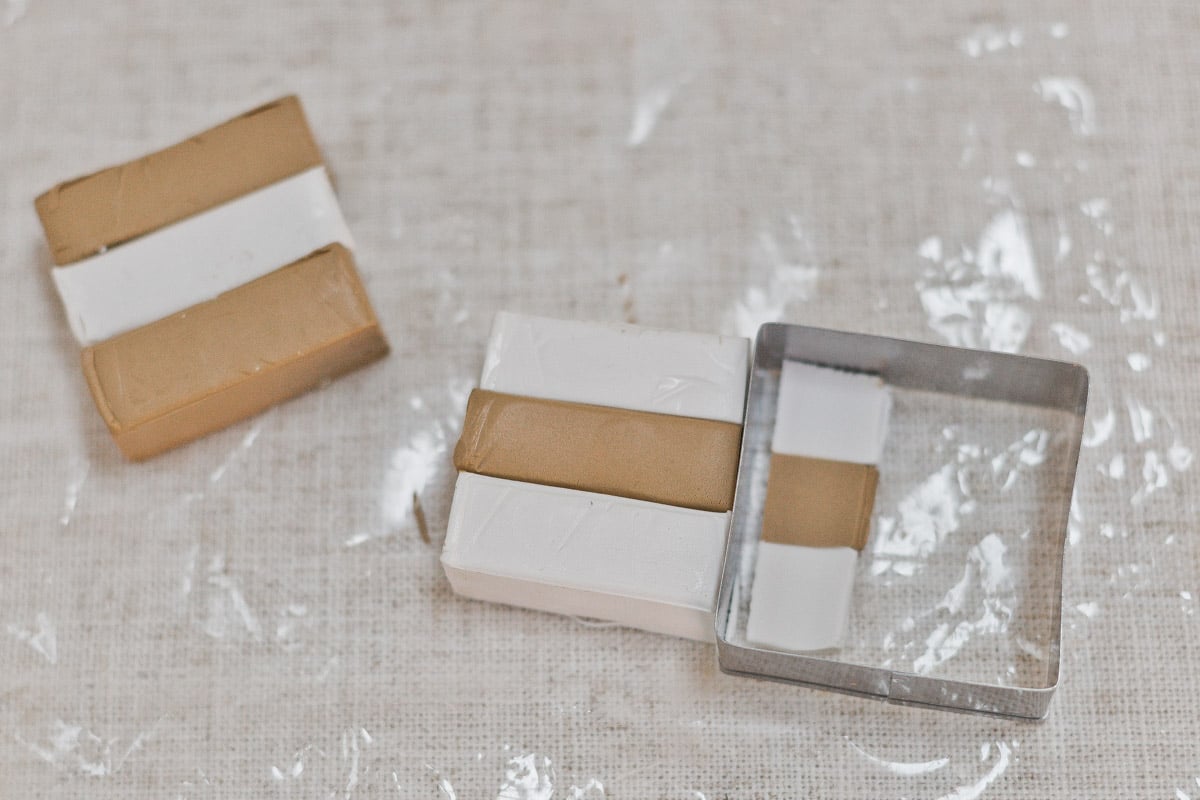
3. Once you have the clay cut for each color, you can start putting them together in an alternating pattern, as shown in the photo.
I like to do three lines of clay at a time, like the photo shows. Then you can easily get thee square clay cutter to cut through in an upcoming step.
4. Repeat this process alternating the colors again, so you have the opposite color way in this next one.
So for example, in the first set, I had ivory and then latte and then ivory again. So for this next set, I will have latte, then ivory, then latte again.
5. Once you’ve created several sets of each color way, you can start cutting.
Use the square cutter to cut off the very end of the clay, if it’s uneven on the sides, so that you have a straight edge.
*Using the square cutter for all the cutting is a little hack that I found saved a lot of time. It helped keep the lines straight and cut through the layers quickly.
Then use a small ruler to measure about 1/4 inch before cutting with the square cutter. eyeballed mine without a ruler pretty well.
But for the most precise measurement, you may want to use thee ruler.
6. Once you have the first piece cut, you can use that as your measurement for all the remaining pieces.
Or continue using your ruler instead, if desired.
7. Once you’ve cut both colorway sets, you can start putting them together in a larger sheet, like the photo.
Alternating the colors ways to form a checkered or check pattern.
8. When you have a large enough sheet going of the check pattern, lightly press them together and then roll it out with the clay roller so that all the pieces stick together and form one large sheet.
Make sure to turn the sheet every few rolls to maintain an even thickness across the entire sheet.

9. Using a bowl turned upside down and a clay cutting tool to cut all the way around. Forming a circle.
Smooth any edges with your fingers if needed.
10. Then use a bowl (could be the same bowl or a different one that’s a little larger) to rest the clay in before putting it all in the oven on a metal tray.
This bowl will help create the curved shape of the bowl once baked, so that it has raised edges.
*It’s very important to make sure you use an oven safe bowl for this part of the tutorial.
11. Bake in the oven according to instructions on the packaging. Which for me was 275F for 30 minutes.
I put my bowl on a tray that was parchment lined.
12. Once the bowl in baked, remove from the oven and let it cool.
Use a pair of scissors to trim any edges if needed to make the bowl perfect.
Then it’s ready to use! So easy, right?
Take it further (more clay bowls)
I love how this clay bowl turned out so much I decided to make some smaller mini clay bowls with the scrap clay I had leftover.
They turned out really cute too. And would make great gifts, wedding favors, etc.
What can you use these clay bowls for?
- Jewelry storage
- Odds and ends
- Halloween candy bowls and trays
- Holiday gifts! Definitely making some of these for friends around the holidays this year.
That’s it for now on the clay bowls! But I’d love to hear what you think of the final project?
Do you like the check print trend in home decor? Or do you prefer it in fashion and clothing? Would love to hear your thoughts in the comments below.
—
This post is sponsored by Sculpey. All opinions are my own. Thank you for supporting the brands that help keep Paper and Stitch running.


4 comments | Click here to reply
I love the check bowls! I can envision making a few of these in different colors for different seasons and holidays! Thanks forvsharing this, Diane! I also really liked the post for the DIY coat rack.
Joanne
Joanne WrightThis will be great to use for gifts. I can make big one thanks.
EysanOmg! That would be such a cute gift pairing, Jessica. I love that idea.
Brittni-Brittni
I think I need to try this for Christmas gifts! My goal is to make soap scrubs with the luffa I grew this year. I think this would pair perfectly with the soap!
Jessica