
It’s no secret that velvet is having a major moment right now in home decor. So, after some (brief) hesitation, I’ve officially jumped into the velvet deep end with today’s DIY for velvet color blocked geo pillows in partnership with Fiskars. Who just so happens to be one of my favorite scissor brands.
I’ve been wanting some bright new pillows anyway – just something to break up the neutral-ness of the couch a bit, that I can change out whenever I get bored. And these velvet color blocked cushions are definitely doing the trick! But if you’re not a velvet fan, you can switch it out for a different fabric just as easily.
Bonus! They’re a fun way to incorporate that lush feeling of the holidays in a more subtle way, with holiday-inspired colors (reds, pinks, greens, etc) that will still look great after the holidays are over.

We made three shapes in all, but I’m especially partial to the half circle, which I’ve been calling my baby croissant because I think it looks like a pastry, with the three sections. Naturally. Click through for the tutorial!

Here’s what you’ll need to make your own velvet pillows at home…
Materials + tools
- sewing machine
- 1/2 yard in fabric total
- Spools of thread in colors that match your fabric
- Fiskars Original Orange-handled Scissors
- Straight pins
- Sewing chalk
- 12-20 ounces of poly filling (pillow stuffing)
- Wooden dowel (to poke filling into pillow corners)
Quick notes… When color blocking your pillows, a half yard would be the total amount. So, with 2 colors you’d have a quarter yard of each color, etc.
Also, I’m recommending Fiskars Original Orange-handled Scissors, specifically, because they’re great for both paper and fabric, which you’ll need for this project. I’d recommend them even if they weren’t a sponsor. We have several pairs in the studio for all of our craft projects. They are lightweight with a handle ergonomically designed to fit your hand to make cutting even more seamless and, on top of all that, they stay sharp for a really long time. Which, when you craft as much as I do, is a pretty important thing. 🙂

Instructions
Create a template using a large piece of paper or poster board. If you want to create a half circle shape, like mine, start by determining the base length (bottom of pillow) and then using two pencils and string (as shown in the photo) to create a half circle shape that will be even on both sides.
Cut out the template and then trace and cut a second template that matched the first, for the back of the pillow. I added an extra inch to the bottom of the back pillow template, just to be on the safe side, in case you want to do that as well. Now, cut the first template into three ‘slices’, as shown.
Trace the templates onto the wrong side of your velvet fabric and cut out, each shape individually. That should give you 4 pieces of fabric – one for the back of the pillow and three pieces for the front.
Next, take your three pieces for the front of the pillow, arrange them as they will look when sewn together, with right sides facing up.
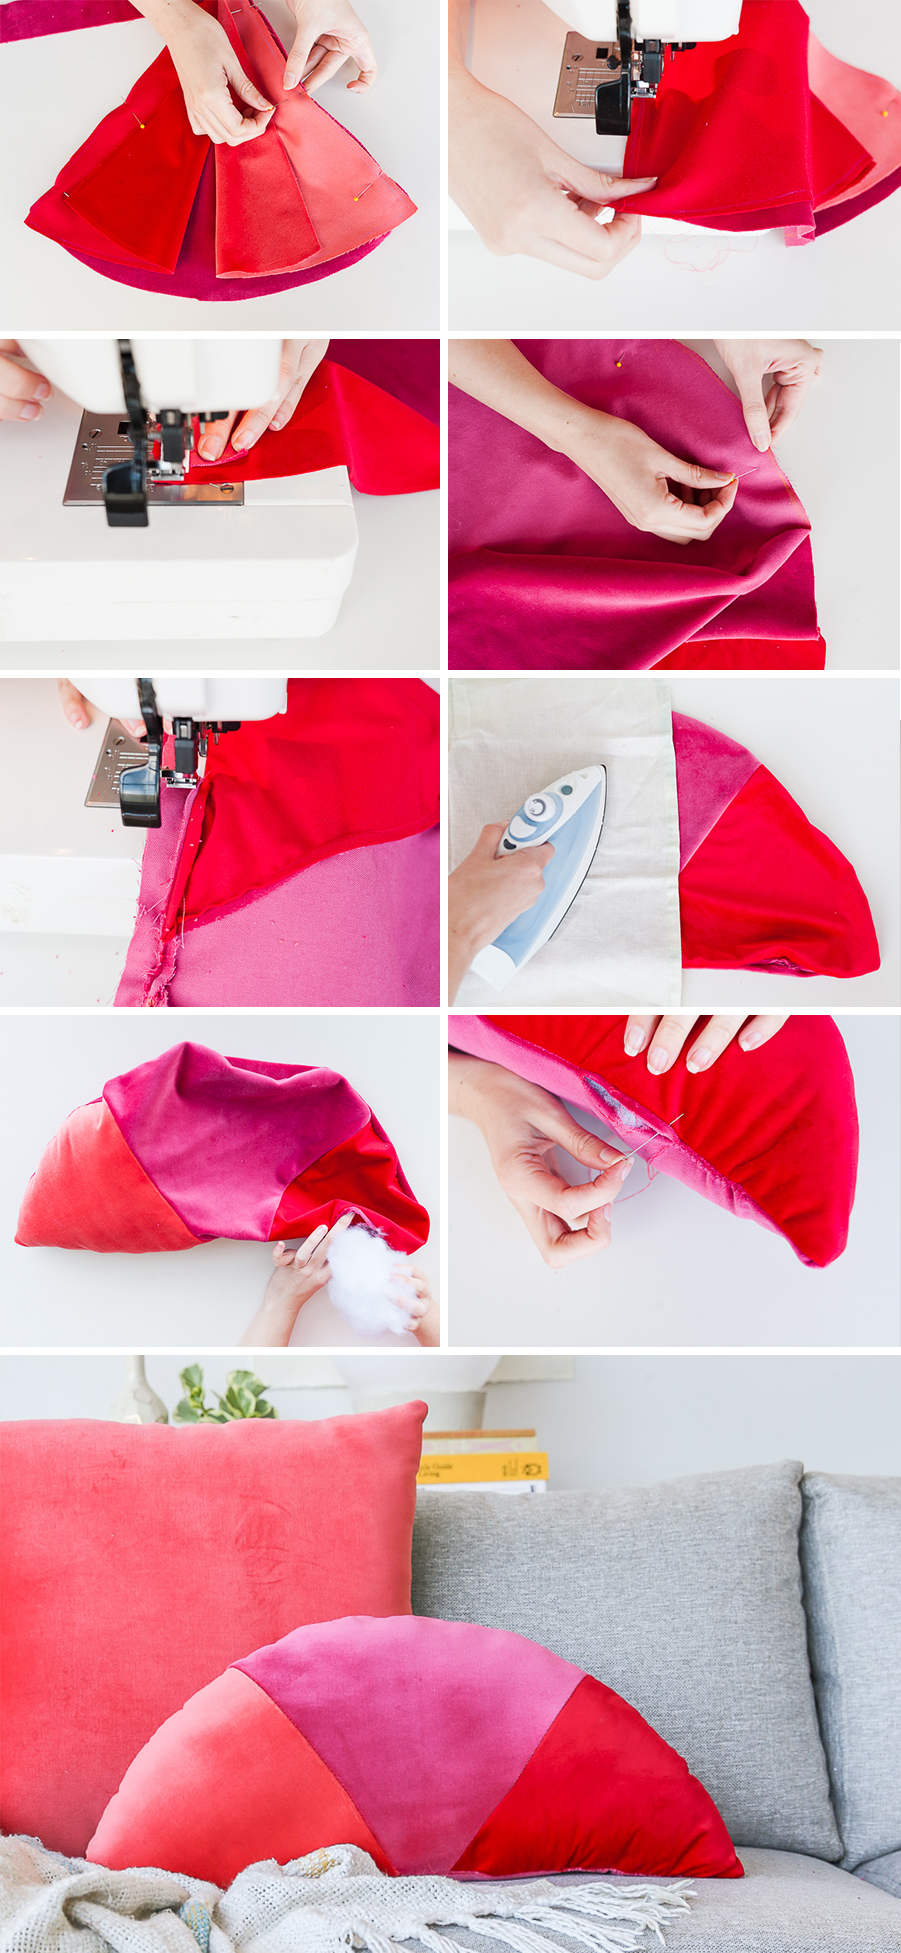
Then, starting with the piece of fabric on the right, flip it over on top of the middle piece and pin them together on the right edge. Next, with the left piece of fabric, flip it over on top of the middle piece as well and pin those 2 pieces together on the left edge.
Then, sew a straight line down both edges that are pinned, being sure to backstitch at the beginning and end of each edge. Remove pins and you’ll have the front of your pillow.
Now, you’re ready to add the back. Pin the two pieces together, right sides facing in (wrong side facing up). Then sew all the way around, minus a wrist width gap so you can turn it inside out and add filling later, again backstitch at the beginning and end.
Turn inside out and iron (on low heat setting) with a towel protecting the velvet surface from direct heat. Add filling to stuff the pillow to your liking, using a wooden dowel to poke the corners with filling as necessary. Hand stitch the opening closed and you’re done.
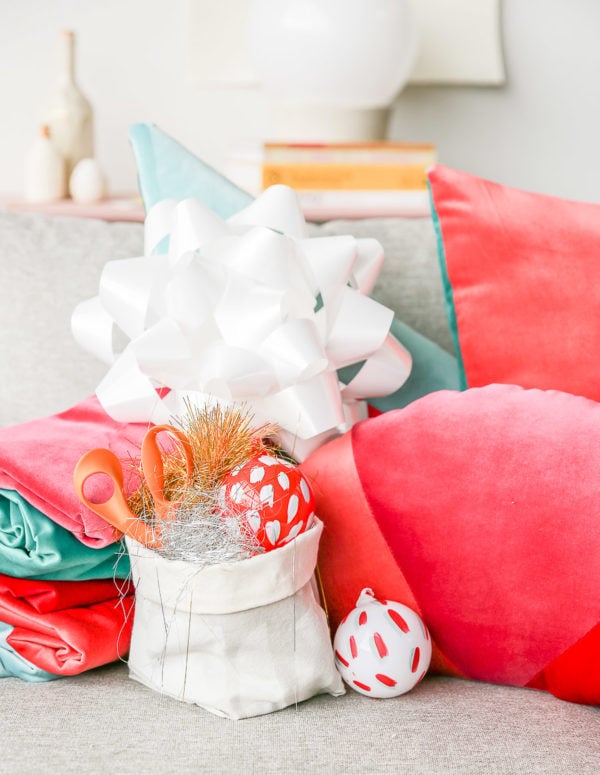

I love these pillows for fall and winter, but I’m becoming increasingly convinced that these go beyond a one-hit winter wonder. If done right, meaning you pick colors that will work year round, you can make these guys all year long.


Photography Amelia Tatnall Lawrence and Brittni Mehlhoff
Sewing Liz Scoper
Styling Brittni Mehlhoff
What do you think? Are you a velvet lover?
For more information on Fiskars crafting products, including their awesome Orange-handled Scissors (which will be celebrating their 50th Anniversary next year – yay!), check out their website or follow Fiskars on Facebook, Twitter, Instagram and Pinterest!
—
This post is in partnership with Fiskars. All opinions are my own. Thanks for supporting the brands that help keep Paper & Stitch running.
21 comments | Click here to reply
This is gorgeous. Totally making this. YUM.
Pousada em Campos do JordãoThis is absolutely amazing! Very useful DIY tutorial. I will try it.
Avril[…] project from Fall for DIY 3. woven pendant lamp DIY from Etsy 4. giant DIY mood board organizer 5. DIY color blocked pillows 6. cute purse makeover from Oh Happy […]
6 DIYs to Try This Weekend - Paper and StitchWhat great pillows! Time for a nap!
Alison Palmer[…] – The dreamiest color blocked pillows. […]
Friday Links - The Crafted LifeHi Marilyn. I explain how you can make your own template in the first couple of steps of the instructions. Hope that helps.
BrittniWhere do I find the templates for the pillows?
Marilyn VincentThanks Laurel!
BrittniThese are so, so gorgeous and I love the colors you used <3
laurel stavrosJessica, Hena, and Corina – Thanks so much you three. 🙂
BrittniPerfect colour blocking and the colours you chose!!
Corina Nikathese are so cute.. love the half circle the most!
Hena TayebWow! These look really good and seem so soft x
JessicaAgreed Natalie. A game-changer for sure. 🙂
BrittniThese are beautiful. Last time I did a pillow I had just learned how to do an invisible stitch – it is easy and it makes closing the gap where you stuffed, well, pretty much invisible! Game-changer!
NatalieHaha. Thanks Megan. And you never know on the velvet front…you might just change your mind. 🙂 But if not, you can always switch the fabric out for something else.
BrittniOh my! These are so adorable! I love the “croissant” pillow especially with the color-blocking. While I’m not a huge fan of velvet (that could change!), I LOVE the way these pillows turned out. I may have to make some new ones of my own. 😀
Thanks for the awesome tutorial!
Megan @ Adventure & HomeThanks Tori. 🙂
BrittniOh! These are so so cute!!!!
Tori//Gringalicious.comThanks Michelle. Color combos are definitely one of my fave things to put together. 🙂
BrittniThey look so cozy, and I love the colour combination!
Michellehttps://www.makeandmess.com/