
I was playing around with oven bake clay the other day and attempted a project that went completely wrong. It was bad! Has that ever happened to you? So, I started packing it all up and stumbled across something entirely different that ended up being kind of fun. And it’s today’s DIY…
I made these teeny tiny little containers for organizing odds and ends, holding flowers / plants, etc. You can add magnets to the back and hang on them on the fridge or leave them as is. I’m using them for office supplies rn, but I feel like they’d be a cute last-minute Mother’s Day gift idea too. What do you think? Click through for the tutorial.
Materials
- oven bake or air dry clay (available on Amazon)
- clay roller (available on Amazon)
- plastic knife or similar
- small dowel rod or similar
- strong magnets (optional – available on Amazon)
- super glue (optional)
Instructions
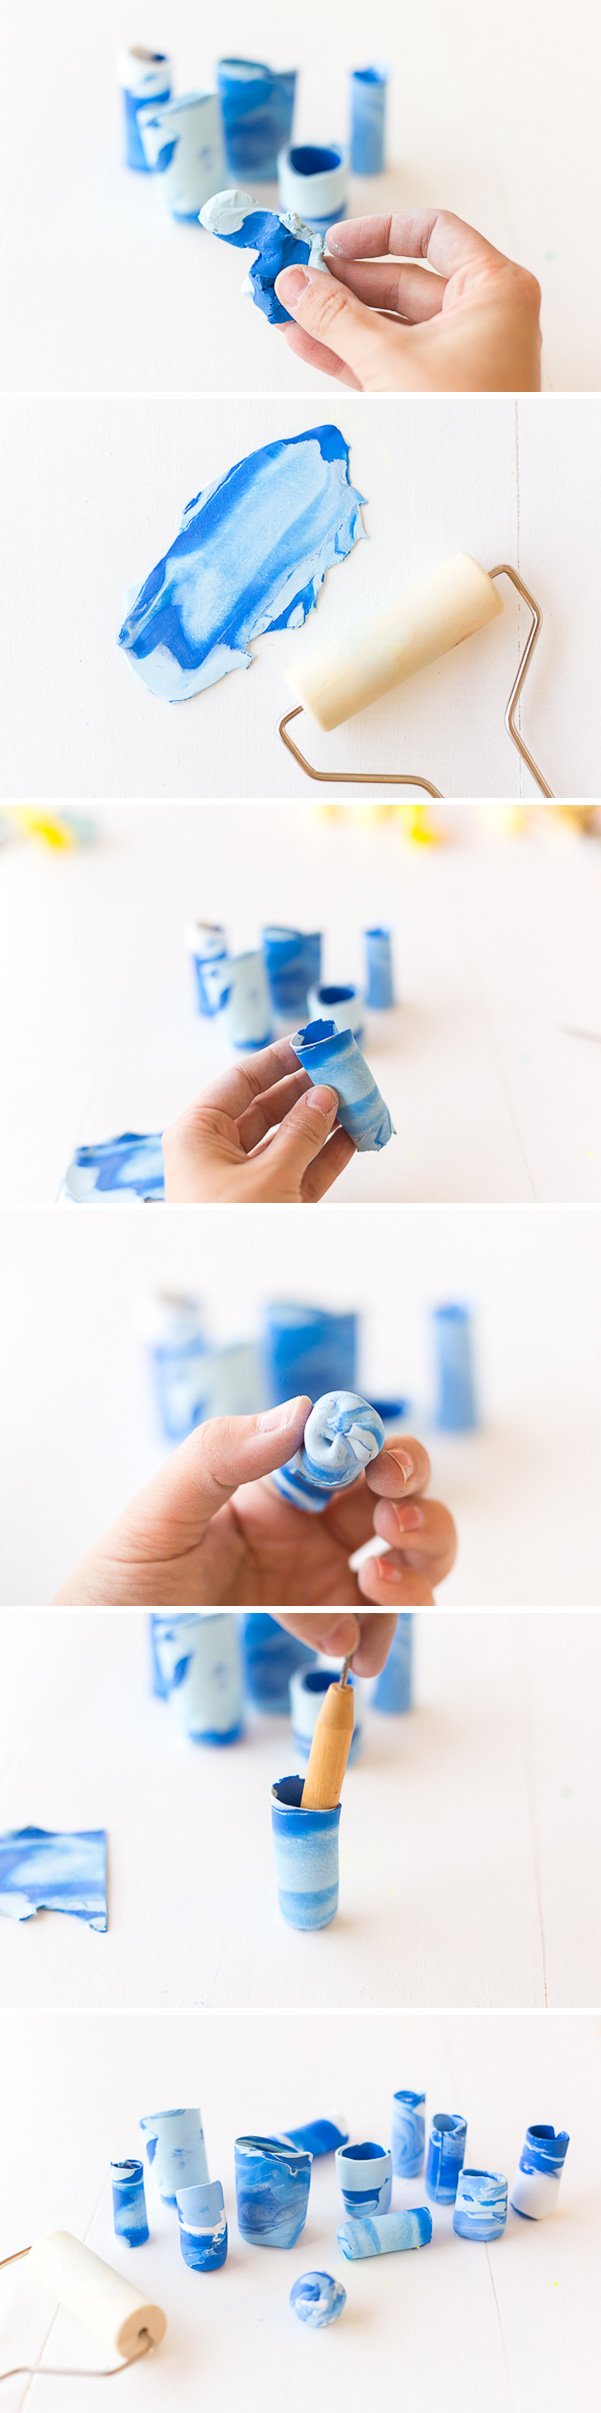
Start by mixing 2-3 clay colors together. I put them all together in a ball and then pulled the ball apart and put it back together a bunch of times, before forming it back into a ball.
Then roll out the ball with a clay roller to about a 1/4 inch thickness. The clay can be a little thinner than that too, but just make sure it’s the same thickness for the entire slab. I found that pieces that are semi rectangular in size (longer in one direction) are best.
Then, form the slab into a tube, remove excess, and connect the two ends. Next, put the tub on your finger and bend over the edges of one end, as shown in the photo. This is to create the bottom / base of the container.
Turn the tube right side up again and use a dowel on the side to press together the clay that now forms the bottom of the container. This helps flatten the base too. Bake in the oven according to instructions on packaging (or air dry if using air dry clay).
Once baked, you can either add a heavy duty magnet, like the ones I used. They’re really, really strong (can hold up to 8 pounds I think). Just attach with super glue.

Then you can add small office items, plants, etc. I did a few different color combos. just for fun. But the blue ones are my absolute fave.
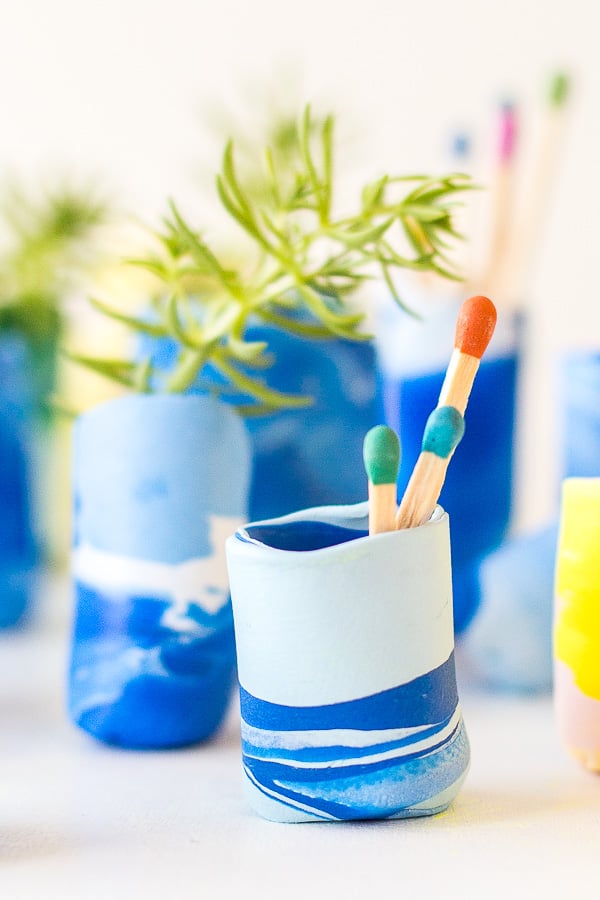

Think you’ll give this DIY a try? Which color combo do you like best?
10 comments | Click here to reply
[…] DIY marbled mini vases 2. cork vases DIY 3. DIY concrete vase tutorial 4. mylar vase DIY 5. DIY textured vase idea 6. mini […]
Make it Mini: The Art of Mini Flower Arrangements (How To)It’s so cute!
Ci-san[…] DIY found here […]
Main Scoop – HAWTHORNE AND MAINThese are SO cute! I would’ve thought I’d be over the marble look by now, but it really is so simplistic and beautiful, it goes well with any colour!
http://www.thesmalladventurer.blogspot.com.au/
Indya | TheSmallAdventurerAw, thanks Carlotta. 🙂 Happy to hear that.
BrittniWow super! This mix of colors is very soothing to look at! Hopefully find time to try!
KisskisscarlottaThanks Karlijn. I agree – you should totally make some. 🙂
BrittniThey are so cool! Definitely need to make them 🙂
KarlijnThanks Michelle. I like the teeny tiny size too. You can make so many that way!
BrittniThey are so adorable, I love the colours and the size!
Michellehttps://www.makeandmess.com/