Made another DIY headboard! And this one has more of a classic shape. So if you’re looking for a more minimal headboard, that can fit any style room, this one is for you. This upholstery project takes less than 2 hours to make and the cost is under $100.

I’ve been seeing lots of minimal upholstered headboards and bed frames lately, but they’re all very pricey. And I can’t seem to even find one outside of a queen or king size bed. The bed in our guest bedroom is a full. So I decided to make my own.
Last time I made an upholstered headboard, it was an arch shape. Remember this DIY round headboard?
But this time, I’m going with a simpler shape, to keep it classic and minimal. And making sure not to skip the step I missed last time that almost had me reupholstering the whole thing
How much does it cost to upholster a headboard?
The total cost is dependent on the size of the bed / headboard frame and the materials you select.
One place to save money is to use an upholstery foam that is on the thinner side. And other places you can save would be opting for a more affordable fabric instead of more expensive upholstery fabric. And using cheaper wood / MDF for the base.
To give you a better idea of how much an upholstered headboard like this one would cost, I’ll share my total.
After adding up all the materials, the final cost of my DIY fabric headboard was less than $100 (I think it was $82) for a full-size bed headboard. Not bad for a custom headboard, huh?
I used linen fabric, 1 inch thick upholstery foam, pretty affordable batting, and birch plywood.
I think you could realistically get the cost down to $40 or $50 for a full-size bed if you really tried. Maybe less if you already have some of the materials.
How thick should an upholstered headboard be?
Somewhere between 1 and 2.5 inches is a good thickness range for a DIY headboard like this.
Much thicker and it may start to look a little weird without piping or some other decorative element.
How much wider should a headboard be than the bed?
Anywhere from two to six inches is a good range for headboard size, but it also depends on the style you’re going for.
My headboard is 6 inches larger than the bed frame, for reference.

Headboard Materials
- Lightweight wood panels or something similar- Depending on the size of your bed, you may be able to easily find one piece of wood long enough to use as the backer / base for this project. If not, you can put two pieces together to create one larger piece. That’s what I did.
- Fabric yardage – The yardage will depend on the size of your bed and headboard. You can find yards of fabric for this project at any fabric store – even Joann Fabrics.
- Upholstery foam – Upholstery foam is available in many thicknesses. The thickness of foam will make up the bulk of the thickness of your finished headboard, so keep that in mind when selecting a size. The thicker the foam, the more expensive. So this wold be a good place to cut cost if needed. I used a 1 inch thick foam. But I would say anything between 3/4 inch and 2 inches would work well.
- Batting – A layer of batting helps soften the shape between the upholstery foam and fabric. You won’t need much. Just enough to cover the front surface of the headboard. That said, if you want your headboard to be more cushy, you could add multiple layers of batting.
- Scissors – Fabric scissors work the best for this, but any scissors will work.
- D rings – You can find these at any home improvement store or online.
Equipment Needed
- Staple gun and staples – I’ve used MANY staple guns over the years and the best one that I’ve used (and still use to this day) is this Dewalt staple gun. It’s not much more than any other staple gun you can find, but it works MUCH better. Trust me. *You could also use an electric staple gun for this, but honestly, I don’t think its necessary.
- Iron – You’ll need an iron to make sure the fabric is wrinkle free before you get started with the project. Some slight / small wrinkles are fine though. They’ll be pulled out when you stretch the fabric over the wood panel.
- Drill – You’ll only need a drill for installing the D-rings. If you decide to use a different method to hang the finished headboard, you won’t need a drill at all.
- Saw – You may need a circular saw if you’re cutting a panel or panels down to the right size for your bed frame.
- Electric knife or regular sharp knife (optional) – I used a kitchen knife to cut the upholstery foam. But an electric knife would be faster and easier, if you have one.

How to Make a Headboard
Onto the headboard tutorial! Here’s the step-by-step process how I made an upholstered headboard for under $100 (in less than 2 hours).
1) First, build a frame with lightweight wood/ panels.
I made the frame 6 inches wider than the existing bed frame, so it would have some extra visual weight.
I used a thin (1/4 inch thick) sheet of plywood (birch) from Home Depot and cut it down to the size I needed, with a saw.
2) Cut down a layer of upholstery foam, batting, and fabric.
Next, you’ll cut all the soft pieces for the upholstered headboard.
The upholstery foam should be the exact size of the wood frame that was built / cut in step one. And the batting and fabric should be at least 3 inches larger than the frame on all sides.
So, you should have the wood frame on the bottom, then upholstery foam, then batting, then fabric at the very top.
3) Iron the fabric top layer.
You may be able to skip this step. It’s just to get rid of any major wrinkles.
I had quite a few I needed to steam out because the fabric had been folded for a long time before I used it.
For any small / minor wrinkles, you can probably skip ironing. The small ones will pulled out when you stretch and staple all of the layers in the next step.

4) Flip it over and staple everything.
You can use spray adhesive to attach the upholstery foam to the piece of plywood. BUT the easy way is to just skip the adhesive and carefully flip over the wood frame with all the foam and fabric layers. Stretch and staple all the layers at once, so you only have to do one round of stapling.
Be sure to pull the fabric and batting tight across the frame when stapling. This will keep the upholstery from sagging later.
Cut off any excess batting and excess fabric once all the stapling is complete.
5) Add hooks / rings and attach to the wall.
The final step is adding hooks and attaching the headboard to the wall.
Using D-rings as hooks for the wall is just one way to hang a headboard like this one. If it the best way? I don’t know, but it worked well for me.
That said, there are many other ways it can be done, like attaching the headboard to the actual bed frame, instead of the wall.
I just happen to use D-rings because I already had them and I couldn’t attached my headboard to the bed frame.
I used three D-rings in total and made sure they were a the same height, all the way across the back of the headboard to make hanging easier.

What was the step that you skipped last time you made a headboard that you’ll never forget to do again?
The batting! When I made the arch headboard (which is my other DIY headboard idea), I was trying to save money and skipped this step. Which ended up being a big mistake because the upholstery foam I used was green.
And because I didn’t use any layers of batting (or another layer of fabric) between the two pieces, the finished headboard has a greenish tint to it, as opposed to the neutral beige / tan color it was supposed to be.
The headboard fabric was thin enough that the green showed through.
I didn’t realize until the headboard was completely finished and I didn’t want to have to rip off the fabric and start over. So I left it as is, and I got used to the color. BUT I will never make that mistake again.
Batting also helps soften the shape of the foam, so it would have helped in that case too. In the end, the arch headboard looks good. But definitely could have been made better with batting underneath the fabric top layer.
Anyway! Back to the current DIY project. I love how out turned out.
It’s simple, but still elevates the space. Plus, it matches the vintage Moroccan rug I recently brought in here. Bonus!


DIY Headboard Idea
Equipment
- Staple gun and staples - I've used MANY staple guns over the years and the best one that I've used (and still use to this day) its this Dewalt staple gun. It's not much more than any other staple gun you can find, but it works MUCH better. Trust me on this one.
- Iron - You'll need an iron to make sure the fabric is wrinkle free before you get started with the project. Some slight / small wrinkles are fine though - they'll be pulled out when you stretch the fabric over the wood panel.
- Drill - You'll only need a drill for installing the D-rings. If you decide to use a different method to hang the finished headboard, you won't need a drill at all.
- Saw - You may need a circular saw if you're cutting a panel or panels down to the right size for your bed frame.
Ingredients
- Lightweight wood panels or something similar Depending on the size of your bed you may be able to easily find one piece of wood long enough to use as the backer / base for this project. If not, you can put two pieces together to create one larger piece. That's what I did.
- Fabric yardage The yardage will depend on thee size of your bed and headboard.
- Upholstery foam Upholstery foam is available in many thicknesses. The thickness of foam you get will make up the bulk of the thickness of your finished headboard so keep that in mind when selecting a size. The thicker the foam, the more expensive. So this wold be a good place to cut cost if needed. I used a 1 inch thick foam. But I would say anything between 3/4 inch and 2 inches would work well. More than two inches and it might need some piping around the edges.
- Batting Batting helps soften the shape between the upholstery foam and fabric. You won't need much. Just enough to cover the front surface of the headboard.
- Scissors Fabric scissors work the bets for this but any scissors will work.
- D rings You can find these at any home improvement store.
Instructions
First, build a frame with lightweight wood/ panels.
- I made the frame 6 inches wider than the existing bed frame, so it would have some extra visual weight. I used a thin (1/4 inch thick) birch plywood from Home Depot and cut it down to the size I needed, with a saw.
Cut down a layer of upholstery foam, batting, and fabric.
- Next, you'll cut all the soft pieces for the upholstered headboard.
- The upholstery foam should be the exact size of the wood frame that was built / cut in step one. And the batting and fabric should be at least 3 inches larger than the frame on all sides.
- So, you should have the wood frame on the bottom, then upholstery foam, then batting, then fabric at the very top.
Iron the fabric top layer.
- You may be able to skip this step. It's just to get rid of any major wrinkles. I had quite a few I needed to steam out beceuas the fabric had been folded for a long time before I used it.
- For any small / minor wrinkles, you can probably skip ironing. The small ones will pulled out when you stretch and staple all of the layers in the next step.
Flip it over and staple everything.
- Carefully flip over the wood frame with all the foam and fabric layers. Stretch and staple all the layers at once, so you only have to do one round of stapling.
- Be sure to pull the fabric and batting tight across the frame when stapling. This will keep the upholstery foam sagging later.
Add hooks / rings and attach to the wall.
- Using D-rings as hooks for the wall is just one way to hang a headboard like this one. There are many other ways it can be done, like attaching the headboard to the actual bed frame, instead of the wall.
- I just happen to use D-rings because I already had them and I couldn't attached my headboard to the bed frame.
Looking for more DIY projects like this one?
Here are a couple of my favorites…
- Amazon hack… for a DIY wall sconce that is affordable (and cute).
- Want a super easy DIY to try? This painted headboard will give your bedroom a fresh new look on a budget.
- Made a wood entry table, but I’m using it as a console in my bedroom instead.
2 comments | Click here to reply
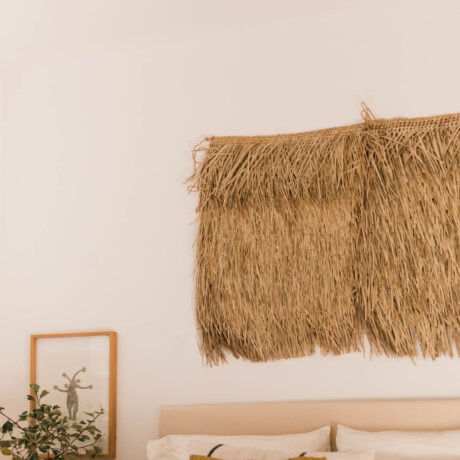
I love your traditional rain “coats” hanging over the bed!
IngridLove the headboard.
ajit