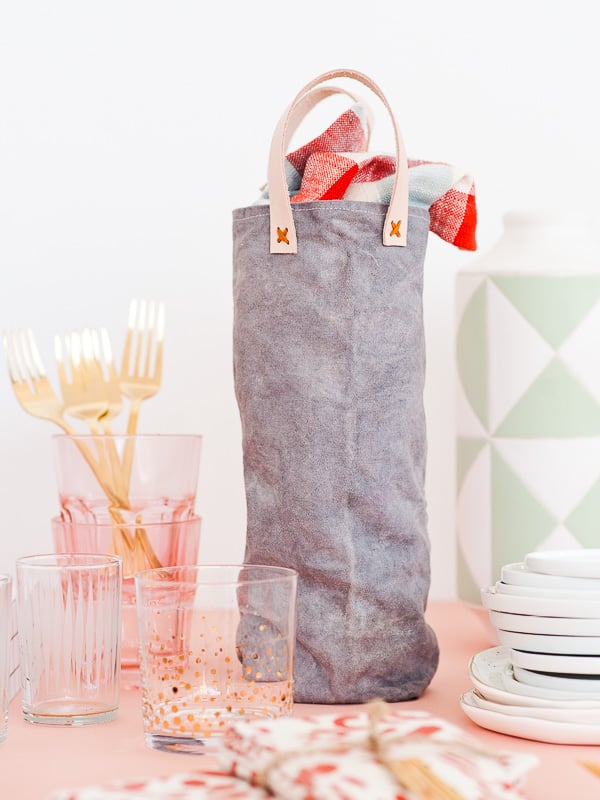
Canvas wine bags from scratch!

Recently, I flew to Dallas for a wine event to teach a workshop of how to make wax canvas wine bags and everyone’s reaction was so positive, I thought I’d turn it into a DIY hostess gift for the blog.
I love gifting wine for parties, etc – especially around the holidays. Who couldn’t use another bottle or two? And this DIY idea makes the gift feel a bit more special and (dare I say) more thoughtful since it incorporates a handmade element.
Aside from gifting these totes with wine, I was thinking it would be fun to craft these at your party and then let the guests take them home as favors, if you’re feeling ambitious. Just throwing it out there! Either way, you can click through for the full tutorial…

And just in case you’re not big on the leather handles idea, you can skip those last couple of steps and instead, tie on some handmade pom poms or even just rolling the canvas down a couple of times and then tying on a monogrammed gift tag, for something more casual. Between the three options, you have a handful of options to include every personality on your hostess hit list. 🙂
Here’s how to make your now canvas wine totes….
Materials
- medium to heavy weight canvas (available by the year at art supply stores)
- sewing machine and thread
- fabric dye (I like Rit – I used royal blue and black)
- embroidery floss and needle for hand stitching
- 3/4 inch wide leather strips (mine are from Amazon)
Instructions (Canvas Wine Bag)
1. Start by measuring a piece of canvas for your wine bag, based on the desired size. A good starting point is 28.5 inches long and 7 inches wide (you can measure the width of a wine bottle you have on hand to see if you want to make yours wider or more narrow than mine). And cut with sharp fabric scissors.
2. Once cut, fold the canvas, as shown in photo, and pin vertically, again as shown. I only needed roughly 4 pins because the weight of the canvas was heavy enough to stay in place.
3. Next, at the bottom (folded) end, start by sewing a backstitch to secure the thread, and then sew a straight line all the way to the open end. Be sure not to sew too close to the edge – you’ll probably want to sew your line about a 1/4 inch from the edge. Add another backstitch when you reach the end of the canvas, then cut the thread.
4. Repeat step 3, on the opposite side. Then remove straight pins and cut excess salvage, if needed.
5. While the bag is still inside out, reach inside, find the corners with your fingers and pinch them together. Then use your other hand to secure the two points and create something of a flat triangle, as shown.
6. Measure from the tip to 1.5 inches down, make a mark, and then make a horizontal line across as your guide. Flip over and do the same on the other side. And then pin one of the triangles, so it doesn’t come undone (but don’t pin them together – they’re separate).
7. Start with the triangle that’s not pinned down, sew a straight line across the guide that you made in step 6. Being sure to backstitch at each end. Repeat this process for the other triangle that was pinned. Remove pin and sew line, being sure to backstitch at each end.
8. Using a needle and thread, sew the two triangle corners together. This will keep the bottom flat on the bag and make it even more secure.
9. Line up the seams, then roll back the fabric at the top of the bag 1/2 – 1 inch. Pin down just one section to give you a better idea of where the measurement needs to be and then the roll rest down. Follow that as a guide and adjust as necessary. And then sew and backstitch once again.
11. Turn tote right side out. Next up is dyeing the bag. I do a lot of dyeing projects around here, so I won’t explain the process again…but here’s the step by step tutorial for dyeing if you need a refresher.
12. Once dyed, washed, and dried, you can stop here and add pom poms or a gift tag. OR keep going and add leather straps…. Start by cutting two lengths of leather strap, 8-9 inches long each. Then punch four holes on each side, in the form of a square. See photo for reference.
13. String a needle with embroidery thread and attach the handles to the tote, making sure to run the thread through each hole several times, for security. Cut and double knot string to keep from unraveling.

Note: Before adding the leather straps, I actually hand waxed the dyed canvas as well, which helps with making them water-resistnat and a bit more rugged.
This process is very easy and I plan to share exactly how to do it in an upcoming post, but decided not to include in this tutorial because it was already pretty lengthy. 🙂 Let me know if you have any questions though!


Photography Amelia Tatnall Lawrence
Sewing Elizabeth Scoper
Styling Brittni Mehlhoff
Hope you liked this DIY idea! Curious to know… What’s the best hostess gift you’ve ever given or received?
Looking for more projects like this one?
- learn how to make reusable paper towels using items you already have
- DIY canvas lunch bags from scratch
- sew some reusable produce bags in 15 minutes
- how to make napkins (the easy way)
13 comments | Click here to reply
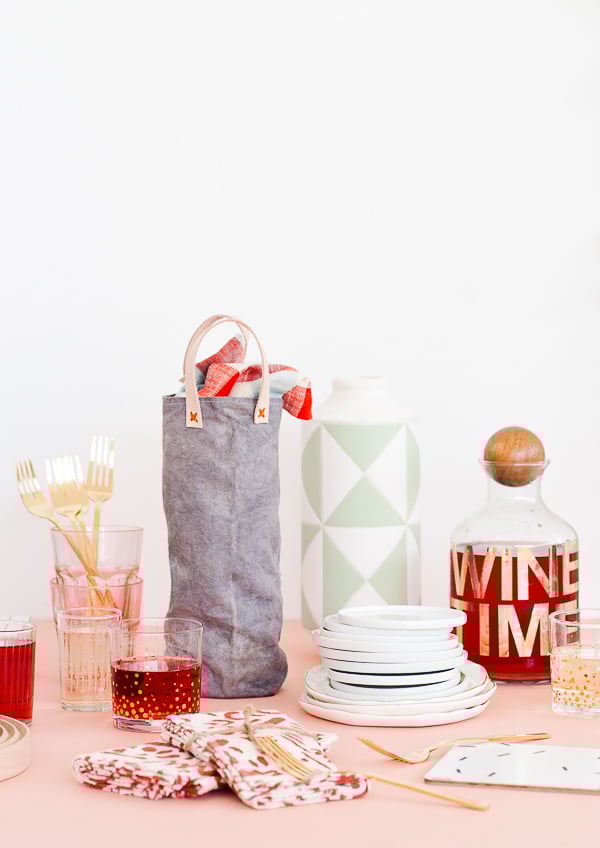
Hi Jill. The decanter itself is from West Elm and then I added the gold letters as a DIY project.
Brittni-Brittni
Where did you get the “wine time” decanter? So cute!
Jill[…] 11. canvas wine bag DIY […]
Wrap It Up: The Ultimate DIY Gift Wrapping Guide - Paper and Stitch[…] Canvas Wine Bag DIY from papernstitchblog.com […]
20 of the Best DIY Gift Ideas for Wine Lovers or Yourself[…] water and stain resistant surface. I have used the exact wax I linked to before, when I made my waxed canvas wine bags, and it works great / is super […]
How to Block Print on Fabric + Hand Stamped Canvas DIY Luggage Rack[…] Canvas Wine Totes […]
8 DIY Last Minute Gifts – Dollar DIY[…] Why settle for an ordinary wine gift bag when you can make these lovely canvas ones instead? […]
Friday faves | The Christmas edition – Make and Tell[…] Canvas Wine Bag by Paper & Stitch […]
Inspiration | 5 DIY Projects To Get You Inspired This Week - Make&MessI love how these turned out! There is nothing quite like dying your own fabric. I am going to add this to my “must make” list for holiday gifts!
sara | alice & loisWhat a cool idea, and they look so special!
Michellehttps://www.makeandmess.com/
Oh, these are so cute and have just the right balance between sophisticated and personal. Super practical too!
Charmaine Ng– Charmaine
http://charmainenyw.com
Thanks Amy. 🙂
BrittniI love the colors you used and the sewn detail on the leather strap is so perfect!!
Amy | Delineate Your Dwelling