
When we were in London, we stayed in an amazing home that is owned by a designer, who has cool little DIYable items all around her home. And one of those items inspired today’s project for geometric (and house-shaped) cutting boards that also happen to be an easy Ikea hack, which you know I love.
The London home owner had a set of house-shaped cutting boards that we used for cutting bread, etc while we were there. And I looked them up while we were there to try to track them down. They’re no longer available, so I took a (very bad iPhone) photo and made a note to make my own when we got back home.
And I finally got around to it! So I wanted to share the tutorial and Ikea hack for anyone looking to add some personality to their kitchen accessories: DIY cutting boards in geometric shapes.

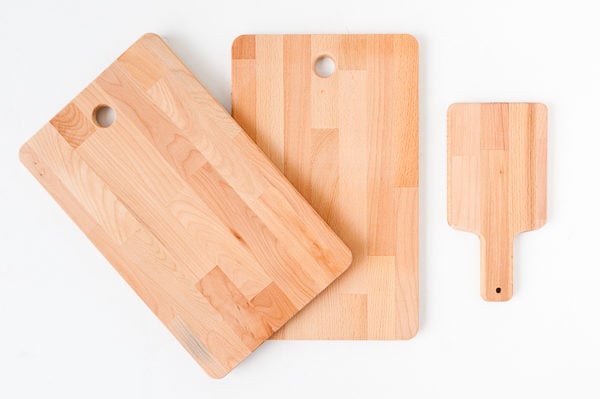
Here’s how to create your own custom shape Ikea hack cutting boards in about 10 minutes…
Materials
- Ikea cutting board
- compact circular saw* (this is the one I use)
- table clamps
- painter’s tape or washi tape (optional)
- pencil
- power sander or sandpaper (this is the power sander I use)
- food safe mineral oil (MUST be food safe)
*You can also use a regular circular saw. I have both, but I like the control of the compact one better for a project like this. It fits better in your hand, is lighter than a circular saw, and feels less intimidating, in my opinion.
**Also, if you have a jigsaw (which is next on my list of tools to buy), you can create shapes with curves that don’t have straight cuts (i.e. circles, arches, waves, etc), which would also be super fun for cutting boards.

Instructions
1. To cut a house-shaped cutting board, you’ll need to make some measurements. Start by finding the top center of the board and making a mark with a pencil. Then create the first angle for the ‘roof’ going down from that center point to the side of the cutting board. And mimic that same angle on the other side as well, by measuring how far down the side of the cutting board that first angle is, and marking it off at the same measurement.
If you’re creating an asymmetrical angle instead of a house shape, you don’t have to worry about measurements, just mark off a design that you like.
2. Add painter’s tape or washi tape to create a more obvious guide to follow for your saw, if you’d like. I did this and found it to be helpful visually, but it’s not necessary if you can see the pencil lines really well.
3. Clamp down your cutting board, using table clamps to keep the board secure while cutting. Make sure that the areas that you are cutting are a safe distance away from the table that the cutting board is clamped to.
4. Make the cuts with your saw, remove the tape, and sand the edges for a smooth finish.
5. Next, apply food safe mineral oil with a cloth to the entire surface (front, back, and sides). Wait 5 minutes or so and wipe off any excess oil with a dry cloth. You can reapply the oil every few weeks, if needed.
6. (Optional) Add a leather knotted strap, if desired. I actually drilled a hole (with a spade bit) in some of the smaller cutting boards that didn’t already have a hole and it was super easy. *Wet your leather first before trying to knot it. This will make it softer and easy to bend, etc. Then will harden back up as it dries.


Photography by Amelia Tatnall and Brittni Mehlhoff
Styling by Brittni Mehlhoff
What other shapes and designs do you think would be fun for this cutting board DIY?
21 comments | Click here to reply
[…] overall well-being 4. How (& why) you should moisturize your Scalp 5. This DIY Geometric cutting board 6. All the ways you can Cook with turmeric 7. Delicious carrot recipes 8. […]
Sunday Funday – ThebeautybyerI love this idea. Perfect for gift giving too!
Alison Palmer[…] geometric cutting boards DIY 2. do it yourself headboard idea 3. DIY dresser makeover from Ikea 4. pineapple coconut rum […]
6 DIYs to Try This Weekend - Paper and Stitch[…] 3. Geometric Cutting Boards by Paper & Stitch […]
10 DIYS to Make for Mother's Day - The Crafted LifeHi Marie. I’ve had them both for years, so I don’t think they’re available anymore. 🙁 Bought them from Anthro.
BrittniOh that’s lovely!
MarieWhere do the small yellow drainer and spoon hanging on the wall come from? I need them in my life! 🙂
[…] earrings from Oh Happy Day 3. DIY crepe paper fringe necklace from The House That Lars Built 4. DIY cutting board Ikea hack 5. DIY paper mache jewelry dishes that I made for the Fossil Blog 6. My fave overnight oats […]
6 DIYs to Try This Weekend - Paper and StitchAbosolutly amzing idear.
NatalieFantastic idea thanks for the tips on Ikea hacks
Zahara[…] For full post click here. […]
DIY Cutting Board Ikea Hack - Makers Bakers Movers & ShakersCreativity at its best!
Rob SimpsonAwesomely done Brittni 🙂
Other Cutting Board Options: A BBQ Grill Scraper!
We have made a wooden scraper for our BBQ after the result of an unfortunate accident. A tiny wire came off the grill brush, got embedded in some hamburger…and then my throat. 2 surgeries in a row & 4 hours under the knife. We banned the brush & hubby made a wooden scraper with a bevelled edge. Some DIY’s just may save your life!
Kim SchellenbergVeryvery nice!!!
NinaAnd beautiful photos!
What a fabulous idea! Love it. ~ Cobs.
Cobs.I love the mix of different shapes! The photo styling in this picture is amazing too!
Cat MeschiaThanks Queti. 🙂
BrittniOh these are so cute! Clever idea!
QuetiGlad you like ’em Andrea. They’re so, so easy to make.
BrittniOh my goodness! These are so adorable! I would love to have all sorts of geometric shaped cutting boards all around my kitchen!
www.thebeautydojo.com
Andrea HandojoThanks Michelle. 🙂
BrittniThat’s an amazing idea, I love upgrading Ikea things!
Michellehttps://www.makeandmess.com/