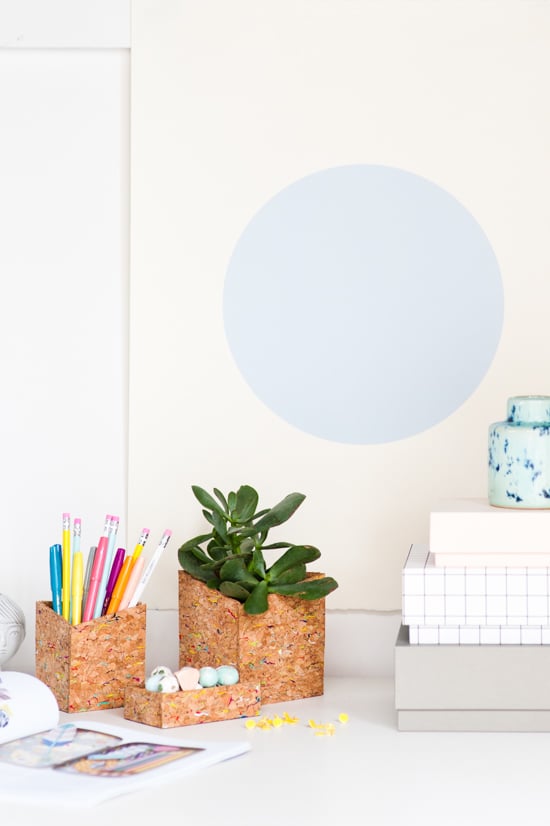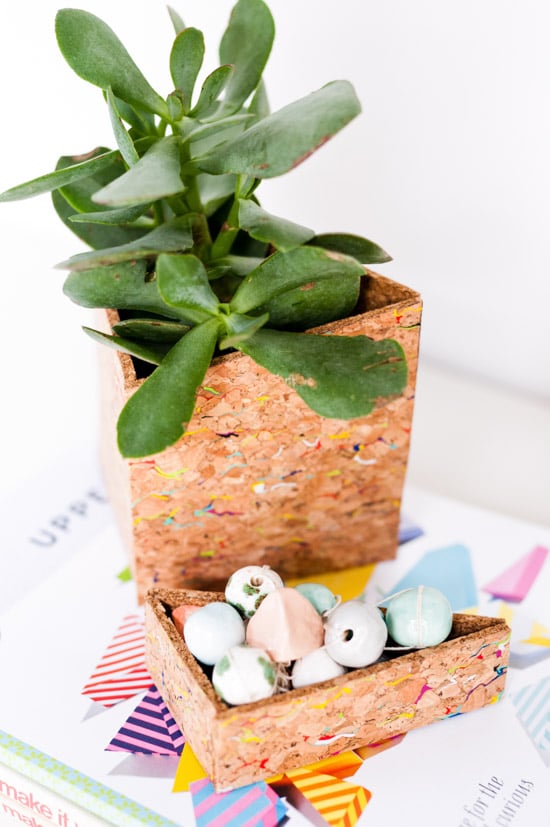
Let the games begin! After yesterday’s announcement, I’m hitting the ground running with today’s DIY office organizer. Because if there is one thing we need to get a handle on around here, it’s organization. There are still lots of boxes to unpack and bags upon bags of craft supplies to go through. But I can’t tackle everything at once, so I’m starting small and working my way up to the big stuff. Who’s with me?
These geometric cork containers can be used for keeping pens, paper clips, and paint brushes tidy. Or pop a plant in one and you have a geo planter. You can hang these on the wall or keep them on your desk. Lots of options for this one. I keep picturing a ton of these (like 15-20) hanging on the wall with plants inside. What do you think?
Materials:
– cork sheets (mine have little flecks of color in them, if you like that sort of thing)
– scissors
– hot glue gun
– pen or pencil for marking
– ruler* or straightedge
*You can definitely create these cork containers without a ruler if you prefer. I did mine without one. BUT it’s a lot easier to get the measurements right the first time if you have one (which I realized after the fact). Just FYI.
How To:
1. Start by creating a triangle (any size) and marking off the line to cut on, using a ruler or straightedge.
2. Cut the triangle out with scissors. This will be the bottom of your container.
3. Next, measure and cut each side of your triangle and cut a rectangle for each side of the triangle from the cork. *Make sure all of the rectangles are the same height. These will be the sides of your container.
If you’re not using a ruler, just trace one side of the triangle base to get the correct width, then cut a rectangle that is that width. Repeat this process with the other two sides of the triangle. Again, making sure that all of the sides are the same height.
4. (optional step) To create a container that is lower in the front than it is in the back, determine the severity of the angle you want and, using a straightedge or ruler, mark those lines. I found it easiest, to put the two front pieces together (without glueing), like how they’ll be when they’re connected to the base, and drew an angle on each one that lined up with the other. See photo.
5. Next, it’s time to glue all of the pieces together. Run a bead of hot glue along all three edges of the base triangle and attach the side walls. Then glue the side walls together.
6. (optional step) If you decide to create a hanging wall container, you’ll want to cut out a small hole in the back of the container that can rest on a nail in the wall. OR add a wall hook to the back, if you prefer.
Add pens, pencils, or plants and you’re good to go. Geometric cork containers for office organization and beyond.
Photography by Amelia Tatnall
Concept and styling by Brittni Mehlhoff
Think you’ll give this DIY a try? How do you keep your office supplies organized?


23 comments | Click here to reply
This is so cute and so creative. Thank you for your wonderful inspirations.
DesainI NEED NEED NEED THAT CORK.
where can I find it? I Life in Holland so it needs to be on the Internet. …..
Pleaseeee I want it so badddd
Greets Rosalie
Rosalie[…] 3. Cork Office Organizer by Paper & Stitch […]
10 Colorful Office DIYS - The Crafted LifeI love the idea of using cork board. I will have to try this out!
AnnaAwesome Jeannie. Let me know how it turns out.
BrittniI love the flecks of colour in the cork sheets! I need to try this DIY, the succulent looks great in the cork container!
http://printedforest.blogspot.co.uk/
BeckyFunny how something this creative is actually so simple. Thanks for sharing!
Anouk[…] Gotta love anything made with cork. […]
Friday Favorites no. 076 | links from the week - Amelia Writes[…] Cork office organizers are even better when the double as succulent planters. […]
Links to Love - Sarah Hearts[…] beetje met kurk, maar ook dat begin ik steeds leuker te vinden. Op Paper & Stitch vind je een leuke DIY met dit materiaal. ▲ Daniëlle geeft tips hoe je het beste om kunt gaan met negatief ingestelde […]
Weekend happiness #10 - Bringing HappinessThanks Mackenzie and Meagan. Every desk could use a little more office organization, right? Or at least mine can. 🙂
BrittniI definitely think the planter is a good idea! What a cute way to keep things coordinated on your desk (or around it), I totally need to do this for my desk. I always seem to find things that don’t have a home.
MeaganCork is so versatile and fun! I really like the colored specks in yours. I’ve never seen that before.
My desk could mosdef use a cork organizer! Thanks for the tutorial 🙂
-Mackenzie @ http://smithfamilyrenovations.com
MackenzieThanks Sharon. Yeah, I think the speckled cork definitely gives it a little something extra. Always up for pops of color.
BrittniSo clever. And yah I like the speckled cork. Haven’t seen it before? Sort of mcm’ish.
sharon / theprincipledtype.blogspot.comHi Lucy. I tried to find a link online to where you could buy it, but I couldn’t find anything. I bought it at my local Michael’s store, so you might want to try that.
BrittniI am adding this to my list of DIY projects for my new apartment. I especially love the cork you chose. Can you tell me where to find it?
LucyThanks Paige!
BrittniThese organizers are adorable! I need them in my life!
Paige
Paigehttp://thehappyflammily.com
Thanks Honey & Gazelle. Those colorful specks were the whole reason why I bought the cork in the first place. Hadn’t seen anything like it before. Glad you like it.
BrittniOooh, I really like the cork boards with the bits of colour! Adds a little special something something! Love this idea (:
honey&gazelleThanks Michelle. Sure, customizing these containers in your favorite color would be super simple to do with a little paint.
BrittniWonderful idea! I love that you can pin things to cork as well! Maybe with a touch of neon colour it would look even better?
https://www.makeandmess.com/
Michelle