Pencil organizers don’t exactly sound cool, but this one is actually pretty cute.

I get it. There’s nothing super exciting about a pencil caddy. BUT a rollup organizer that can store tons of pens and pencils without taking up too much space? I’d make one of those. As long as it’s cute.
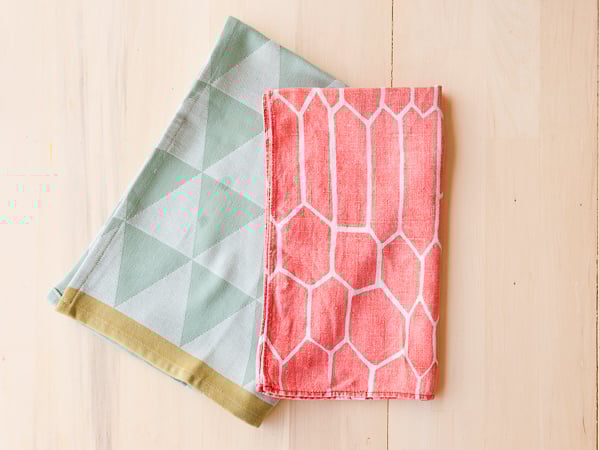
It’s a 15 minute project that is almost too easy (and functional) not to take the time to make. All you need is a tea towel and a sewing machine (and thread). That’s it!
We made a couple and I’ve been using them to keep small items like pencils, scissors, paint brushes, etc handy at the studio. But it also totally works for back to school, if you have any little ones. Click through for the step by step instructions.
How to Make a DIY Pencil Organizer
Materials for Rollup Pencil Caddy
- tea towel with an interesting design
- sewing machine / thread
- (optional) thin leather strip 8-12 inches long
Making a Pencil Organizer (Instructions)
1. Lay your tea towel flat. Then, use a pencil (or whatever you plan to organize in your rollup) to measure where the fold would need to be (up from the bottom section). Pin on each side and sew up the sides. Backstitch at the beginning and end of each sewn line.
2. Continue to use your pencil (or other supplies you’ll be storing) to roughly measure and decide how wide each section should be. Pin those sections and then sew each dividing line, running from the bottom of the rollup to the top of the fold in step one. Backstitch at the beginning and end of each sewn line.
3. Fold over your top section and decide how far you would like the fold to come. If your towel is just the right length you can skip this step. But if not, cut off excess fabric and hem to create a finished edge.
4. You can stop there or add a few more finishing touches. To make your flap a bit stiffer / easier to fold over, iron your fabric at the fold and sew a seam from side to side to make a flap that will lay flat.
5. (Optional) To keep the rollup secure, you can add a leather strip, tied in a knot. I didn’t attach mine to the actual rollup – just wrapped it around and knotted it after everything was rolled. But you can sew the two pieces together, if it makes more sense to have that piece connected.
What else can I use this rollup organizer for?
This rollup pencil organizer that works for all kinds of things, not just pencils. It would make the perfect makeup organizer! You can use it for makeup brushes and tubular makeup items (like eyeliner, lipgloss, etc). Or what about as a makeup brush organizer?
Speaking of brushes, artist brushes would fit perfectly in the slots of this rollup too. I currently have one that I use to store all of my pottery tools, which has been helpful for keeping everything organized in one spot.

Honestly, I am always, ALWAYS losing small things in my desk.
These pencils organizers would also be a good thing to throw into your purse for important (smaller) items that you normally have to dig to the bottom of your bag to find. They’re a lot harder to lose track of than one single pencil or a pack of gum, key, etc.


How to Make a DIY Pencil Organizer
Equipment
- tea towel with an interesting design
- sewing machine / thread
- (optional) thin leather strip 8-12 inches long
Instructions
- Lay your tea towel flat. Then, use a pencil (or whatever you plan to organize in your rollup) to measure where the fold would need to be (up from the bottom section). Pin on each side and sew up the sides. Backstitch at the beginning and end of each sewn line.
- Continue to use your pencil (or other supplies you'll be storing) to roughly measure and decide how wide each section should be. Pin those sections and then sew each dividing line, running from the bottom of the rollup to the top of the fold in step one. Backstitch at the beginning and end of each sewn line.
- Fold over your top section and decide how far you would like the fold to come. If your towel is just the right length you can skip this step. But if not, cut off excess fabric and hem to create a finished edge.
- You can stop there or add a few more finishing touches. To make your flap a bit stiffer / easier to fold over, iron your fabric at the fold and sew a seam from side to side to make a flap that will lay flat.
- (Optional) To keep the rollup secure, you can add a leather strip, tied in a knot. I didn't attach mine to the actual rollup - just wrapped it around and knotted it after everything was rolled. But you can sew the two pieces together, if it makes more sense to have that piece connected.
Sewing Rachel Brewer
Photography Amelia Tatnall and Brittni Mehlhoff
Are you always losing track of craft supplies like I am? Think you’ll give this DIY pencil organizer a try?
17 comments | Click here to reply
[…] DIY rollup organizer 2. brushstroke painted mugs project from Fall for DIY 3. woven pendant tutorial from Fabrica de […]
6 DIYs to Try This Weekend - Paper and Stitch[…] 17. DIY rollup organizer for craft supplies […]
63 Awesome DIY Gifts for Everyone on Your List + What's your Favorite Gift You've Ever Received?! - Paper and StitchSo cute!
nivelleim a newbie blogger so come along and visit my blog 🙂
This is absolutely amazing! I’ve always looked for a simple way to organize my stuff. It’s so cute and easy to create. Thanks for this nice introduction 🙂
EigenkreationYour fabric choices are so charming, I might have to find the same exact ones haha! Thank you for sharing such a simple and useful DIY for back to school!
Eden PassanteWow! This doesn’t look too hard but very pretty! I love the cloth you have used, it looks stunning! Will have to try this!
MahriyaWhat a perfect idea, not only for school supplies!
Michellehttps://www.makeandmess.com/
Definitely want to try this for some of my art supplies – even despite my hatred of sewing 🙂
Krista | The IllustraiI love this idea, it is a great organiser for pencils. I made a bag for my blog once too, it can also be used for pencils: http://www.idimin.berlin/das-einfachste-kosmetiktaeschchen-the-simplest-cosmetic-pouch/
KaliCheck it out, maybe you like my idea of how to make a simple pouch:-)
Kali
Favorite colors! Also I love this simple sewing project for a problem I always have… too many great pencils and pen and not enough places to put them!
Amy | Delineate Your DwellingWhat a wonderful idea!! : D
Gemma
Gemmawww.fadedwindmills.com
Omg, love this. Perfect! Thank you for sharing. Off I go to find a cute tea towel.. x
www.paintingoctober.blogspot.co.uk
KateAwesome tutorial. This would work for knitting needles and makeup/nail art brushes too. My knitting needles come in something similar.
Laura [Merkitty]I love this!! It reminds me a lot of knitting needle organizers!
Kiersten
KierstenLove this! I’ve wanted to figure out how to make one for a while so this will definitely help. I’ve saved it to use later. Love the title!
Tina x www.teaisfortina.co.uk
TinaHaha Kimberly. That song has been stuck in my head for two days for some reason. For clips, you could create kind of a pouch within the rollup that can be sewn directly to the inside. And if they’re binder clips, like mine, you can also just attach them to the outer edges (probably no more than couple would fit, but that could still work). Hope that helps!
Brittni-Brittni
I love this organizer; it will help to keep my different types of pens and pencils organized. Do you have a solution for clips? I can’t wait to see your studio makeover to get ideas for other tips. My office is a slam hot mess right now. Oh, and I always love your titles. You have that song stuck in my head now. 🙂
Kimberly