
I used to have a couple of ties that I could make into a bow or knot for collared shirts to make them look a little more special. The ones I had actually came with the shirts, but I would switch them out, etc. Until at some point, I had lost them all. Those tiny little accessories tend to be the first thing that my dresser eats up, never to return to me.
So, I figured I would make my own since they’re so straight forward. You really only need some long strips of fabric and a sewing machine. How hard can it be, right?
Materials
- 55 x 1.5 inches of fabric for a longer bow tie version (like the black one)
- 36 x 3 inches of fabric for a shorter version (like the pink one)
- sewing machine
Instructions
1. Fold the fabric in half with the good sides facing in, towards each other. Line it up as straight as possible. Feel free to use straight pins to keep fabric in place, if desired.

2. Start sewing at either end with a straight stitch, running the entire length of the fabric, leaving a 2 inch break somewhere towards the end (but not all the way at the end), to make it easy to turn right side out again later.

3. Next, to add some interest to the ends, sew a straight stitch at a diagonal at both ends, as shown. Cut off excess fabric form the corners if necessary.
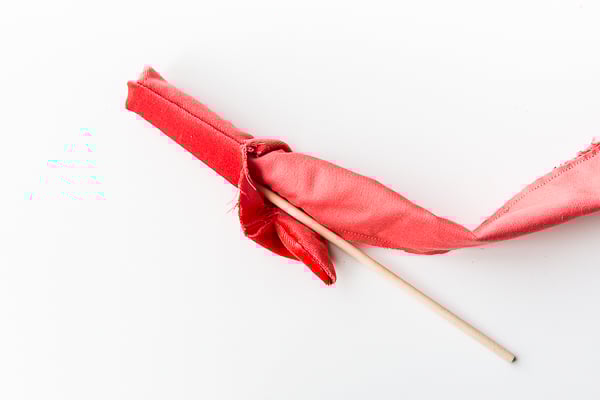
4. Turn right side out and poke the corners out if necessary with a dowel rod or you fingers.
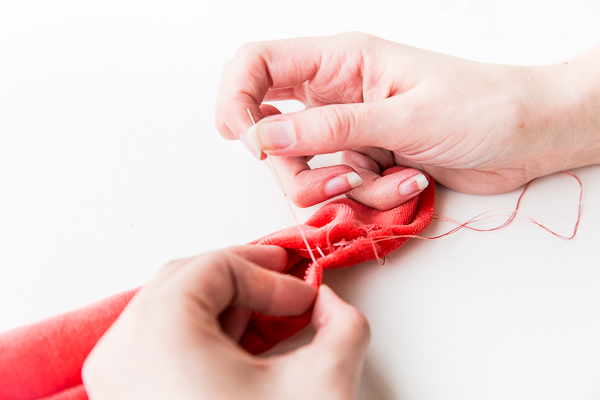
5. Hand stitch the remaining opening (an invisible stitch would be the best option for this) and it’s ready to go.
Bonus. If you’re onboard with the choker trend, you can use a skinny version of this DIY as a choker as well.


Photography Brittni Mehlhoff
Sewing Liz Scoper
Which version is your fave? What do you think of this look?
9 comments | Click here to reply
[…] DIY skinny bow tie (for men and […]
63 Awesome DIY Gifts for Everyone on Your List + What's your Favorite Gift You've Ever Received?! - Paper and StitchI love the velvet one – i’m definitely trying it this weekend. I love a a bow tie but I usually just grab whatever vaguely useable fabric is nearby. I can’t wait to make a proper version! Thanks
KimHi Asri. The velvet tie does look wired in the photo a little bit, but it’s actually just the fabric…since there is some texture to it, with the velvet, it stays in place a bit better. To create that particular look, tie the sewn strip of fabric into a regular knot. Then, pull the top piece (that flops over the knot) back through underneath. Hope that helps. It’s hard to explain in words, but it’s super, super easy to do.
BrittniHey! Did I miss the part where you explained how to tie the red one? It looks like it’s wired!
AsriWhat a good idea, Lunarae, to borrow skinny ties to use. Smart.
BrittniI’m rocking on the red choice for both a great pop of color, & the style of knot used. Back in the 1980’s, when dinosaurs roamed the Earth, I would raid my sweetie’s skinny tie collection for a new look in my tight college budget.
LunaraeThanks so much Jessica and Michelle. 🙂 Happy to hear that.
BrittniThe black one is super cute, although I love the way you tie the red one!
Michellehttps://www.makeandmess.com/
Both are stunning x
Jessica — NinetyCo
Jessica