Handmade holiday baby gifts for the win! These DIY gift ideas are perfect for the kids and babies in your life.

When it comes to receiving presents, handmade and DIY gifts are generally the things that I love most (and keep the longest). There’s just something about getting a gift from someone that they actually made that makes it feel more special, right?
Which is why I also love, love, LOVE making gifts for other people for the holidays. It especially comes in handy for close friends / family and that person on your list that ‘has everything’.
This year though, the first thing that came to mind when brainstorming DIY gift ideas for the holidays was a few fun things for kids and babies.
Hayes is getting to an age now where he really loves playing with little toys, having people read to him, etc. So, I wanted to create a few things that he can enjoy now and later: a soft baby book, a patterned swaddle blanket, and a kids memory game. I used my Cricut Maker for all 3 projects and am sharing the tutorials today. Click through for the tutorials.

Over the years, I’ve shared many Cricut Maker projects, so I probably don’t need to tell you all the reasons I love it…because I’ve mentioned it so many times. BUT I will say, it is a very handy tool to have if you’re a DIYer / crafty person.
If you’re on the fence about buying one, and you make things a lot, it’s worth the purchase! And I’d say that whether Cricut was sponsoring this post or not. In fact, I’ve actually said that very thing to many, many people in my DMs.
You can use it for making / cutting paper ornaments, DIY leather projects (cutting and embellishing), cutting fabric (which I’ll show you today with the soft baby book), adding vinyl to fabric and glass and wood (and lots of other things), for iron-ons, to add a pattern to an old pair of shoes, and SO much more!
So now that you know why I love it, here are three examples of how I used my Cricut Maker to create DIY gifts for the holidays (specifically for kids and babies)…

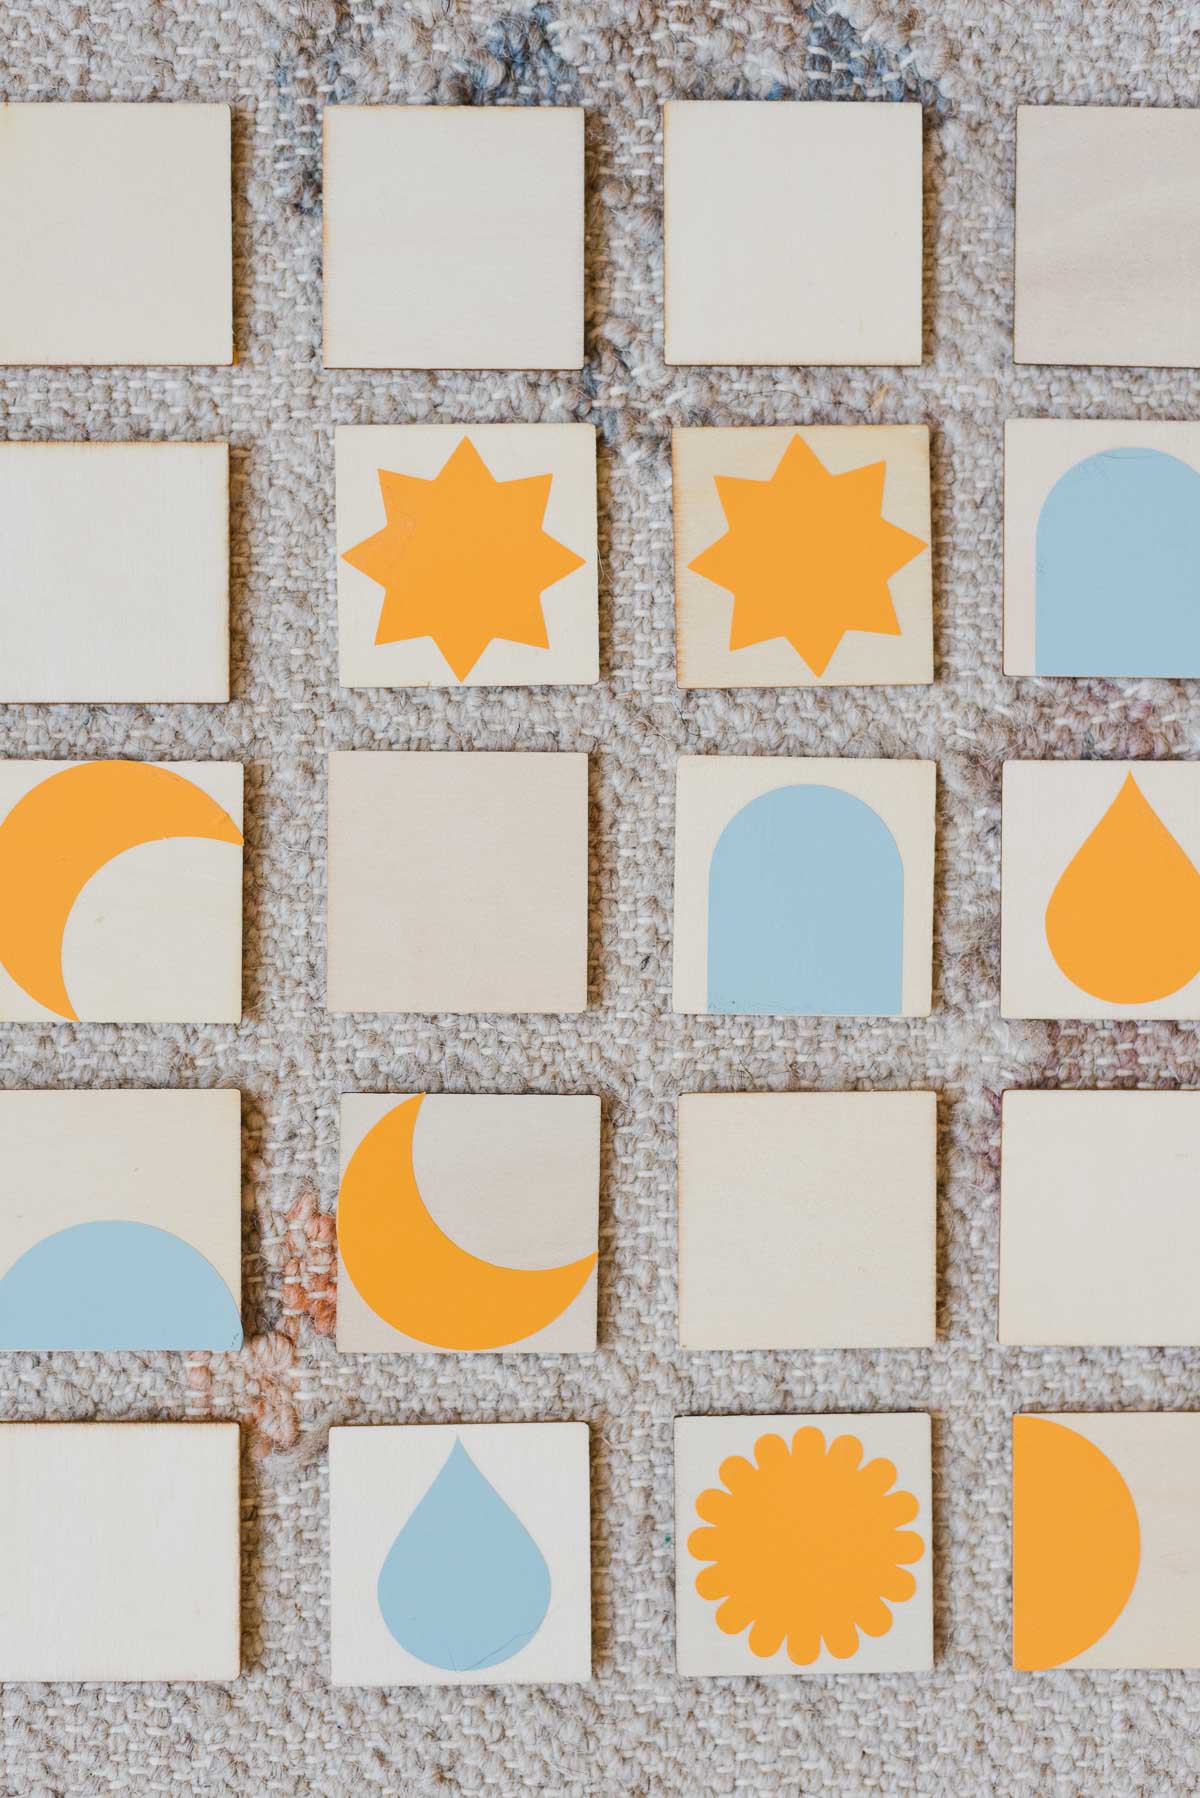
DIY Gift Idea #1: Kids Memory Game
I used to love playing memory games when I was a kid. It was so fun to try and remember where certain pieces were and try to match them up. Obviously, Hayes is a bit young for this one BUT I made it anyway and he can play with the pieces as blocks until he’s old enough to use it properly.
One of the best things about creating a memory game like this is that you can personalize it to any child’s interests. Does your kid love dinosaurs? Make him or her a dino themed memory game set using you Cricut maker and Cricut vinyl along with some small wooden tiles like these.
The list of possibilities goes on and on…you can make a memory game that includes all your child’s favorite colors, animals, sports teams, nature items, etc. I decided to do a pattern memory game because Hayes loves his pattern book and I thought it would be a fun thing to design.
To get started, you’ll need your Cricut Maker, Standard Grip Machine Mat (its the green one), Cricut premium vinyl – permanent, and 2×2 square wood tiles. I found a 60 pack on Amazon that works perfectly for memory cards.
As for the premium vinyl, it comes in lots and lots of colors (I used Something Blue and Tangerine) and you can use the premium vinyl -permanent OR the premium vinyl – removable. I went with the permanent option, which lasts up to three years.
Cutting the vinyl with the Cricut Maker is super easy. Start by selecting a design in Cricut’s Design Space or uploading your own (I used simple shapes – shape templates included above). Then, I sized each shape down to 2 inches.
Once sized down to 2 inches, I made a duplicate of each shape. It’s important to wait until after it’s resized to make the duplicate, so that they’re exactly the same for the matching game.
Next, attach the vinyl to the machine mat, and feed it through the Cricut Maker to cut the shapes or designs you’ve created. Once the design is cut and weeded, add transfer tape. Just cut the transfer tape down to the size of the vinyl and remove the sticky part of the transfer tape, attaching it to the vinyl that’s been cut and weeded.
Use the scraper tool to push the transfer tape down onto the surface of the vinyl and help it stick. Then, cut each piece away from the others, so it will be easy to attach each shape to the wood square. Center the vinyl shape onto the wood square and press down with the scraper again.
Pull away the transfer tape to reveal the completed design. That’s it! From there, it’s ready to be used or wrapped up as a DIY holiday gift.

DIY Gift Idea #2: Personalized Swaddle Blanket Gift
Adding some kind of personalization to a store-bought swaddle is the perfect gift for a new baby – whether it’s for the holidays or even as a baby shower gift. You can customize the blanket with the child’s name, a simple pattern, cute shapes, etc. I used my Cricut Maker to embellish this simple mustard cotton swaddle with a pattern, but there are so many possibilities with this one.
*If you decide to embellish the blanket with a word or name, be sure to check the mirror image button in the Cricut Design space before cutting.
Here’s how to make your own… Start by uploading your design to the Cricut Design space, attach Cricut’s Everyday Iron-On material (shiny side down) to the Standard Grip Machine Mat, and start cutting.
Once the design has been cut with the Maker and weeded, use the EasyPress to heat set the design onto the swaddle. My go-to temperature for projects like this one is around 330 degrees with 30 second intervals until the design is completely adhered. You can use this heat guide to help determine the right temperature and timing for your project though.
DIY Gift Idea #3: Soft Baby Book Gift
Hayes loves playing with books – mainly just holding them and turning the pages for now. But with all the books he has on his book shelves, he doesn’t actually have any soft fabric books. So, I thought I would rectify that.
A customized soft fabric book like this would be an awesome DIY gift for any baby or young kid you may know. You can personalize the fabric colors, shapes, number of pages, etc to reflect any child’s personality.
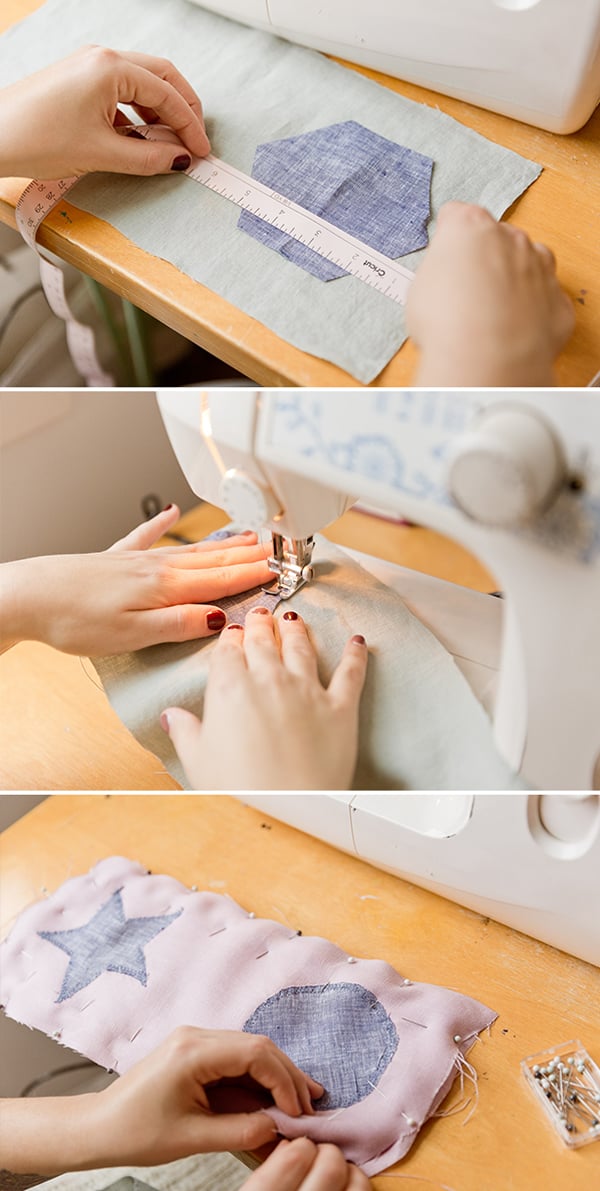
To make a fabric soft book like mine, you’ll need your Cricut Maker, fabric (in multiple colors and patterns), batting, FabricGrip machine mat (12×24), a Cricut sewing kit (which has the fabric scissors, straight pins, and measuring tape you’ll need, plus a seam ripper if you run into any sewing issues and several other items), thread, and of course a sewing machine.
Once you’ve created or downloaded the shapes you plan to use for the book (shape templates included above), upload them to the Cricut Design space. Once they’re in there, and you’ve added any other shapes you like from the Cricut Design space, they are ready to cut. Use the FabricGrip machine mat and the proper cutting tool, which will vary depending on your fabric.
Once all your decorative shapes have been cut, create 6 rectangle designs for the book pages, in the Cricut Design space, that are each 14×7 inches. Attach the fabric you’d like to use to the FabricGrip mat and cut them with the Maker. As another option, you can cut these 6 rectangles by hand, if you prefer to do it that way.
Now that all the shapes and pages have been cut, pin each of the shapes to a page (each rectangle has two ‘pages’ with extra room for the spine in the middle. See photo. Just make sure the shapes are centered on its square ‘page’ – leaving 1” of space for the ‘spine’ in the middle of each rectangle.
Once pinned, use a zig zag stitch to sew on each of the shapes. The zig zag stitch acts as a cute embellishment and prevents fraying.
Once all your shapes are sewn on, cut 3 pieces of batting that are 12”x5” and sandwich them between 2 pages (the long rectangles). Pin and sew along the edges with a zig zag stitch. Then, stack your pages and sew two lines for the spine right in the middle. See photo.


Photography by Amelia Lawrence
Are you planning to make any DIY gifts for loved ones over the holiday season? If so, I’d love to hear what you’re making!
2 comments | Click here to reply
I like them all! When I saw the memory game my reaction was ‘oh this one is the best!’ but then I saw the others and my reaction was the same, so well, I want to make them all. But I think I will make the memory game first. My nephew will love it!
Karlijn van der WijkThanks for sharing 🙂 Three great gift ideas!
Lewis