
Plush toys and soft toys for kids are always a hit as gifts. But handmade plush toys?! Even better! Learn how to make plushies for kids, in all different kinds of shapes. It’s a great way to use up leftover fabric scraps.

Cute little soft toys and plushies are such great gifts for kids and/or expectant moms-to-be. And the fact that these are DIY-able AND super affordable to create, make them even better in my eyes. So, I thought I’d show you how to make your own.
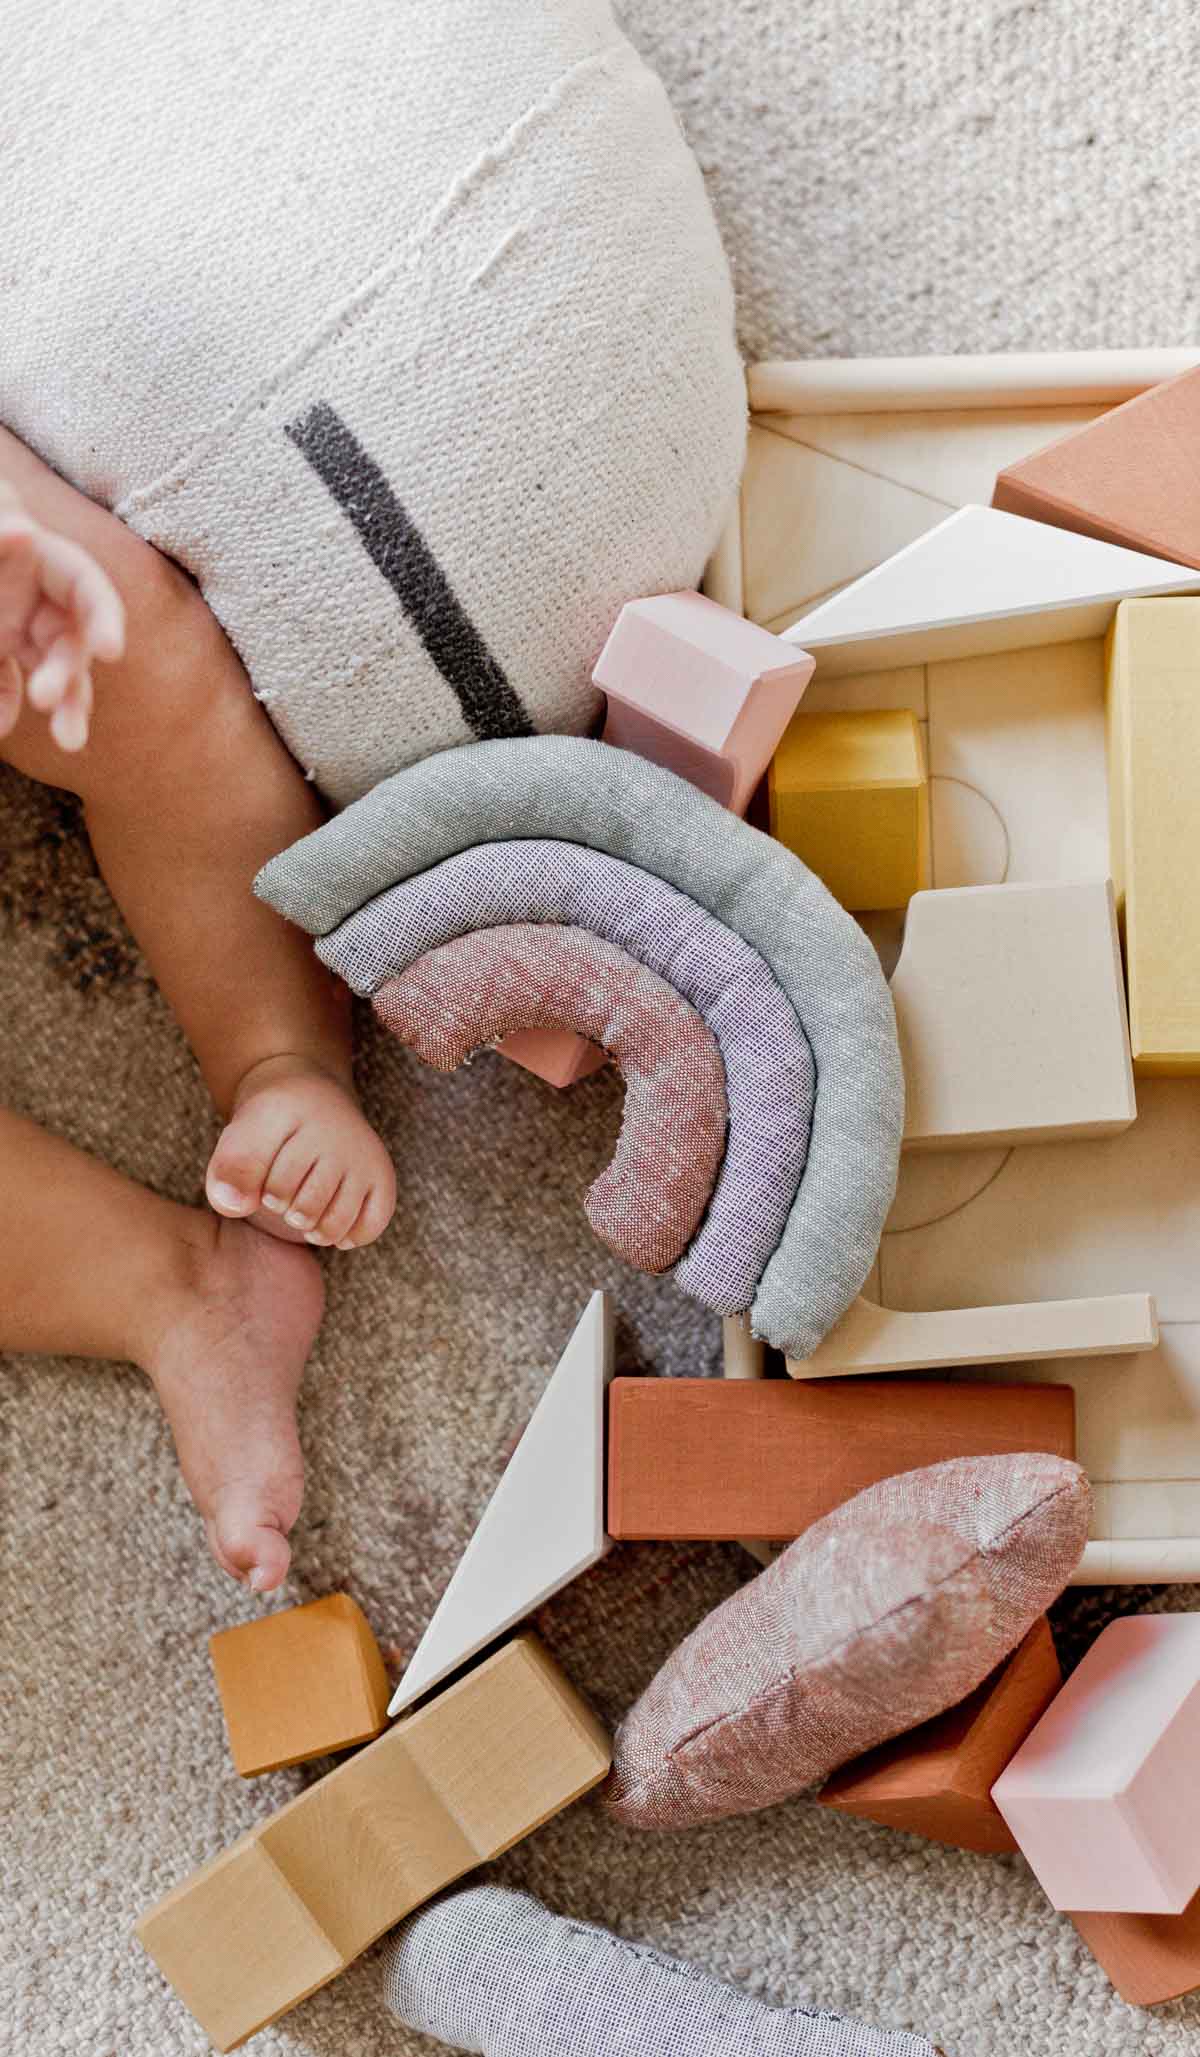
I had a few of these made for Hayes before he was born and he still plays with them to this day.
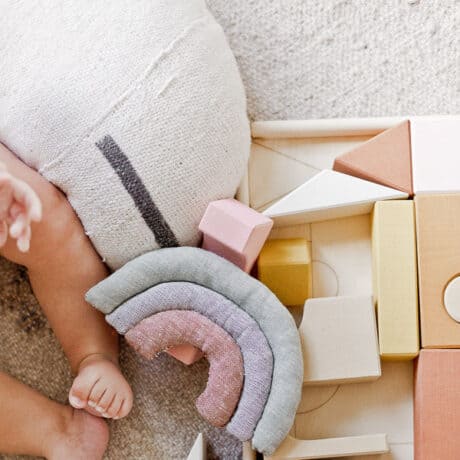
The rainbow toy is his favorite. Click through for the tutorial.
Custom plush toys like this are really quick sewing project and cost less than $10 to make.
Wanna make your own? Here’s how…
Materials Needed to Make Soft Toys
- scrap fabric (I used linen)
- organic cotton stuffing, more fabric scraps, or similar*
- sewing machine
- thread
- scissors
*Note before getting started / disclaimer
Because parts of these stuffed toys are sewn by hand and also include some kind of filling inside each item to make it soft, please use caution with these toys and monitor small children while they are in use.
I recommend using stuffing that is non-toxic like organic cotton (I used organic cotton roving scraps that I already had for this project), wool, or more fabric scraps.
Or as another option, you could use buckwheat hulls, flaxseed, or millet – which are also great natural options for stuffing. But again, would require monitoring to ensure the stitching doesn’t come undone.


How to Make Plush Toys
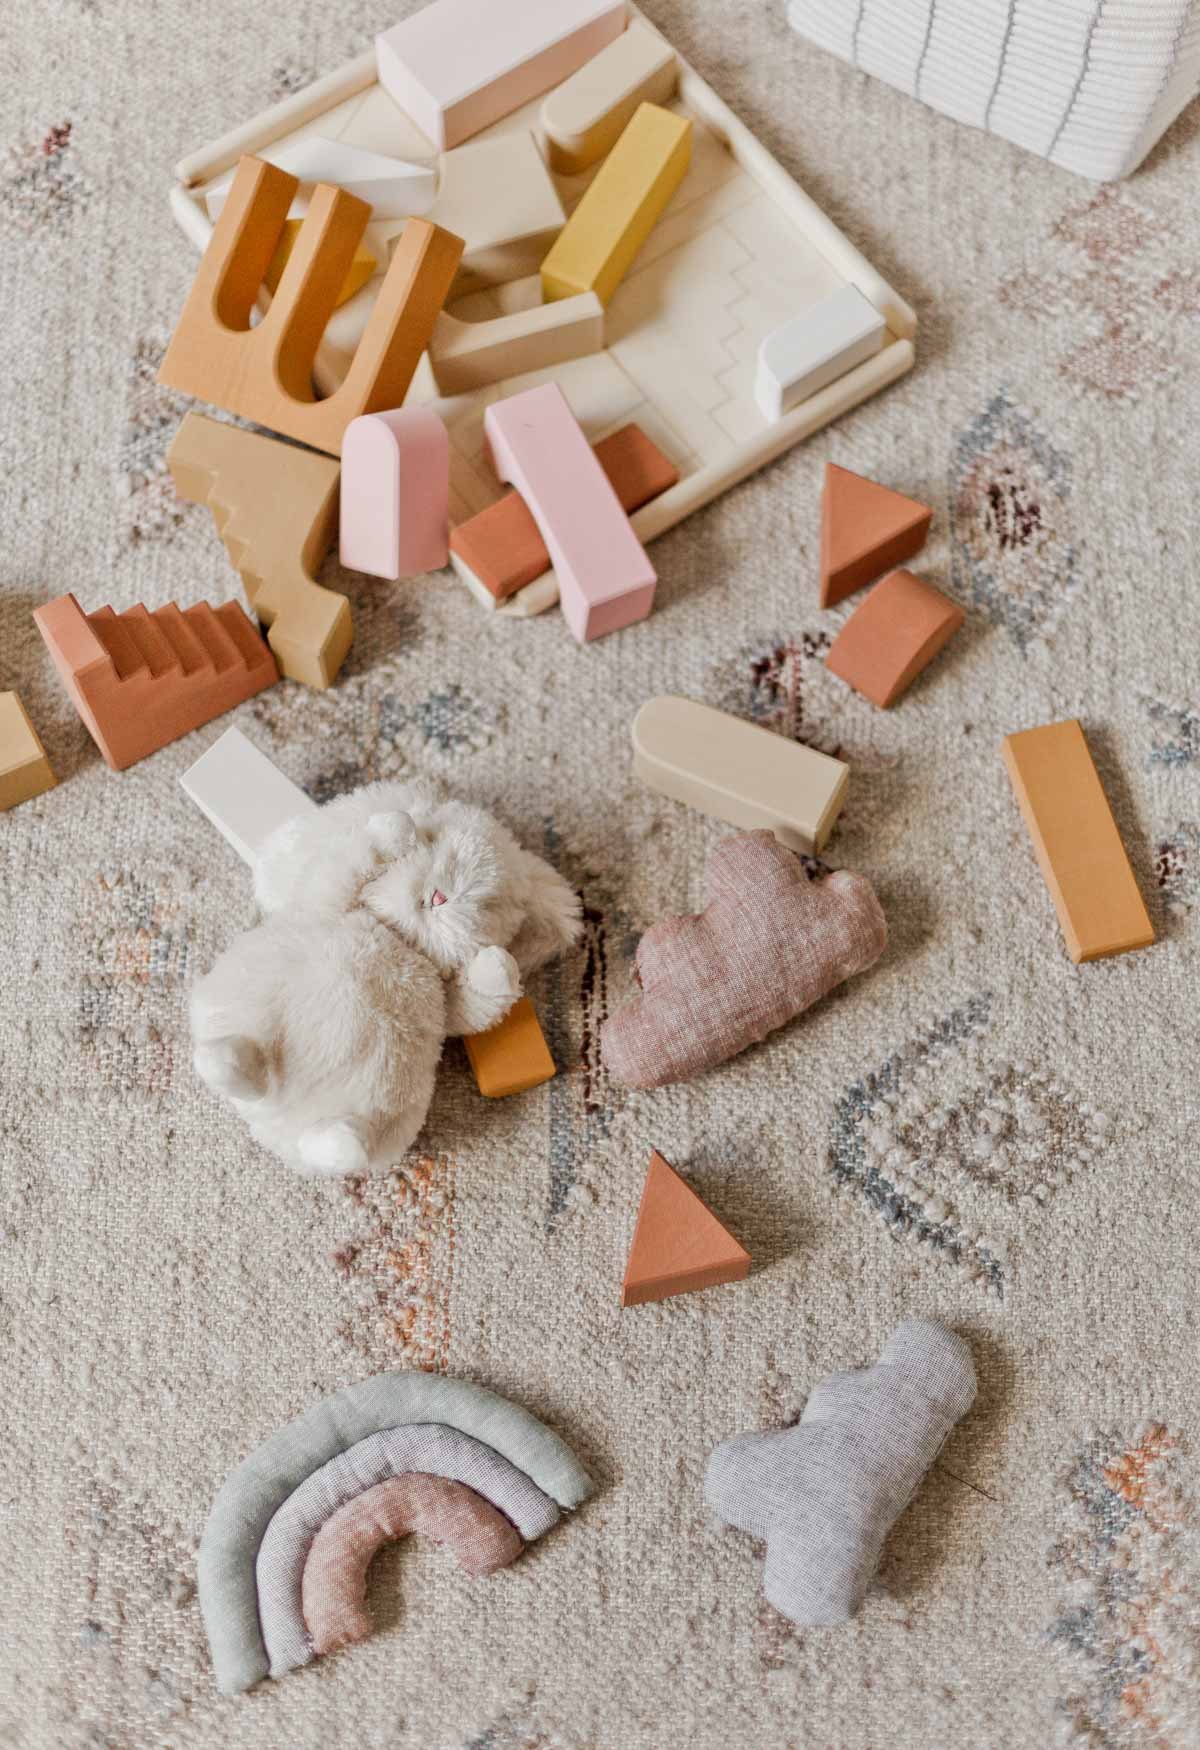
1. Create a template out of fabric or paper for the shape(s) you want to create – cloud, rainbow, teardrop, etc.
You can use my memory game shapes template as a guide for a few of those (just blow them up bigger when printing).
Then trace onto fabric and draw an additional line all the way around the shape that is 1/4 to 1/2 inch out from the original line. This will be your seam allowance.
2. Pin the two pieces of fabric (which will be your front and back pieces) together before cutting out along the seam allowance line.

3. Sew along the shape lines but leave about a 3 inch (or more to make it easier) opening for the stuffing to go into.
Be sure to back stitch on either side of the opening.
For cloud, raindrop, moon, or star shapes this is all you will need to do before moving onto the next step.
But if you’re making the rainbow shape, you will need to sew separate pieces for reach bow in the rainbow. In this case, three different ones.
4. Flip inside out. We used a pen and a skinny dowel rod to push everything through.


5. Fill with your choice of stuffing with the fill of your choice. Stuff the corners first and then fill out the middle.
We found that teasing the stuffing eliminates lumps in the pillow, if you’re using organic cotton, or something similar.
If you’re using loose filling (like millet, buckwheat, flaxseed, lavender), you won’t need to worry about this.

6. Hand sew the opening, using an invisible stitch, and secure on the ends with double or triple knots. Make sure that the stitching is very secure to stand up to use from children.
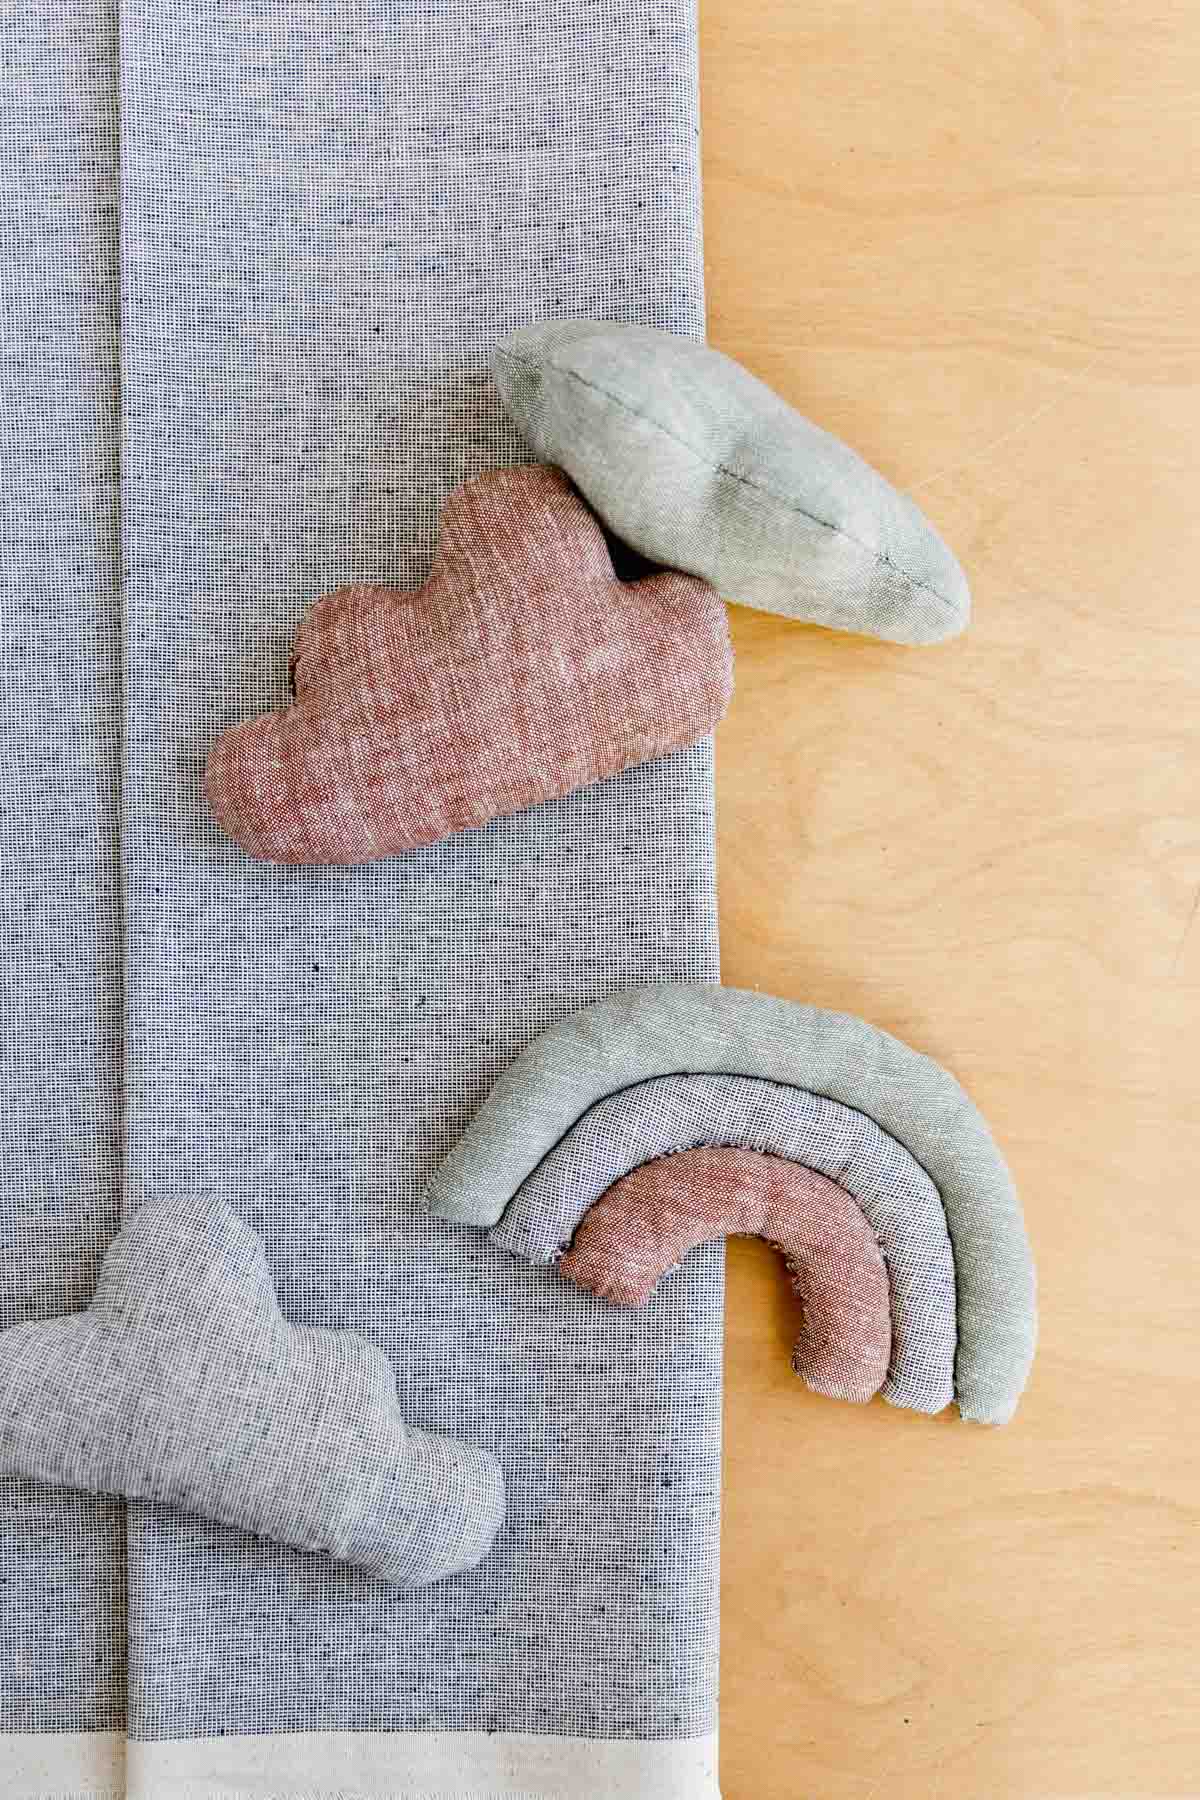
And if creating the rainbow toy, you’ll also need to attach each of the bow pieces / arches together after the openings are stitched up.
You can again use an invisible stitch to attach each arch together to form the final rainbow. Be sure to tie off ends in double or tripe knots.
Looking for more DIY toy ideas like this one?
Check out these additional DIY projects that you might like…
- DIY baby gifts – This tutorial post includes instructions for a soft, handmade fabric book, a DIY memory game, and DIY pattern swaddle blankets.
- DIY leaf pillow – You can make a giant stuffed monstera leaf pillow (like three feet long or longer) OR a smaller, more normal sized leaf pillow. Both sizes are super cute and would use the same materials needed for this project. So, you wouldn’t need any additional supplies.
- DIY star pillows – You can make giant star pillows or teeny tiny ones that are more like toys. Either way, super cute!
- reversible pillow idea – This one isn’t specific to kid toys, but if you have some larger pieces of fabric laying around, this reversible pillow would be a good one to try. It’s really easy to make!
- DIY toy car – Looking for wood toys? Check out the wooden toy cars I made and grab the tutorial.
More Ways to Use Fabric Scraps
Have leftover fabric scraps after making this project? Here are a few more DIY ideas to use up those extra pieces of fabric, so nothing goes to waste.
- A tutorial for how to make a bow tie – make a kid size bowtie or an adult size one.
- Use fabric scraps to make your own reusable paper towels. Great eco-friendly way to reuse leftover materials.
- A fresh DIY take for making a paper mache bowl out of fabric instead. LOVE this project!
- Use scrap fabric to make reusable bags for veggies.
- And last but not least, upgrade old shoes with this DIY sandals idea that utilizes fabric scraps.


Sewing Emma Spear
Photography Brittni Mehlhoff
How to Make Custom Soft Toys for Kids (Various Shapes)
Equipment
- sewing machine
Ingredients
- scrap fabric (I used linen)
- organic cotton stuffing, more fabric scraps, or similar
- thread
- scissors
Instructions
Create a template out of fabric or paper for the shape(s) you want to create - cloud, rainbow, teardrop, etc.
- You can use my memory game shapes template as a guide for a few of those (just blow them up bigger when printing).Then trace onto fabric and draw an additional line all the way around the shape that is 1/4 to 1/2 inch out from the original line. This will be your seam allowance.
Pin the two pieces of fabric (which will be your front and back pieces) together before cutting out along the seam allowance line.
Sew along the shape lines but leave about a 3 inch (or more to make it easier) opening for the stuffing to go into. Be sure to back stitch on either side of the opening.
- For cloud, raindrop, moon, or star shapes this is all you will need to do before moving onto the next step.
- But if you're making the rainbow shape, you will need to sew separate pieces for reach bow in the rainbow. In this case, three different ones.
Flip inside out. We used a pen and a skinny dowel rod to push everything through.
Fill with your choice of stuffing with the fill of your choice. Stuff the corners first and then fill out the middle.
- We found that teasing the stuffing eliminates lumps in the pillow.
- If you're using loose filling (like millet, buckwheat, flaxseed, lavender), you won't need to worry about this.
Hand sew the opening, using an invisible stitch, and secure on the ends with double or triple knots. **Make sure that the stitching is very secure to stand up to use from children.**
- And if creating the rainbow toy, you'll also need to attach each of the bow pieces / arches together after the openings are stitched up.
- You can again use an invisible stitch to attach each arch together to form the final rainbow. Be sure to tie off ends in double or tripe knots.
1 comment | Click here to reply
These are such cute toys! I love the vintage look of the handmade plush toys and they are are so much cuter than LOL and shopkins! I’m always looking for crafts to do with my young girls and this one will be our next for sure! I also use crafts to do bribes when needed and my youngest has a cavity to fill next week so this will be just the thing! Thank you!
Mia Tenille