
If you’ve ever wondered how to make a potholder, today’s DIY is for you. It’s fast, easy, and only required ONE supply. Literally can’t beat that!

These DIY potholders work during any time of year in the kitchen. But there’s something about crochet that makes me think of the fall and winter months. Not to mention, after last week’s nutella cinnamon rolls, I think it’s full speed ahead on fall projects.
The best part about these DIY potholders though is that it only requires ONE material and no special tools required (unless you count scissors as a special tool).
How is that even possible? Because these homemade potholder are finger crocheted. Anyone as excited as I am?! Click through for the tutorial.

Another Way to Make a Potholder
Before we jump in, I did want to mention that there is another (very easy) way to make a potholder, if you don’t want t use your hands. And that’s with a potholder loom. They’re super affordable (under 20 dollars for the smaller size) and simple to use.
Personally, I love using potholder looms for making small weavings.
I wrote a lengthy post all about the potholder loom (well actually looms – I have two) I use and where I source weaving loops, etc, if you want to check that out.
Now that you know that, let’s get into today’s actual DIY…
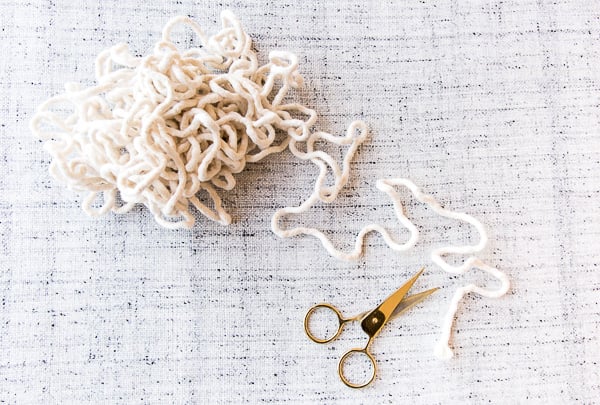
Materials for DIY potholders
- 20 yards of 3/8 inch cotton piping*
- scissors
*I used 3/8 inch piping for this project, but you can use any width you’d like.
I’ve used cotton piping for several DIY projects over the years, like my tutorial for how to make a rug (from scratch). It’s a great (inexpensive) material to have on hand.

How to Make a Potholder
1. Start with a slipknot.
2. Form a loop.
Then pull the long side of your cotton piping through the hole you created with the slipknot, forming a loop about the same size as the first hole. As shown in photo. Continue this process until you’ve reached roughly 8 inches in length.
3. Make additional rows.
Then, you’ll start creating additional rows to thicken the width. To do that, thread the cotton piping through the second to last loop and then the last loop.
Repeat this process (where you’re threading through two holes each time) until you’ve reached the end again. Once you reach the end, make a loop only going through the last loop. This will give you the start for the next row.
4. Continue creating loops.
Then continue by creating loops through the previous holes to create more rows this same way until it’s roughly the size of a potholder – about 8 inches wide by 8 inches high.
5. Pull the piping through.
Once you’ve reached the desired size, pull the piping all of the way through the final loop and pull tight.
6. Add a loop.
Now, it’s time to add a loop for hanging and then you’re done. To add the loop, take the extra piping and feed it through the closest loop hole until you have a loop that is about 1 inch in diameter.
Wrap piping around the base of the loop and create a knot to secure it.
7. Cut off excess piping.
Finish it off, by cutting off the excess piping as close to the base of the hanging loop.

And that’s how you make a potholder with your hands!
The cotton piping is pretty thick, so these little guys will really help protect surfaces from heat, etc.
ALSO, they can be dyed or painted, if you’re looking for something with a bit more color or want to take this project a step further.


How to Make a Potholder
Ingredients
- 20 yards of 3/8 inch cotton piping
- scissors
Instructions
Start with a slipknot.
Form a loop.
- Then pull the long side of your cotton piping through the hole you created with the slipknot, forming a loop about the same size as the first hole. As shown in photo. Continue this process until you've reached roughly 8 inches in length.
Make additional rows.
- Then, you'll start creating additional rows to thicken the width. To do that, thread the cotton piping through the second to last loop and then the last loop.
- Repeat this process (where you're threading through two holes each time) until you've reached the end again. Once you reach the end, make a loop only going through the last loop. This will give you the start for the next row.
Continue creating loops.
- Then continue by creating loops through the previous holes to create more rows this same way until it's roughly the size of a potholder - about 8 inches wide by 8 inches high.
Pull the piping through.
- Once you've reached the desired size, pull the piping all of the way through the final loop and pull tight.
Add a loop.
- Now, it's time to add a loop for hanging and then you're done. To add the loop, take the extra piping and feed it through the closest loop hole until you have a loop that is about 1 inch in diameter.
- Wrap piping around the base of the loop and create a knot to secure it.
Cut off excess piping.
- Finish it off, by cutting off the excess piping as close to the base of the hanging loop
Notes
Photos Jess Smith
DIYing by Cori Maass
Have you ever tried hand crochet before or potholder making? Think you’ll try these DIY potholders for your kitchen?
SaveSave
20 comments | Click here to reply
Hi Beverly. Don’t you love that?! It’s one of my faves. I bought it from Group Partner. Here’s a link:
Brittnihttps://group-partner.com/collections/all/products/rory They have a bunch of other face options too, if you click on the ‘all pots’ section. 🙂 Happy shopping.
I read this blog about the potholders because I loved the utensil holder. Did you make it or buy it? I have a daughter who loves “head” and “hand” creations. She go crazy for this Head!
BeverlyHi Christina. Yes, it’s a bread board / cutting board from HAY. Here’s a link: https://www.designpublic.com/products/schneck-field-bread-board-kitchen-utensils-hay
BrittniIs that a cutting board in the photo next to your beautiful potholders? I’ve seen it in another magazine and think it’s wonderful! Where did you find it?
Christina Arnold[…] 14. DIY potholders / hot pads […]
63 Awesome DIY Gifts for Everyone on Your List + What's your Favorite Gift You've Ever Received?! - Paper and Stitch[…] Pom Magnets Moon Phase Lights Finger Knit Potholders Typographic Luggage Tags 3D Graphic Mugs Tassel Earrings Leaf Candle Concrete Ring […]
50 Must do DIYs | October 2017 | Fall For DIYHi Hannah. I don’t know if Michaels has it, but I do know that JoAnns typically has a bunch of different sizes available
BrittniIn store. I’ve bought some there before.
Is this piping available someplace like Michael’s, do you think? Would love to be able to pick it up today. Great post.
KristenIt really looks easy but I hope I will be able to create something nice. The idea of hand knit really amazed me.
Hannah Norton[…] your weekend, I’ve rounded up these amazing projects for you to try!1. DIY Potholders from Paper & Stitch 2. Concrete and Wire Ring Holders from Fall for DIY 3. Round Velvet Pillow DIY from A Beautiful […]
7 DIYS TO TRY THIS WEEKEND – Why Don't You Make MeYep, they are thicker / heavier than yarn Katie. Let me know if you give it a try!
BrittniThese seam to be heavier than regular yarn. I have made reg yarn pot holders and always got burned. I may just try the cotton piping.
Katie JacksonMaybe today is the THE day than Sophie?! 🙂 It’s so easy!
BrittniThese are so cute! I’ve always wanted to learn how to hand knit.
SophieThanks for the suggestions Lucy. I love the idea of wrapping embroidery floss around sections of piping before crocheting it to add color.
BrittniLovely idea, thanks for sharing. 2 tips for adding colour.
Lucy, Kent ~ EnglandUse embroidery silk, just pull out a length and hold it against the cotton piping.
Want bling? Then use some of the gorgeous metallic sewing thread on the market just as you did with the embroidery thread or combine both with the cotton piping.
As well as pot holders these make great personalised belts.
Embroidery and metallic thread finger crocheted together make lovely bookmarks
Thanks Courtney. 🙂
BrittniI love that creation! I love the way it turned out.
Courtneyhttp://sugarcoatedbears.blogspot.com/
Thanks Michelle. Such an easy project to try!
BrittniI love how easy this is, and I really like the texture!
Michellehttps://www.makeandmess.com/