
I made a huge DIY rug (5×8) from scratch with just a handful of supplies. And you can make one too…any size you want!
After my DIY weaving project I felt like I needed another challenge, so I decided to tackle another large-scale project that’s been on my list…a DIY rug from scratch! I desperately needed a new rug and I tirelessly searched for one that I absolutely loved (that was also budget-friendly).
Sadly, I apparently have very expensive taste because every rug I found that would work was WAY outside the range of what my wallet felt like it could handle. So, like any DIYer, I decided to make one myself, using cotton piping.
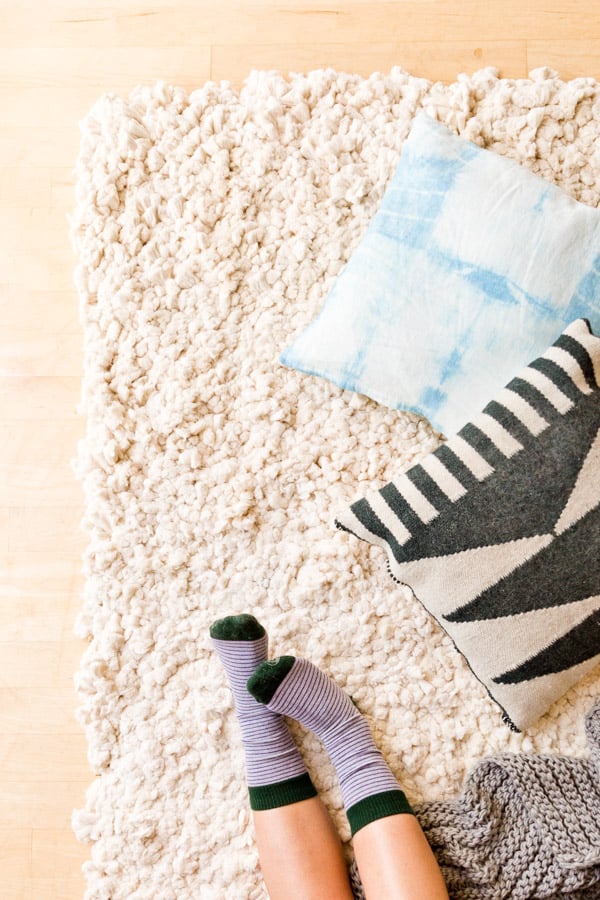
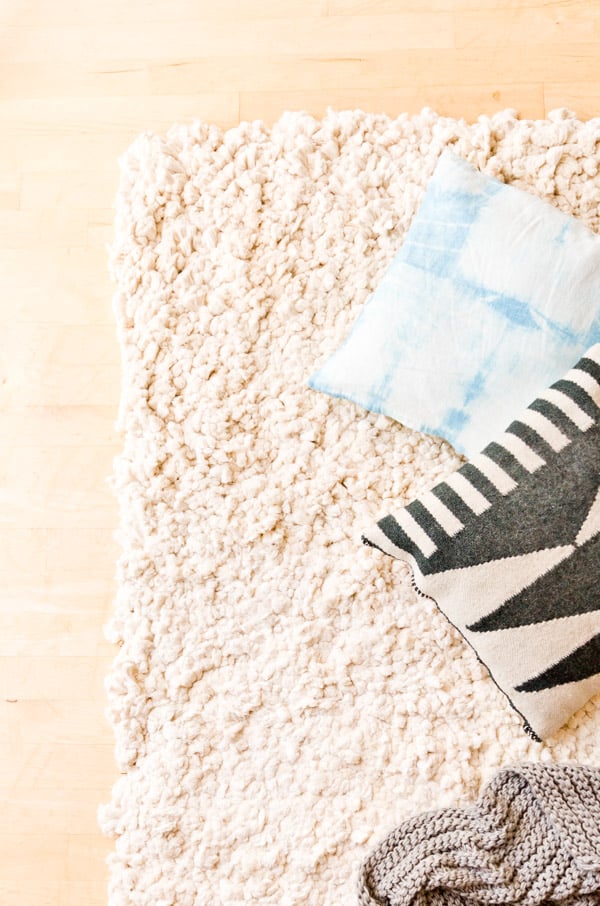
It was definitely a labor of love (as I’m sure you can imagine making a giant rug by hand would be), but I really like how it turned out. And it is just in time for the weather to start cooling down because this thing is as cozy as it comes…It’s like walking on clouds! Super fluffy and plush.

How to Make a DIY Rug with Cotton Piping
This DIY rug technique can be used for a runner, a small rug in the kitchen or bathroom, or even a larger rug for seating areas like mine. Want to make your own cotton rug like this one?
Here are the step by step instructions…

DIY Rug Materials
- Multi-use netting (I used this exact one)
- Cotton piping* (available on Amazon + fabric / craft stores)
- Small rubber bands (like the small ones you can find in the hair aisle)
- Scissors
*Cotton piping is available in various thicknesses (ranging from 1/4 inch up to 1 inch and more) and any thickness will work for this project. But the thicker the piping, the faster the DIY process will be (and the less yards you will need to use to complete it).
My personal favorites for piping sizes are: 1/2 inch and 11/16 inch, but you can use ANY size. Piping comes in lots of sizes.
How to Make a Rug – Step by Step Instructions
1. Determine size and cut the netting.
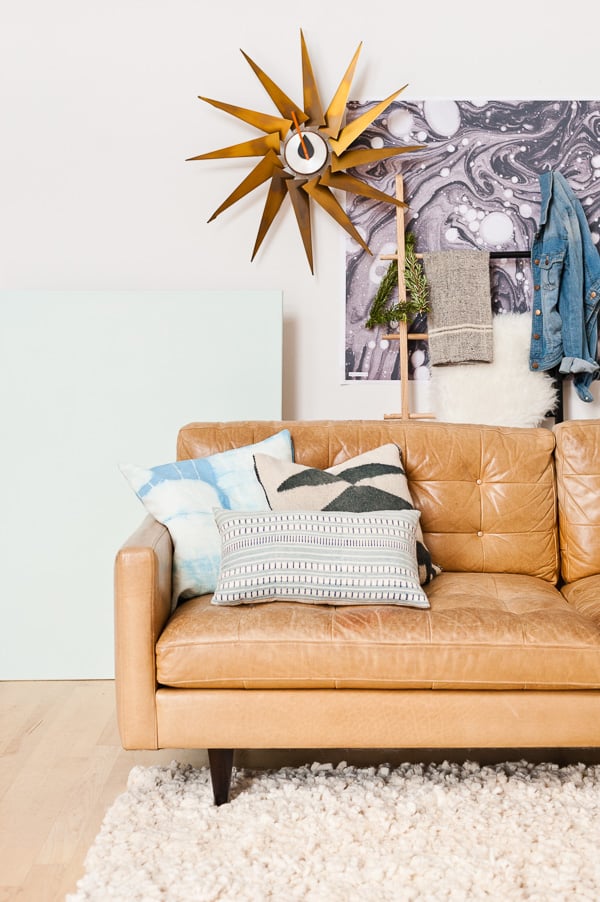
Determine what length you’d like your rug to be. In my case, I wanted a 5×8 rug for underneath the couch.
My roll of netting is smaller than that, so I did some quick math to determine how many pieces I would need to cut to make a 5X8 rug (3 pieces that are 8 feet long, since the netting is 2 feet wide).
And I would have an extra foot leftover from the width, that I could cut off of the mesh before getting started, etc.
Once you have that figured out, roll out the length of the netting you need and cut the pieces with a pair of scissors.
2. Cut the cotton piping.
Next, start cutting pieces of cotton piping that are about 4 inches long (each).
You want them all to be roughly the same length, so that the rug looks relatively even when its completed, while also having a little bit of variation, so you can more of a textured feel that looks handmade (and not manufactured).
Note: Depending on the size of your rug, you’re going to need a lot more cotton piping than you might expect. To give you a better idea of what I’m talking about…we used more than 200 yards of cotton piping for an 5×8 rug. That’s a lot of cotton!
But cotton piping is pretty affordable, so it’s still relatively budget-friendly, when you consider the cost of a thick handmade rug like this one would cost thousands of dollars to purchase in store. The cost of materials for a 5×8 rug totaled $300-350.

3. Weave the cotton into the netting grid.
Next, weave the cut cotton pieces in between the netting grid, as shown in the photo. Then, pull the pieces upward and tie them together with a rubber band (again, as shown in the photo).
Once secured with a rubber band, fluff out the piping pieces so they have more of a fuzzy pom-pom shape.
4. Repeat steps 2 and 3.
Repeat steps #2 and #3 until you’ve completely covered the netting pieces you cut in step #1.
5. Assembled the pieces.
Now it’s time to assemble the pieces into one single unit. This may not apply if you’re making a small rug or a runner.
The process is the pretty much the same as step #3, but this time, you’ll be weaving pieces though the ends of each separate piece of mesh to bring them together as one.
Securing them together in the ‘pom-pom form’ (for lack of a better term) with rubber bands, and fluffing them out once secure.
6. Repeat this process.
Repeat this process along the edge of all pieces that need to be joined together until completed.
7. Trim and tidy up edges.
Lastly, trim any edge or interior pieces that feel like they need it, with a pair of sharp sicissors.
I like to trim the outer edges all the way around to make them even to one another and then occasionally, there will be an interior pieces that needs a trim because it’s way longer than the others.

Update: Note about Cotton Piping Sizes
You can use any size piping to create a rug like the ones you see in this post, but one thing to note in that the smaller the piping, the more it will take to complete your rug.
So for example, if you use a cotton piping that is 1/6 inch thick, you may need to double that piping up in the netting to get a thick, cushy look like mine. But if you use piping that is a 1/2 inch or thicker, you will not need to do that.
My favorite cotton piping sizes for the rugs I’ve made with this technique are 1/2 inch and 11/16 inch. I also like 1 inch thick piping, but not quite as much as the other two.
This is just what I like though. You may find a groove with a different size that you like better, so it doesn’t hurt to buy a very small amount (like a couple of feet) of a few different sizes to test them out first before buying lots of yardage.
You can find cotton piping by the yard at craft supply stores like JoAnn’s, usually with the upholstery supplies.
And then when you’ve decided which size you like best, you can shop around to see what’s cheapest (online on Amazon or somewhere similar or in-store at a craft supply store).
Update: Note About Using Rubber Bands to Secure the Piping
It is true that over time (years) rubber bands may deteriorate or break. This was not an issue for me personally, but there are many comments asking questions about this particular thing.
So, if you would prefer not to use rubber bands, there is another option.
You can use string to wrap around the cording instead of rubber bands, if you prefer.
If possible, a thin string with a little bit of elastic would be ideal, if possible, like these (just stay away from the clear option as I’m not sure that’s strong enough.
Pull each one tight and double knot it then cut off the excess.
NOTE: This will be more time consuming than the rubber band method. And for me, the rubber bands have held up quite well.
But I wanted to share this option for anyone that would prefer to use something else.

I’ll be the first to admit, the process is time-consuming. I’m not going to lie. BUT the results are really pretty cool, if you ask me.
And literally ANYONE at any skill level can make one, as long as you have the patience to stick it out. And then you can add rug making to your list of skills!
The process is SUPER easy. It’d be a good nightly ritual while sitting down to watch a movie, etc. Kind of like knitting…slowly plugging away at a project a couple of hours a night until it’s done.
And when it’s done, you have an actual rug to show for it. That you made yourself! How many people can say that that they made a rug?!
How to Care for your DIY Rug
I recommend spot cleaning for spills. Since you are using a cotton material, any spot cleaner that would work on this material should be fine. Just dab the area clean / dry when finished, instead of rubbing.
For spills and stains that aren’t able to be spot cleaned and are in need of repair, the piping can be removed and replaced with new piping very easily.
Just remove the piping that is damaged or stained beyond repair and use the same method you used initially to fill in the missing pieces.
Does this Area Rug Shed?
The rug does shed a little at first, just as many other rugs this still do. But it sheds less and less as time goes on.
Is this Rug Technique Similar to Latch Hook?
It is kind of similar, but there are two key differences.
One of those difference is that the cotton cording I used to create this DIY rug isn’t secured on it’s own (with a knot like latch hook is). And the second key difference is that there are no special tools to use.
As you can see in the materials list toward the top of this post, there aren’t very many materials or special supplies need to create this rug. Which in my opinion, is a huge plus. No learning curve for new tools required!
Can I Make a DIY Rug Like This in Any Size?
Yes! In fact, I recently made a new version of this rug, as a runner and it looks great! I used the exact same technique as what I shared above.
But this handmade cotton rug is a runner and I wanted to share a couple new photos, in case you’d like to create something similar.
My DIY rug runner is 2 feet wide and 5 feet long, but you can create a runner any width and length you need. Making it a cool option for any spot in your house that you can’t find the ‘perfect’ size rug for.
I have a super long hallway upstairs (it’s almost 20 feet long) that could totally use an extended runner.
I have also received updates from people who have made one of these DIY rugs from my tutorial and several people shared that they made a bath mat size rug (2×3 in size) in an afternoon or over two days.
So, there really is no limit on the size for this project – big or small.


DIY Rug: How to make a DIY rug (large scale) with cotton piping
Ingredients
- Multi-use netting
- Cotton piping
- Small rubber bands
- Scissors
Instructions
- Determine what length you’d like your rug to be. In my case, I wanted a 5x8 rug for underneath the couch.My roll of netting is smaller than that, so I did some quick math to determine how many pieces I would need to cut to make a 5X8 rug (3 pieces that are 8 feet long, since the netting is 2 feet wide), and I would have an extra foot leftover from the width, that I could cut off of the mesh before getting started, etc.Once you have that figured out, roll out the length of the netting you need and cut the pieces with a pair of scissors.
- Next, start cutting pieces of cotton piping that are 3-4 inches long (each). *The shorter the pieces used, the less height or thickness your rug will have when finished. *You want them all to be roughly the same length, so that the rug looks relatively even when its completed, while also having a little bit of variation, so you can more of a textured feel that looks handmade (and not manufactured). Note: Depending on the size of your rug, you’re going to need a lot more cotton piping than you might expect. To give you a better idea of what I’m talking about…we used more than 200 yards of cotton piping for an 5x8 rug. That’s a lot of cotton!But cotton piping is pretty affordable, so it’s still relatively budget-friendly, when you consider the cost of a thick handmade rug like this one would cost thousands of dollars to purchase in store. The cost of materials for a 5x8 rug totaled about $300.
- Next, weave the cut cotton pieces in between the netting grid, as shown in the photo. Then, pull the pieces upward and tie them together with a rubber band (again, as shown in the photo). Once secured with a rubber band, fluff out the piping pieces so they have more of a fuzzy pom-pom shape.
- Repeat steps 2 and 3 above until you’ve completely covered the netting pieces.
- Then it’s time to assemble the pieces into one single unit. This may not apply if you’re making a small rug or a runner.The process is the pretty much the same as step #3, but this time, you’ll be weaving pieces though the ends of each separate piece of mesh to bring them together as one. Securing them together in the 'pom-pom form' (for lack of a better term) with rubber bands, and fluffing them out once secure.
- Repeat this process along the edge of all pieces that need to be joined together until completed.
- Lastly, trim any edge or interior pieces that feel like they need it, with a pair of sharp sicissors.I like to trim the outer edges all the way around to make them even to one another and then occasionally, there will be an interior pieces that needs a trim because it's way longer than the others.
Notes
Update: Note about Cotton Piping Sizes
You can use any size piping to create a rug like the ones you see in this post, but one thing to note in that the smaller the piping, the more it will take to complete your rug. So for example, if you use a cotton piping that is 1/6 inch thick, you may need to double that piping up in the netting to get a thick, cushy look like mine. But if you use piping that is a 1/2 inch or thicker, you will not need to do that. My favorite cotton piping sizes for the rugs I've made with this technique are 1/2 inch and 11/16 inch. I also like 1 inch thick piping, but not quite as much as the other two. This is just what I like though. You may find a groove with a different size that you like better, so it doesn't hurt to buy a very small amount (like a couple of feet) of a few different sizes to test them out first before buying lots of yardage. You can find cotton piping by the yard at craft supply stores like JoAnn's, usually with the upholstery supplies. And then when you've decided which size you like best, you can shop around to see what's cheapest (online on Amazon or somewhere similar or in-store at a craft supply store).Update: Note About Using Rubber Bands to Secure the Piping It is true that over time (years) rubber bands may deteriorate or break. This was not an issue for me personally, but there are many comments asking questions about this particular thing. So, if you would prefer not to use rubber bands, there is another option. You can use string to wrap around the cording instead of rubber bands, if you prefer. If possible, a thin string with a little bit of elastic would be ideal, if possible, like these (just stay away from the clear option as I’m not sure that’s strong enough. Pull each one tight and double knot it then cut off the excess. NOTE: This will be more time consuming than the rubber band method. And for me, the rubber bands have held up quite well. But I wanted to share this option for anyone that would prefer to use something else.
Photography Amelia Tatnall Lawrence
Styling and crafting Brittni Mehlhoff
Still Have Questions about this DIY Rug?
I have you covered! I made a permanent rug highlight on my Instagram feed that will always be there for you to reference, which is very detailed. You can click that link and go directly to it, or go to my feed and click the DIY rug highlight from there.
It’s a much more detailed video, where I walk you through the answers to some of the most asked questions I have received about this DIY rug process and I even shared a hack for making this project move along a little bit more quickly, if you’re making a big rug like my first one (or even a runner size rug).
If that video doesn’t answer your question, and you didn’t see the answer in this post, which I’ve updated with new answers as new things have been asked, feel free to ask your question in the comments.
I still respond to comments on this post years later as much as possible to help.
Let me know if you make one of these! I’d love to see it.
-Brittni
299 comments | Click here to reply
I can’t find the video to tell where exactly the rubber band goes
ShellyMaking a carpet by hand is time consuming. But really add warmth to your vibe.
Mehdi AhmadiThe atmosphere is great.
That is amazingly awesome!! . I had no idea stuff like this existed. But now that I know I might get into it myself!!😁
A small world cupDo you vacuum this rug? Does it hold up well? Also, if no furniture in on top, do you use a nonslip mat underneath?
ReneeThank you!
I would also love to try this – but with wool. I imagine that almost anything could work – ratty old sweater, for example. With your technique, I imagine you could use almost anything…
mariaQuick question. I really want to make one of these but I have dogs and need to vacuum regularly. Does this hold up the vacuuming?
CelesteThank you for the awesome tutorial! I am looking forward to a nice diy project that involves sitting since I’m pregnant. Since this was made a while ago now, just curious, how has it held up for you?
EmilyYou weren’t kidding about it being time consuming! But I love my end product so much. Not only does it make my room feel cozier, but it also acts as a sort of protectant for my newly resurfaced wood floors! Thanks for the idea.
Penny LundSuch a beautiful project! Do you have any trouble vacuuming the rug?
syoLove it utterly! But I have no time, desire and energy for it, not to mention that I have a bunny’s span of attention.
williamaustinWill anybody make me that? If so, what are you going to start charging?
Thank you.
Brittni, thank you for the amazing idea. My supplies are arriving any day now and will be making a 5×8 rug for my parents living room. You rock and also am proud to say after reading all of the comments looking like I’m the first guy in this thread. 🤘
NickHi Alanna! When it’s completed, you should be able to flip that part the opposite way to get it to balance out / stop rolling. But I haven’t had that happen personally… So, if you have the time, feel free to DM a video or photo on Instagram (my username is @paperandstitch) and I can take a better look and suggest something more specific.
Brittni-Brittni
I am in the middle of making this and my finished rows keep rolling. How should I flatten it out??
Alanna BushekVery creative, will also check your Instagram highlight.
Naina KalraHey I have a question can you dye the cotton piping if you want a different color?
MareLOVE LOVE LOVE this!! Can’t wait to make my own although finding cotton piping in the UK is hard. It seems to tassel at the end instead of fluff.
Do you know if there is a difference between cotton piping and cotton chord or rope?
JadeHi Tina. I don’t know what deer netting looks like, so I don’t think I could say for sure. You don’t want the material to be flimsy. But if you already have the supplies, it be worth doing a small test to see how it goes.
Brittni-Brittni
I have a question, I bought deer netting instead of the garden netting. It is smaller but do you think that it would work? It also looks flimsier than what you used.
I really love, love this rug idea and I am wanting to use some chunky yarn that I have. I cant wait to try it. Thanks for the tutorial
Tina PawassHi Michelle. Can you be more specific about the cotton pulling right off? Are you pulling on it when it comes off? Or are you just walking on it and it comes off? Haven’t had this happen, so I’ll need more details. Also, are you using the rubber bands or string to secure the pieces? If you’d like, DM me a video on IG (I’m @paperandstitch over there) and I can help. But I’ll have to be able to see it to troubleshoot with you. 🙂
Brittni-Brittni
So I’m in the middle of making this and I have a concern that may prohibit me from continuing this project. So I bought 1 inch piping, and I do like the way it looks but the cotton literally pulls right off of it. I know that sounds obvious, but I didn’t really know what cotton piping was so it was still a surprise. I saw you mentioned it sheds less overtime, but is that still true for the 1in piping? Or will it just keep shedding? I can actually see 1 of my 3 gets eating the cotton as well if it continues to shed a lot.
MichelleChrystine – I trimmed the edges at the very end, after the rug was completed and any other areas that needed it. Hope that helps.
Brittni-Brittni
Rosemarie – I used a variety of sizes, like I mentioned in the blog post. For the runner that I most recently made, I used 1/2 inch, 11/16 inch, and 1 inch pieces. I like using a combination personally, but it’s personal preference. Wanted to let you know that I also have a highlight on my IG stories that goes into way more specifics. And I think it would be helpful to you – if you go to my profile https://www.instagram.com/paperandstitch/ and then click on the DIIY Rug highlight.
Brittni-Brittni
Hey! I’m wondering what size piping you used specifically
Rosemarie SkillmanGreat tutorial! It does remind me of the latch hook kits we used to do… ahem… back in the day… I actually think I might still have one of those around here somewhere.
I wonder, how do you finish off the edges? I’m thinking of doing one of these, but dying the cotton beforehand. Obviously I want to make sure the excess colour is completely rinsed out before I start working, or I’ll have some very blue hands!
ChrystineTotally love It ! However I don’t have time , drive or energy to make this, not to mention I have the attention span of a hamster.
AmyWill someone make this for me? If so how much will you charge?
Thanks ,
Amy
[…] no secret that I love a good rug DIY, but did you also know that I love project ideas that use rugs to create entirely new things that […]
A DIY Cat Bed that Cost Less than $8 to Make! Did I Mention it's Actually Cute Too? - Paper and StitchI love the look of this rug but I know the rubber bands will break and or breakdown. Although it would take more time I think that I might use the rubber bands to hold the pieces but then tie below the rubber band and remove. I would try this first before committing time and materials.
Susan Tutko[…] can resists a DIY rug project? Especially when it only costs […]
DIY Rug Hack: How to Upgrade an Inexpensive Rug for $10 in 10 Minuteshave you ever had to worry about the rubber bands breaking? I know when they age they get brittle and break.
Debrubber bands dissolve with time
Vicki StoneI’m thinking about making this sort of rug for my college apartment next year. I just have one question, do the rubber bands ever come undone? Or do you think there is a more secure way to attach the piping without taking longer? Thanks!
MorganCan this be dyed and is it easy to vacuum and clean? 🙂 Looks amazing by the way, thanks so much for sharing…think it could be exactly what I’ve been looking for!!
ConnieWow! Impressive!
NormaJeanThis looks so fun! I’ve been wanting to get a rug for my room but they’re all so expensive. I think it would be fun to dye the cord prices in different colors and create some sort of pattern. My room is pretty dark so I’m always looking for ways to brighten it up.
MarlenaHas anyone found something that easily cuts through 1″ cotton piping? I’ve tried tin snips, pruning shears, and every pair of scissors I’ve seen. I wish I knew someone with a tile saw… Any ideas will be greatly appreciated!
KittyAwesome . Thank you. I am gonna try this out.
Deborah KiraboAw, thank you so much Kathleen. 🙂 Really appreciate that.
BrittniHi, sweet Brittni! After seeing this phenomenal rug, your diy, and … reading your patient answers to the questions repeated again and again about the same subjects … you will have a dedicated new follower! You have given us a straightforward, easily understood, project tutorial linked to all elements for purchase! It is one I hope to undertake (I need a fairly small size) in the not too distant future! It’s yummy, soft-looking, and the white is perfect for our home!
KathleenCan’t wait to look at your other projects … especially since this is so uniquely creative! Thank you for sharing!
So, it’s been awhile since you made this. How has it held up? I would be worried about the rubber bands popping apart over time. I love the idea of it, but am having a hard time coming up with something that would hold it just as well as the rubber bands.
RoseOmg I love this but definetly don’t have the patients for it could you make me one?!
KarenI think I would like to try making a rug, beautiful!
DianeDo they make the cotton tubing in different colors?
Can you vacuum the rug? Thanks!
ChristaHow does a vacuum do on this rug? Would it ruin it?
JewlesTo all who are worried about the rubber band method, I am as well but perhaps if you used a nice strong thread, very thin rope or even fishing line, you could tie it as you go along using one long strand instead of having to knot each individually with a small piece. That would save time and it would probably be stronger.
PanicmoseHi Leah. Thanks for sharing your experience. I did mention in the blog post that it cost me roughly $300 in supplies to make a 5×8 rug. So for a 2×3 rug size to cost $100, that sounds right on track for the $300 cost of a 5×8 rug. And yep, it is time-consuming…something I also mentioned in the blog post. 🙂 But in the end, I think it’s worth the cost and time to have a handmade rug that costs a fraction of the price you would pay for a similar style available at West Elm, etc. I am 100% certain that I did not use 1,400 yards of cotton piping to complete this project…but I also used piping up to an inch in diameter, which does help fill the space much faster. So that might be part of it. Like I mentioned, I did use several different sizes of piping, but the thicker the piping used, the less piping it would take to complete (and the shorter it takes to make). Anyway, I hope that helps clarify some things. Wishing you the best.
Brittni-Brittni
I attempted to make this rug for my husband for Christmas this year. I followed the directions to a T and bought 200 yards of cotton piping to start, thinking this will get me very close to the 5×8 rug, as mentioned in the blog. I used 1/4″-1/2″ cotton piping. I am not kidding, the rug took 12 hours and IS ONLY 2’x3′!!!!!! It is so small and not even close to the size that I was hoping for. It is seriously 15% of the rug that I wanted and it cost $100 so far. I don’t want to use it for a bath mat, as I don’t want it to get super wet, but now am looking for another use. It is super cute and fluffy, but like I said, its very small. According to my calculations I will need 1,400 yards of cotton piping to create my full rug. BEWARE! it will be smaller and WAAAAAY more expensive than you’re hoping for.
LeahSorry this may have asked already but the cotton piping does tend to fall apart easily is there any way to help make it a little more robust? I was thinking hair spray at the very end to help hold it in place but I’m worried about it accumulating dirt.
KaliWow that looks amazing! I have been trying to find a similar cotton piping of that thickness but not having much luck. Could you recommend a site ? Or let me know where you purchased it from?
Daisy MildenhallKeep up the excellent work!!
Daisy
Hi Lori. I recommend spot cleaning. But there have been tons of people in the comments recommending other ways to clean it if you want to check those out. 🙂
BrittniThanks Kelly. The rug held up pretty well in the low traffic area we had it in…I’m not currently using it because we moved again (it’s been over two years since I wrote this post and made the rug) and decided I wanted a change. And as for th fluffiness, yes, I pulled the thread away that was wrapped around the cording at both ends, but left it on in the middle part so that part would be more sturdy for staying put through the grid lines, etc. hope that helps.
BrittniI just stumbled onto this post and I REAAAALLLLY want to attempt this. AND I’m curious how your rug has held up? I also have a (very ….lame) question…
KellyHow do you get the cotton to look so fluffy? Do you remove the thin thread the cording is wrapped in? Please help. :o)
Love this so much. Am I correct to think when it gets all over dirty and grey, it is garbage? Is there any way to clean it?
LoriHi Ronda. I would not recommend machine washing. Spot clean only. 🙂 Hope that helps.
Brittni-Brittni
Love it!! But can it be machine washed? How would it dry?
Ronda JonesHoly crap Brittni you are patient!!! Not only do you repeated answer the same questions re: elastics, cleaning, size of netting, size of piping, durability (for frick sakes people, READ a couple comments) but you are so kind. Anyway I ordered the goodies and cannot wait to start mine! Take Care!!
Carla BowerCan you vacuum this or would the rubber bands come up?
BrendaHello B!
I’m going to try this for my new house. What size piping did you use? And how many total yards?
Thanks
MichelleMichelle
As long as the pieces are secure (with rubber bands or string, etc), yes you can vacuum it.
BrittniI was wondering…. can you vacuum one of these rugs?
Chasity WilliamsSorry my english is very poor….I live in Italy,I’d like a rug like your (i love it!) bit please help me with the unit of measure. Mine will be 3×2,70 meters, how many cotton should i buy? In amazon the bigger is 20 millimeters thickness, do you think is better? (I think so, the rug is big). Thank you so much for your answer! Ciao Martina
MartinaCan you get the piping in other colors? I want red.
SuzyIm really wanting to try this. Om having a hard time finding the grid for the rug. Where can i find i?
Kathy KeatonI love this look, HOWEVER, I would never use today’s rubber bands. They break within a few months, so what is the point? 1/2 a century ago when I made a rug similar to this, I just pulled the two ends thru the loop. It held fine, but the yarn was nowhere near as thick as this. How do you clean this sucker??!
CharonHow do keep the rubber bands from breaking and do u clean the rug?
Cindra geroHey! How has this rug held up over the years since you made it? x
lottieWhy not use a rug hook and knot the cotton piping in the mesh? I made a rug using wool yarn years ago using the latch hook and it was very soft, sturdy, and long wearing.
Mary BrittonLooks good just wondering, what thickness did you end up using and roughly how long were the pieces you cut? 😁
DavHi! I love how simple this seems to be to make and so beautiful! I would really love to make it, but my only concern/question is how dirty does it get? Specifically, we have a golden retriever that sheds a lot. Have you noticed your dog’s hair getting stuck in the rug? Or dirt/random other things? (We have a toddler too, so crumbs etc?) Also, if you have noticed this, do they come out well with the vacuum? Thanks so much for sharing this idea and being so gracious in answering all the questions!
AmberLooks amazing but hair rubber bands eventually break
BarryI love this idea only would want to use something other than rubber bands since they dry rot at some point. And what did you do for the spot in the mesh that broke?
TwVery beautiful and very creative!
PatI have a good idea about substituting the rubber bands since they will dry and break eventually…it would more than double the time spent making it, but in my opinion would be well worth it…hand stitch the pieces together! Yes, the time spent on it would be long, but quilters spend hours and hours on their craft and this beautiful rug would last for ages! Just a suggestion. ; )
rubber bands do break over time. being exposed to air breaks down the elasticity(which is why you find them in bags in stores) which in turn makes them brittle. if i were to do this (and i probably will, i need a carpet that doesnt cost an arm and a leg) i would probably use yarn or embroidery thread (both you can get at second hand stores like Goodwill for next to nothing, that is if you dont already have plenty of both like i do) to tie the tubing to the mesh.
ZoeHi Kitty. I don’t believe I took a picture of the underside of the rug. But perhaps I’ll add one in the future. It’s still holding up…it’s been in a low traffic area, so that’s something to keep in mind. But generally it’s pretty sturdy. Hope that helps.
Brittni-Brittni
I absolutely love love love this!!! You’ve done an amazing job, is it still holding strong?? I have been struggling to find the perfect rug for my bedroom (also due to expensive taste and too small a budget haha!!) I was just wondering if you had a picture of the underside so I could see which bits of the netting you have attached the cord to, I was also wondering what size cord you used too.
KittyThank you
Um I have an idea on rubber bands, why not use tiny little zip ties the little ones. That are thin and still super strong.
LjI started a rug similar years ago many many using twine pompoms and canvas for backing. Needless to say never finished it. This sounds much easier. Still time consuming but I don’t have to make thousands of thick pom POM’s and sew onto canvas. I have all this stuff so I want to make a Hugh one for my floor. Love the look.
Ljfantastic idea!
Bruce DenigerIm finding that as im fluffy the cotton its shedding a bunch. any tips on how to avoid the shedding,
leahInstead of rubber band could you like use yarn to tie it so when ya wash it it doesn’t come apart or the rubber bands wash well I know it would take longer just asking
Carol RathburnNo problem at all Dawn. 🙂 I know there are a lot of comments to sift through. Happy Wednesday!
BrittniOmg!!!!! Please ignore my last comment and question! I didn’t see the answers to that same question already! 🤦🏼♀️
DawnSorry!!!!
It’s been a while now since you made this rug, how has it held up? Have any of the little rubber bands snapped yet? I love how this rug looks and am thinking of making one!
DawnThanks so much for the helpful suggestions, Sherrie. That dyeing technique sounds like it could actually work and I LOVE that you found a high temperature rubber band option since that has been such a hot topic in the comments. 🙂 Thank you for sharing!
BrittniSo, about the many questions using string or rubber bands for this project. I have an alternative if anyone is interested. Because of the high temperature used in these bands, they will last a long time and stay secure without any deuteriation. I recommend this for those that still like the rubber band idea but are a little worried about the longevity of them. I have use these bands for years for my Rotisserie and I reuse them at least 4 times before throwing them away because they look black after a while though I do wash them after each use. They are 7″ long so they can be cut in half and tied like the string but will stretch and give you the elastic secure fell that the elastic gives and makes it easier to tie and tighten.
Ebay, is the cheapest and on this particular site they have 200 for $18.00 free shipping and in half that would be 400. I wouldn’t know exactly how any to get since I don’t know how many times one would want to cut 7” for a particular size of rub. Anyway. This idea isn’t as cheap as the string or the rubber bands, but for those who want longevity and the idea of the rubber band this can be used.
https://www.ebay.com/itm/200-7-ELASTIC-FOOD-TIES-FOR-ROTISSERIE-POULTRY-CHICKEN/251386602515?hash=item3a87cf2413:g:8ooAAOxyqUpQ6PK9
SherrieI really have enjoyed all the comments and your constant instructions to people concerning this great rug. I am going to try it and am waiting for the piping. For all of you that don’t want white as the color for your rug, I researched dying and have a solution I believe. Because of the thickness of this piping, it will be a little more expensive than a material that isn’t as thick, but I believe it can be done if done as I was instructed to do it below.
I contract a dye company that makes great dyes (not RITS), for many kinds of dye projects and told them my problem with the piping I wanted to use for this rug. I gave them the address on Amazon for this 1” piping most of us are using, so they could read about it and tell me what their recommendation would be. I also asked if it would be better to due it in pieces or as one long rope. The follow is their recommendation.
Hi Sherrie, Ivy at Dharma Trading Co here,
Using the item ship weight as a rough guide (7lbs), you can use the Dye Estimator tool to calculate how much dye you will need for your cord. It can vary dramatically depending on the color you choose but we’ll do the math for you – simply select your color and plug the weight into the shipping Dye Calculator tool here: https://www.dharmatrading.com/cgi-bin/procion_yields.cgi
There are pros and cons to dyeing the cording whole vs. in pieces; dyeing it whole will minimize the possibility of frayed ends but you may not get quite as good penetration of the dye. That said, I would probably lean towards dyeing it whole because I think that fraying would be a real issue with rope/cord, due to the agitation that is necessary when dyeing, rinsing, and washing and I think there are ways to ensure that the cord absorbs the dye.
Here are the basic (Solid Color Dyeing) instructions that you will use with the Fiber Reactive Dyes: https://www.dharmatrading.com/techniques/tubdye/tub-dyeing-basics-with-fiber-reactive-dye.html
The only things I would do differently than we recommend in the instructions above, is I would A) make sure the rope is dry rather than wet when it goes in the dye; B) leave the cord in the dye for at least 30-45 minutes before you add the liquefied Soda Ash Fixative.
Normally we recommend pre-washing and leaving the item to be dyed wet so that it will submerge more easily but in this case, if the cord is wet, and because it’s so dense, I believe it will severely impact the dye absorption (if it’s already full of water, where will the dye go??) You can definitely pre-wash it if you think it might have any kind of finish on the surface of the fiber, just be sure to fully dry it before putting it into the dye bath. The extra long soak in the dye before adding the fixative will help ensure that the dye has enough time to travel to the center of the cord before you activate it; otherwise, the Soda Ash Fixative will activate only the dye near the outer surface of the cord. You also want to be sure to add the SA slowly (over 10 minutes or so) and be sure to keep the rope in the activated dye for at least another 30 minutes, but preferably a full hour (stirring/moving it periodically).
Lastly, the Calsolene Oil is an optional ingredient when Tub dyeing and in this instance, you can do without it; just be sure to pre-dissolve the dye thoroughly and keep the cord moving efficiently and often while it’s in the dye bath.
Feel free to give us a call if you have more questions and we’ll be happy to help by phone Monday through Friday, anytime between 8 and 5 (PST).
Regards,
Ivy Stockstill
Customer Support| Fixing Stuff & Weird Product Questions|
Dharma Trading Company
1805 S McDowell Blvd Ext, Petaluma CA 94954
P 707.283.0390 Ext 1210 (Worldwide)
P 800.542.5227 (US & Canada)
F 707.283.0379 or via Skype™: DharmaTrading
www.dharmatrading.com
Like us on Facebook…Please?!
I haven’t tried any of this but I believe if done the way they stated above, there is a good possibility it will come out great.
Good luck to us all.
Sherrie[…] adding a simple design to make it more eye-catching. There’s no denying that I love a good rug DIY around here (this one […]
How to Customize a Plain Rug with Embroidery (DIY) - Paper and StitchEMReiiff – Possibly, but it would take a very long time to carpet an entire room this way. 🙂
Brittnido you think this is possible to do as a carpet in a small room that does not get a lot of use?
EMReiiffHello there! The netting I used and all other supplies are linked in the materials section in this post. Most are from Amazon – just click the link and you’ll go right to it.
Brittni-Brittni
I just got done reading about your rug. Do have a question for you where did you get the netting. I would really like to try and made one. Thank you for time Emilie Woolington cjmattbear@yhaoo.com
HiHi Hanna. This is a good question. And I don’t think it’s been asked yet either. The rug does shed a little at first, but sheds less and less as time goes on. Hope that helps.
BrittniI have read through the comments and do not see this question. Does the rug shed? I’ve had wool rugs that look similar and they have shed like crazy…i can’t even sit on them without looking like I’m covered in dog hair.
HannaI heard rubber bands desintigrate. it’s like 10 years, but still
Vicki StoneI AM MAKING THIS. JUST BUILT A HOUSE & BEEN LOOKING FOR A BEDROOM RUG. THANKS FOR THE INSPIRATION!
GRAMMYI AM MAKING THIS! WE’RE MOVING INTO A NEW HOME AND I’VE BEEN SEARCHING HIGH & LOW FOR THE PERFECT BEDROOM RUG. THANK YOU SO MUCH FOR THE INSPIRATION!
GRAMMY[…] the last DIY rug I shared ended up being my most popular project of all time (so far at least), it only seemed fair […]
How to Make a Large Scale (Patchwork) DIY Rug - Paper and StitchHow’d the rug hold up over time?
AngieThat’s a great idea Jan to have the FAQ at the bottom of the post since there are sooo many comments to go through to see if a question has been answered. Love that idea and I will work on it. 🙂 And thanks for following along!
BrittniBrittni ~ This is just beautiful!
JanAnd I agree, you have the patience of Job to answer the same questions over and over for the last year and a half. I also thought about dying it, and I have a few little dabs of this stuff that I might play with next time I get my dyes out. I also like the idea someone had to use it for a lounge chair. It would make a comfy cover for a beanbag chair…
I don’t see the interest in this project waning anytime soon, so I wonder if it would help to put your “answers to all your questions” comment at the end of the article with a huge headline: “Frequently Asked Questions” There are so many comments, it is rather daunting to read them all. However, I think most of us would read that before immediately reminding you that rubber bands eventually stretch out, or get stiff and break or asking how to clean it. 🙂
Just recently started following you. Can’t wait to do some more exploring and see what other fun ideas have to go on my “to do” list.
Jan
Sorry for the redundant question! Saw your responses about the rubber bands. Thank you 🙂
SarahHow is your rug holding up? I an totally interested in making one, but my concern is the rubber bands popping.
SarahCan you vacuum the rug without it coming apart?
RachelThanks Donna. 🙂 Much appreciated. And so happy to hear that you like this project.
BrittniPlease ignore the comment I made about the rubber bands and the questions I asked. I see you’ve repeatedly have answered my question through your comments. It’s very gracious of you to reply on the comments that people write. I certainly appreciate your website. It’s awesome and this rug is awesome thank you
Donna ZoernerThis is just beautiful! I do have one question about the ruberbands. Its my experience that rubberbands deteriorate. Isn’t that a problem eventually? I want to make this but I also don’t want to spend $300 and lots of time for it to Fall Apart. Thank you so much for your time
Donna ZoernerHi Bonnie. It’s linked up in the materials list (I got mine from Amazon). Click the link and it will take you directly to the netting I used.
Brittni-Brittni
Where do you purchase the netting. I plan to begin with a small area rug since I have never made a rug before. Your’s is beautiful!!
BonnieHi Linda. Glad to hear you’re interested in making the rug. In answer to your question… I wouldn’t recommended tugging on the cotton in that way, but yes it does become stronger (at least in my experience) when tightened together (with rubber bands like I did or with tight string if you prefer). I believe I’ve mentioned here in the comments a couple of times (that my rug was in a low traffic area and held up very well). If you are concerned though regarding the cotton, I would try making a small portion of the rug with the rubber bands as I outlined in the tutorial and test that out for yourself. Obviously, you won’t be tugging on the cotton of the rug when it’s finished, and mine really did hold up well in a low traffic area, but testing out a section to make sure its to your liking would probably be the best option.
Brittni-Brittni
Hi Brittni…I just purchased some 1” cotton piping from my local fabric store and am concerned with shedding. It seems that if I gently tug on the cut end, the cotton simply rips away into a fluff. I haven’t yet started to weave this into the netting (purchasing it tomorrow) so I am wondering if this issue resolves itself once it is secured with string or elastic, compounded with the addition of all the extra cotton piping to make it more dense and compact. I saw an earlier post that I think shared the same concern but you weren’t clear on the problem therefore you couldn’t advise. Hopefully my description will give a better idea of the problem that I think others may too have experienced. I love the rug and just want to make sure I can address this problem up front.
LindaHi Nikki, Flo, Sula, and Haley. Thanks so much for your interest in the rug! All of your questions have been answered in the comments thread of this post, if you want to scroll though and check ’em out. 🙂
Brittni-Brittni
What is the size of the cotton piping you used?
Haley HeesackerHi Kasey. It’s EXTREMELY soft. Wish you could feel it through the computer screen. 100% cotton is oh-so-soft.
Brittni-Brittni
How soft is the cotton piping? the rug looks soo soft but I’m wondering if thats true!
kaseyAwesome rug and idea. One question, do you vacuum the rug?
SulaHi,
FloI really want to try this rug. It looks so soft and fluffy. However, how do you clean it, especially with the elastics?
When I do get mine done, I’ll send some pics.
Bye for now,
I am currently working on decorating my apartment. And this do it your self-rug would be awesome in the apartment. And looks very cozy. thank you for sharing
kathleen NibteHello,
Nikki JohnstoneI love the idea for this project. Just wondering, do the rubber bands eventually disintegrate? That’s the only part that concerns me.
Hi Jessica. Since I haven’t tried it, I can’t say one way or another if it would work. If you are going to do it, I would try it on a small section first (that can easily be removed just in case) before spraying over the entire piece. Wish I could give you a more specific answer. But since I haven’t tried it, I can’t recommend.
Brittni-Brittni
I was wondering do you think it might work to mix a dye and put in a spray bottle and lay it outdoors and spray a finished area and work it in with your hand with a glove on. I was even thinking using other colors st give it a water color look.
JessicaHi Anna. Yes, the netting holes are one inch squares. Just measured it this morning to double check for you. And then for the cotton piping, I varied the sizes I used (bc at some point I ran out of one size – can’t remember which one), but essentially you just want the cotton piping to be thick enough in each hole that it doesn’t move around all the much. And then, with the added pressure of the holes around it (when they fill with piping), it will stay in place. Hope this helps.
BrittniPart of me wants to go big and fill my living room floor with a rug like this, but part of me thinks start small and create a rug for my bed-side. Thanks for the tutorial! I am a huge fan of cotton and love to use it wherever I can.
TomActually Brittni, I do have another question which I don’t see the answer to in the discussions. How big are the holes in your netting? Are they 1-inch squares? And did you tie a 1-inch piece of cotton with a smaller piece in that one square? Thank you SO MUCH for answering all our questions on this project. Your final product looks so good, I want mine to look exactly like it!!!
AnnaHi Anna. Don’t worry, you ordered the right one! 🙂 Mine had that fine string wrapped around the cotton too – it helps keep the cotton from ripping / shredding. Let me know if you have any other questions though or run into any issues when you start making your rug!
Brittni-Brittni
This project looked so amazing, I ordered the big box of cotton piping this afternoon. However, I just noticed on the box it says Cotton Piping Filler Cord. The 1 inch thick cotton has some sort of fine cord wrapped around the cotton as if it was put there to hold the cotton in place. Brittni, please please don’t tell me I ordered the wrong thing…..
AnnaAw, thanks Rita. Happy to hear such sweet words and truly appreciate it. 🙂
BrittniAmazing…just amazing.
RitaAnd YOU have the patience of a SAINT. There HAVE to be trolls on here because NO one could possibly read your instructions AND all the comments and ask the SAME question over and over, ad nauseum. Geesh, people. And as with ANY DIY, its trial, and error. There isn’t necessarily right and wrong. There might be good, better and best and several best at that. It’s just limited to imagination. EX: Dab a smidge of E6000 inside every fold of cotton. Laborious, yes, but added security. Try different mediums…2 cotton to 1 roving or chenille. It’s just limited to imagination.
Brittany, I’m subscribing to your channel not only because of the brilliance of this project but because of the GRACE in which you’ve handled the unbelievable redundancy of questions. Hats off. GREAT job!
How well do the rubber bands hold up. Would it be better to tie the piping in a knot onto the mesh? Beautiful rug. I see this in my future!! Thanks for sharing!!
KatieYes you do have saintly patience to repeat your answers, and your rug is so strikingly cozy and beautiful. I would be tempted to put a completed white rug on a safe surface and then blot dyes into it in some pattern. It could be wet to allow for some overlap or bleeding for a watercolor effect. I would love to try this and might be tempted since you said you did your large one so very quickly. Wonderful that you shared this.
Olivia RussoAre the hair ties strong enough to withstand foot traffic?
Thanks!
AlyAly
Curious if you put cotton on all the sides of each little square? And did you use 2 cotton pieces each time?
TiffanyThanks Julie. There are lots of cleaning answers and suggestions in the comments, if you want to check ’em out. 🙂
Brittniquestion – it is so beautiful but can you clean it in any way??
julieI don’t know a more affordable material, Sam. Other than yarn? But yarn is much, much thinner so the process would be even more time consuming.
BrittniI love it!
SamDo you happen to know other material cheaper than the one you used? In my country is expensive and importing would just be equally expensive. Any other thing easily found?
Hi Sharon, I would not recommend washing this rug in the washing machine.
BrittniIt is Beautiful .Can you wash in the machine?
SharonInteresting idea, Deb! I don’t believe the size shrunk when finished with the cotton piping. The netting is strong and can withstand some tugging, etc BUT only if the cotton piping is secured with rubber bands (as shown in the tutorial) OR with a tight string being tied and wrapped around instead of a rubber band, etc.
BrittniWhat a beautiful rug! I have in mind using this process for another project…makeing a ‘cushion’ for a retro lounge chair. I was trying to find the right size sheepskin but I like this more, the texture will be fantastic!! It seems fluffy enough not to maybe not need additional batting but I’d want to put a backing of some sort, maybe canvas. Did the netting shrink up as you applied the batting or if I cut a pattern to size will it end up that size when finished? Also, do you think the netting is strong enough to support some tugging and twisting, as when someone gets in and out of a lounge chair?
DebI’m excited to get started, thanks!!
Hi Anna. There was a commenter named Lela who shared her suggestion for a cleaning solution that she thinks would work for this rug, which you can find below (I think its 10 comments down or so). Other than that, I’ve shared my cleaning thoughts in the comments below as well, if you want to browse through those. Hope that helps!
Brittni-Brittni
Well Done! Any advice on the best way to wash this type of rug?
AnnaHi Tenn. I believe I’ve answered this in the comments below as well. But the only other thing I could think of is using a string to wrap around the cording instead of rubber bands, which I’ve also suggested to many other commenters. If possible, a thin string with a little bit of elastic would be ideal, if possible, like these (just stay away from the clear option as I’m not sure that’s strong enough): http://amzn.to/2fmZ0XZ Pull each one tight and double knot it then cut off the excess. This will be more time consuming than the rubber band method, but it sounds like it might be a better solution for you. Hope that helps.
Brittni-Brittni
Hi. Can you suggest a permanent method for securing the piping. I thought of using a hand held sewing machine to close the piping. Then I noticed that the machines can only do thin fabrics. I don’t want to replace any portion of the rug when I’m done with it.
TennWatch those run-on sentences.
SamHi Larissa. It’s held up pretty well. I’ve replaced a few (super small) patches that got stained, but other than that it’s been good….It is in a low traffic area, so that’s something to keep in mind.
BrittniHi! I love the rug and am considering making one for my nursery since its so cozy and plush looking! I was wondering how it has held up since you made it last year, and how it vacuums?
Larissa MeyerIt is kind of similar, Victoria, but there are some definite differences. One of them being that the cording isn’t secured on it’s own (with a knot like latch hook is) and another is that there are no special tools to use.
BrittniIs this the same as latch hook, but without the hook??
VictoriaHi Patricia. It’d be hard to say one way or another on that one, since I’m not familiar with the material you’re referring to. It just depends on how durable it is and how large the grid pattern is. I’ve linked to the exact material I used in the post, so if it’s similar to that, it may work.
Brittni-Brittni
On the netting can you use plastic like the stuff you use too fence around your garden? It’s grate like. And your rug is Beautiful!
Patricia StaleyHi Jessica. It’s hard for me to say definitively without seeing it, but if the piping is too thick to comfortably weave two rows in one hole than definitely feel free to weave one end in each hole instead of two. It will vary based on the thickness of your cording. Hope that helps!
Brittni-Brittni
Hi!! I am working on this rug and I absolutely love it!! I have figured out how to dye the pieces and they have tired out great but I am still confused on how to weave each one and yes I have read each comment!! Haha 😁 I have 11/16 piping. I started weaving and tying off pieces and then weaving the next row in the same box but it was making it super tight and almost hard to work with. So I thought maybe one end in each whole it spreads it out more and I would be using less piping… so I’m trying to figure out which one you would suggest? Thank u!!!
JessicaThanks for the cleaning solution suggestion Lela. Much appreciated!
BrittniI have a solution (pun intended (?)) for the washing issue. A friend gave me his recipe for cleaning carpets using a machine (steam cleaner, Rug Doctor, etc.), and I also keep it on hand in a spray bottle. I have cleaned cran/cherry grape juice with it without leaving any stain when it was sprayed on immediately after the stain was made.
2 tablespoons of water softener (20 Mule Team Borax is what I use)
1/4 cup rubbing alcohol
1/4 cup peroxide
1 gallon hot water
And, for those with mite allergies, like me, it kills them as well.
To clean handmade rugs, I would use a bucket or a storage bin, depending on the size and thickness of the rug. Fill the bucket or bin half way with the solution and let it soak an hour or two. Then I would place it upside down on a rack or across saw horses, again, depending on the size, to drain and dry. This did not discolor the carpet in my home or on the upholstery of my friends car. Good luck!
LelaHi Sh-Landa. One inch piping is probably one of the best thicknesses to use…and 3/4 inch is good too.
Brittni-Brittni
What size piping did you use? I ordered some from Amazon and it came in extremely thin. The rug is beautiful I plan on making several in several colors. Thank you.
Sh-LandaIt’s lovely but it’s very difficult to see how you are ‘weaving’, etc.
nadja🙁
Glad you’re getting the hang of it Kat. 🙂
BrittniBrittni, I think I over reacted. I was able to practice more. I think I had aggressively pulled it through a few times and the netting around the piping frayed off. I think you were right, as the density of the piping when surrounded by more piping really does keep it together much better. I just had a brief panic there. Thanks for the quick response. This really is a cool idea and I can’t believe how soft it is. I want to keep smooshing my bare foot on the small part I’ve made.
KatHi Kat. I wish I could see what your’s looks like to better figure out how I can help. It’s hard to visualize what you are describing. The piping shouldn’t be able to come undone though if you’re putting one end through one hole and the other end through another and then banding it together (with string in your case). Is that what you are doing? If so and you’re still having trouble, it might be because you are using string and/or not tie the string off tight enough? That’s why rubber bands work really well because they keep the grip kind of tight.
That said though, if you’re using thick cotton piping like that, it should stay snug in the netting like mine on its own (even without ruler bands). If you have a picture maybe that would help me to understand what you’re dealing with better?
-Brittni
BrittniI am only just beginning this myself, and I may be doing something wrong? I bought the exact netting and one inch piping. However, as I pull it through, the netting around the piping is coming loose, and the piping is all pulling right out before I can band it off. I finally got around it, but all I had to do was barely tug and it all starts to come loose from the netting and the tie. I am using bakers twine instead of rubber bands because I have a baby, and I figured the bands might be a choking hazard. However, now I’m worried about the piping itself being easy to pull loose. I cut 4 inch pieces and just looped it through–as depicted. Wondering if your rug sheds?
KatDid you use the 1″ cotton for your beautiful rug? Do you think it would withstand washing?not do you think the bands would snap?
StaceyCouldn’t this rug be made by hooking the cotton fibers through the netting? I love the rug, but I’m not sure the rubber bands are durable enough. Thank you.
SheriOh my gosh – I love you Val. Your comment made me laugh. 🙂 Let me know how the project turns out!
BrittniOmg I’m dying over here, seriously you are the most patient person on planet earth answering the same questions over and over. Geez people, read the comments! If you can’t be bothered to do that then you don’t deserve a reply. Anywho, I just got 7 boxes of 1 inch piping today (40 yards per box) I’m excited to start this as soon as I get the netting after tomorrow! My best girlfriend is coming over and we’re making this over wine and talks. Thanks for this fabulous idea, but can I vacuum it? JUST kidding.
ValHi Holly. I would recommend trying a thicker option for your project if you can. The one that you sent a link for will definitely work BUT it will take longer and you will use a lot more piping if you go with that thickness. I like the one inch: http://rstyle.me/n/cn8kfamvmw and 1/2 inch thicknesses best: http://amzn.to/2rIJ70p . Hope that helps!
Brittni-Brittni
[…] net produce bag from Say Yes giant DIY weaving made from cotton piping large scale DIY rug from scratch hanging cotton planter DIY from The Lovely Drawer no-sew DIY hot pad / trivet DIY small rope basket […]
6 DIYs You Can Recreate with Cotton Piping - Paper and StitchI cannot wait to try this! I’m planning on redoing my bedroom on a budget and this would be perfect! I know you said the price for your rug was $300? After looking on Amazon at prices I don’t exactly see how it could add up to that amount. Also I was wondering if this one I found is the correct kind used for it? https://www.amazon.com/Wrights-183-9000-29A-50-Yard-Natural/dp/B002PXR65C/ref=sr_1_5/136-0221450-0948175?ie=UTF8&qid=1495669037&sr=8-5&keywords=cotton+piping
HollyIt does take a while, Alex. Agreed. 🙂 But I love the results – it was very satisfying once it was complete, for sure.
BrittniWow, that would take so long but incredibly satisfying once you’re done
AlexHi Erin. Other than spot cleaning, which I’ve mentioned in other comments here, I’m not sure what else you might want to do in terms of cleaning. I haven’t tried using a carpet cleaner on it, so I don’t know if I could recommend it. But as long as you’re careful, and you use a lower setting, it may be okay? I try it in a small area first to be sure though.
Brittni-Brittni
Do you have any advice on cleaning the rug after it has been lived in to keep it fresh?
ErinHi Harmony. I believe the mesh is linked in the materials list in the post. That’s the exact one I used. 🙂
Brittni-Brittni
I’m pretty sure this question has not been asked. Your mesh looks huge. I’ve never seen mesh like that. What kind would I be looking for? You did an incredible job.
Harmony CooperHi Molly. I wouldn’t say a ‘small fortune’, but it’s definitely not a cheap DIY. As I mentioned in the post itself, the supplies cost me around $300. So, in comparison to how much rugs of this size normally cost (if you get a decent quality one), it’s still quite a bit less. Wishing you the best. 🙂
Brittni-Brittni
Cotton piping is NOT cheap, that rug cost a small fortune!
Molly CraigThanks Jess. I love that idea of creating a pattern. Yes – I think the dyeing would work if you precut the pieces before dyeing AND also open them up a bit on each end (pulling back some of the tiny string that incases the piping) so you can get to the inside for dyeing. That part is what will show when you create the rug. Let me know how it goes or if you have any other questions!
Brittni-Brittni
What a gorgeous and genius idea! I’m so looking forward to making this! I’m brainstorming about doing this with a 2nd color to create a pattern to replicate a Moroccan/Beni Ourain style rug for my living room. You mentioned the inside of the cord would not dye well. I’m wondering if I could pre-cut the pieces, THEN dye some of them so the ends of those cords soak up the grey dye? Do you think this could work? I don’t mind if the cords get totally dyed inside because I think the variation of greys and whites would look more authentic anyways. Thoughts?
JessHi Stephanie. I believe the exact piping I used is linked in the materials section of the post. Do you see it?
BrittniI want to know what kind of cotton piping did you use on amazon. Because they have a lot on there.
StephanieHi Vicki. I’ve answered this question in the comments several times. But just in case you didn’t see it. Here it is… If the rubber bands are something that you’re worried about longterm, you can use string to wrap around and knot each piece together (in place of rubber bands) OR as another option, only use rubber bands or string for the outside perimeter of the rug and let the interior pieces just hang out freely, without any additionally security. Because there are so many pieces of piping woven through the mesh, they will stay in place without rubber bands. Of course, that does mean you’d have to be more carefully with pets, vacuuming, etc. So it’s a trade off.
Brittnirubber bands decompose after some years. what else can be used?
Vicki StoneI would like to make one for my daughter’s house,for her bathroom. I would be making a oval one size 24″ X 48″. how much do you think I would need in the cotton piping. If I get this one done I also would like to make myself one in Beige for my bedroom size 7′ X 9′. That’s how much I liked yours. Thx
BethLove your rug! I’m looking to do this project and was wondering, approx how much cotton piping would you suggest for a 5×8 rug, if I buy the 1 inch width? Thank you so much!
TrudyThanks for your suggestion M Wilcox. While my rug is still holding up well with the rubber bands months and months later, I’ve also suggested using cotton string as an alternative or skipping string and rubber bands completely and relying on the tension of the piping to keep everything in place, via my response comments to readers who have asked similar questions. So, we’re on the same page there. 🙂 I highly encourage anyone who makes this rug to go with the option they like best, since each option will give you the same (visual) result in the end.
BrittniThe rug looks awesome but those little rubber bands don’t hold up very well, I can tell you from raising a bunch of girls. They lose their stretch & break after a short time. Tying each loop with cheap cotton string from the hardware store would take longer, but the rug would last longer.
M WilcoxGood question Jessie. I believe anti slip pads have much smaller holes than the multi use netting, which would make it difficult to get the cotton piping through. But if you can find a rug pad that has larger holes, I don’t see why it wouldn’t work. You may need to be more careful with it though because usually rug pads are made of a soft material (which can be accidentally ripped if too much is between the holes). Overall, I would still recommend using the multi use netting over a rug pad. Hope that helps.
Brittni-Brittni
Not sure if this was previously asked somewhere but do you think it would still be possible to achieve this by using an anti slip rug pad (size of desired rug) instead of the multi use netting ?
JessieHi Jen. The number of pieces of cotton piping that would go in each hole vary based on the width of the piping. So, for a super thick piece of piping, you’d only need one and for a thinner piece, you might need two of three. The goal is to fill the grid hole with the piping as much as possible, so that it stays in place, without slipping around, etc. Hope that helps answer your question.
Brittni-Brittni
I’m a little confused as to how you weaved the piping. Is it one strand for each square on the grid? Please clarify 😊
I love how this turned out for you! I am curious to make my own custom size one to go between our couch and tv stand!
JenI am absolutely OBSESSED with the way this rug turned out. It looks even cuter than the rugs I see in stores! It seems really time consuming, but the fact that the steps are super easy makes that no biggie. (: I have an all white bedroom, and I would love for this rug to be at my bedside. It looks so comfy and cozy. I would just sit there with my feet on it just cuz! Haha! As soon as I can convince myself to front the money for this, it will be the first project I do. Until then, it will rest in my blog along with the other projects in my need-to-do DIY list! (;
Mayawww.mayalamode.com
Absolutely adore this, why don’t people read the comments and the answers to questions, how many times were you asked about the width of spool, am rapidly losing faith with the common sense of the good old USA folk, but that doesn’t detract from the gorgeousness of this project, well done
AnnieLooks so cozy, but how does it hold up to regular vacuuming? With multiple pets in my home, and kids, and allergies I vacuum every 2-3 days.
HLove, love, love the texture! This would make great floor pillows for when we have too many teens over for movie night.
MaggieThat sounds like a great option, Billie. Let me know how it turns out with the rug grip. I almost wonder if you could just use the rug grip without attaching the two pieces together with spray adhesive. It might be enough of a grip to go without glueing them together and then you can still replace pieces if you ever need to.
BrittniI absolutely love this rug!!! I too was concerned about the rubber bands, cleaning and animals (after reading through ALL the comments left, I think I’m going to take away a step and add a step in to your instructions. Instead of using bands, I’m going to try as you suggested and simply weave them into desired spots and allow the thickness to secure them. However, for added durability and also to prevent slipping on hardwood floors, I’m considering using spray adhesive and attaching the whole thing to a rug grip. I’m hoping that prevents all the concerns being an issue. Except one. Won’t be able to replace pieces. But at least I’ll still be saving 100’s of bank thanks to you!!! Please feel free to comment on my suggestions. I’ve never made a rug before lol 🤗😘
BillieHi Dominique. It can totally be spot cleaned and I have some notes about vacuuming in a previous comment that you might want to check out. Beyond that, additional washing would be at your discretion.
BrittniReally beautiful looks super cozy… can it be washed??
DominiqueWell since I moved to AZ, I have so so very much time on my hands, my new boyfriend I met on FB doesn’t want me to work therefore I have so many ideas for DIY crafts. I have made a rug before, crocheting, single stitch till finished. Turned out pretty good too. This one will be a challenge tho. Looking forward to starting one.
Shirleyn[…] 16. You can also DIY your own rug, if that’s more your thing. How to make a large scale rug from scratch. […]
Rug Thug: 17 Rugs that Will Make the Room - Paper and StitchOh my gosh! It looks so clean and beautiful. I’m thinking about creating a rug on my own as well but I wonder if its cost effective!
AnaHi Arisun. If the individual pieces are properly secured (with rubber bands or tied together with string) then light vacuuming should be fine. But if the pieces aren’t secured and are just being held in by the force of all of the pieces being tightly pushed together (which does work by the way), you may occasionally suck up a piece in your vacuum if it’s really strong. That has not happened to me personally, but I could see how it would be a possibility. So I’m mentioning it. 🙂 It is a handmade item and should be treated with care.
BrittniIt’s beautiful! Curious how it’s been to clean, does vacuuming do the trick??
Arisun[…] 1. Maak een groot, fluffly kleed. Dit ziet eruit als een héél groot project, met veel handarbeid. Maar tegelijkertijd ook zo lekker rustgevend en zen om in het weekend te doen. Nadat je de eerste ‘plukjes’ vast hebt gemaakt, is het verstand op nul en lekker knutselen. 2. Leren brieven organizer Dit herinnert mij eraan hoe chaos alle losse papieren en brieven op mijn bureau altijd veroorzaken. En hoe handig dit zou zijn! 3. Koperen slalepels Dit is zó’n simpel 1-minuut-project! Het project is niet heel weerbaar (tegen water en veel gebruik), maar aan de andere kant: het is zó snel klaar, dat je het zo weer opnieuw maakt. Leuk idee om je etentje wat extra fancy te maken. 4. Lippenstift houder Dit doet me denken aan DIY-project wat ik voor Pasen heb gemaakt (komt in maart online!). Ik vind deze organizer heel leuk; om je allermooiste lippenstiften on display te hebben. […]
7 DIYs om te proberen dit weekend • A Cup of LifeThat might be something you’d have to test out Renee. As I mentioned in a previous comment below, there are alternatives to the rubber bands that you can use if you’re concerned. Please see the comment below where I answered all questions.
BrittniIt’s awesome and beautiful! But I wonder, will the rubber bands be enough to resist a vacuum cleaner? Or two cats?
Renee-ClaudeThanks so much for your questions everyone! Because of the success of this project, I’ve received an overwhelming amount of questions about this rug. So, rather than responding to them individually, I’m going to try to answer all of the questions in this one comment, so there’s a spot everyone can go back to reference for future questions, etc. 🙂
What thickness of cotton piping did I use? I used a variety of thicknesses of cotton piping because I was on a time crunch when creating the rug, so I couldn’t wait for X number of cotton piping yards to come in for the project in just one thickness. What I used was a combination of piping ranging from 3/8 inch up to 11/16 inch in diameter, but I would say 1/2 inch diameter or even 11/16 inch are probably the ideal sizes.
How much cotton piping did it take to complete this project? Because I used a variety of thicknesses, its difficult to guesstimate how many yards of piping would be needed, if you used just one thickness of piping or if you used multiple thicknesses, etc. As I mentioned in the post though, it will definitely be over 200 yards for a 5×8 rug. Other factors for how much yardage it takes would be how long you cut each piece to fold over through the mesh, whether all the pieces are roughly the same size, etc.
Can this rug be vacuumed and/or cleaned? It depends. If the individual pieces are properly secured (with rubber bands or tied together with string) then light vacuuming should be fine. But if the pieces aren’t secured and are just being held in by the force of all of the pieces being tightly pushed together (which does work by the way), you may occasionally suck up a piece in your vacuum if it’s really strong. That has not happened to me personally, but I could see how it would be a possibility. So I’m mentioning it. 🙂 It is a handmade item and should be treated with care. Hope that helps! As for cleaning, it can be spot cleaned if needed with any product that works well on cotton. And if you’re having trouble getting a stain out, you can remove any of the stained pieces, cut new ones, and replace them super easily. I’ve actually done that once before in a small spot and it worked great. Can’t even tell now.
Is the rug pet friendly? I’m not sure what constitutes pet-friendly necessarily, but I do have a cat and dog of my own and it has been fine with them. 🙂 If you have a cat who liked to knead on things, they may pull a piece up if they’re really going to town, BUT if it’s been secured with rubber bands or strings, that would be pretty unlikely.
Will the rubber bands mentioned in the steps disintegrate over time? I received a lot of questions about this one. I used small elastic hair ties (made out of TPU and/or latex), like these: http://amzn.to/2lCmh9D to secure the piping pieces for my rug. Rubber bands can break down over time (over the course of years), becoming hard or brittle and sometimes breaking at that stage. If that is something you’re worried about longterm, you can use string to wrap around and knot each piece together (in place of rubber bands) OR as another option, only use rubber bands or string for the outside perimeter of the rug and let the interior pieces just hang out freely, without any additionally security. Because there are so many pieces of piping woven through the mesh, they will stay in place without rubber bands. Of course, that does mean you’d have to be more carefully with pets, vacuuming, etc. So it’s a trade off.
Did you cut one big piece of mesh or were there several pieces stitched together? I mentioned this in the body of the post, but I know it’s a lot of info. So, I’m sharing it again here: Basically, I did some quick math to determine how many pieces of netting I would need to cut to make a 5X8 rug (3 pieces that are 8 feet long, since the netting is 2 feet wide), and I would have an extra foot leftover from the width, that I could cut off of the mesh before getting started, etc. Then I ‘stitched’ them together with the piping when it came time to fill up another piece of mesh. You can see the joining of two mesh pieces in one of the photos (second to last one in the steps – right above the final shot of feet on the rug with the pillow).
Can this rug be dyed or made in a color? I actually experimenting with dyeing the cotton piping before starting this project, but because the inside of the piping is what you end up seeing in the final rug design, it was;t a good solution….The outside of the piping dyes easily, but I found that the color doesn’t absorb to the inside easily. So I opted for a natural look. If you really want to go the colorful route though, you can use thick yarn or roving instead in any color you’d like, similar to this project I did more recently: http://www.papernstitchblog.com/2017/01/31/diy-wall-art-weaving-hack/ It would be considerably more expensive though, since thick yarns and roving can be costly.
How’s the rug holding up? The rug is actually holding up pretty well. I’ve switched out a few pieces here and there (when I spilled some wine that wouldn’t easily come out) and we try not to walk on it with shoes on, since it’s white. But other than normal wear from general use, it looks pretty good. The fluffiness does flatten out a tad over time, but that is to be expected with any rug that is as thick as this one. And you can always fluff it back up with your hands, or occasionally switch out the piping in spots if it’s really bothering you.
BrittniJust curious how this rug is holding up? I love the idea, but I need to make sure it’s vacuumable!
ShelbyStill don’t understand how it’s cleaned—spot-cleaning, yes, but can it be vacuumed? Seems to me it would begin to ravel. Also, after a few weeks, doesn’t normal coming-and-going flatten it?
Connie BrownLove this, thinking I’ll try a smaller one and see how it goes. I’m a crocheted, thinking about other options for the rubber and part. I wonder if you pull it through, like with the loom kits or how I put ribbon on a tag, if that would work. I think it would! Or tie with string. Really beautiful!
JulianneHow are these type of rubber bands holding up? I have used them in other craft projects only to have them “dry rot” in about a year. The bands would be my only concern, and I think with all the time involved that I would want something more permanent. Also, did you treat with a stain preventative?
By the eay, the rug is gorgeous!!!
DawnI am wondering how this gorgeous rug is holding up to everyday traffic/use since it has been about 4 months since you shared with us? I am specifically curious about the rubber bands. You see…..I would love to give this a try but I have five kitties and am wondering how easily the bands break. I have one older cat who gallops across a very low pile kitchen area rug and I hear her claws snagging it. Maybe I would have to sew a few stitches in each yard piece to truly secure them. Thank you for any thoughts on this.
Dawn NelsonSimply brilliant. Basic and beautiful too. I”m going to wait for my 50% off coupons to pick up piping though. Cant wait to get started. Thanks for the idea.
RoosMomI will be trying this, but on a smaller scale for a destination trailer.
Joan M. LamoureuxWhat kind of rubber bands do we use? They look small.
Hi,
i love the look of this and it seems like the cost is pretty cheap for a 5×8 rug.
i was wondering thoughg, have you been able to vacuum it? just curious.
i am definitely considering making this.
thanks for the idea!
julianna kufeldtcheers-
Julianna
I am a do it yourself junky and these are the the clearest, most inclusive (sites and $) I have ever read. Thank you
ELEANOR T REYNOLDSHi Brittini,
MurielSuch a good work you did. I really like this idea and I’m thinking about making one for my living room.
Wich thickness did you use for your piping, please. It looks so great!
Thank you
What about the deterioration of the rubber bands over time? Is there a better substitute?
KikiAmazing! Thank you for sharing your diy experienced in making your own rug! It sounds super doable!
Anny Ylles J.What size piping did you use? The article says you used over 200 yards of piping but the size piping you decide on will dictate how much you need and how long the project takes. Just trying to plan out how much to buy. Thanks!
RebekahDo you have a demonstrative video of how to make this? The pictures do not show me enough or I have a hard time understanding. Ive made hook rugs before but im not sure what you are doing with the cotton piping
nicoleCan you possibly tell me what size cotton you used? I love the look and would like to duplicate it. I see where you used 200 yards, but not the diameter of the cotton itself. Thanks in advance.
Lori[…] Source […]
Top 5 Cutest DIY Projects for Your Home or Apartment – MayaLaModeI am in love with this! How Would you be able to do this in a different color other than white?
AprilI absolutely love this rug! Would it be possible to show additional pictures of how you wrapped it around the webbing before rubberbanding it?
SherylJ’adore ce style de travail c’est superbe !! Je ne comprends pas tres bien l’anglais mais j’essayerai de comprendre les explications. Pouvez vous m’aider ? Merci beaucoup.
Claire BricoMes FELICITATIONS”
You have answered a quest of mine, long have I searched for the perfect rug for my bedroom. This is beautiful and easy to make myself. I do wonder about the bands breaking from wear and tear. Have you had that problem occur? Does batting come in colors? Might be a dumb question but…
KristerHello!
Did you find that the material is durable? I am looking to make this rug over the Christmas break and I heard to use a material that has nylon in it.
Thank you,
Kaisha
KaiHow many hours did this take you?
LyndsieThanks!!
I absolutely love this! Great inspiration as I’ve been looking for a budget friendly DIY rug option for our front room. Thanks!
AsiyahHi, I really love this idea and want to make it but I’m wondering if the elastics will eventually go hard and snap? Because every elastic band I’ve had eventually ‘dries out’ and snaps. Just wondering if you’ve experienced that yet or if you think it would work if i cut small bits of thread and knotted the cotton piping instead? I know that will be so much more time consuming though haha! Would love to hear your thoughts 🙂 thanks for a great winter project!
MeganYour rug is beautiful. Is it pet friendly? I’m worried my dog and cats may pull it apart. Does it stand up to vacuuming?
KellyWow I love the look of this rug ! But I do have question. Have you tried cleaning it? vacuuming it?
Erika @ EP art.food.homeI would also like to know how to go about cleaning this rug. I love the look!
I wonder if you could do this with wool roving instead. Thoughts?
Mandy[…] -> Llega el frío al hemisferio norte, así que esta propuesta nos viene muy, pero que muy bien. ¡Crea tu propia alfombra peluda! […]
Ideas del mes: noviembre - DemodéThis is so beautiful! Just a question, how is it when you vacuum it? Does it come apart any? Thanks!!!
JulianaOh my!!! I love this!!
Gemma
Gemmawww.fadedwindmills.com
It is very beautiful but how do you clean ?
Amelia MacheraIt really is beautiful. I love that it’s handmade. My concerns would be cleaning it and the little rubber bands coming loose. (I have toddlers.) I assume you used rubber bands instead of tying them because a knot would be hard on the feet? Thanks for your insight and idea!
LaurenHi, I was just wondering what the ending length of cotton you used was. Thanks!
PrestonLooks lovely…can you vacuum it?
ShaunaHi, I was wondering if you purchased the 10 lb spool from Amazon, if so how many spools did you need to complete your 8×6 rug? Thank you.
MelHow many spools of the 10lb cotton piping did you purchase to make the 8×5? Was there any cotton piping leftover? Thank you.
MelElisa. I had several pieces of netting that were bound together to form one large rug. I would have used just one giant piece of netting, but was limited on what I could find in stores, so I opted to attach them together once complete and it was honestly just as easy. You just follow step 5 instructions when attaching the pieces together and you’ll be good to go. 🙂 Hope that helps.
BrittniGreat idea !!!!
Elisa StorerDefinitely will try….did you cut one big piece of mesh ?
Or did you make small squares and then binded them together ?
Did not understand that part.
Thank you, it looks great
Hi Angelique. I didn’t use a backing and haven’t had issues with slipping (maybe our floors aren’t as shiny and slick as some?). The rug is also pretty heavy and thick, so that can be part of why there aren’t any issues with slipping. That said, you can easily use a rug pad underneath if you think that would be an issue. 🙂 Hope that helps.
BrittniAwesome rug! Did you use any backing? Under felt? Just wondering how slippery it would be on hardwood?
AngeliqueCan’t wait to see it, Carrol. Looking forward to it.
BrittniI love your project. I will definitely try it. Thank you for the simple and clear instructions. Refurbishing my lounge next year and will send photo of finished rug once in place. Hugely inspiring.
Carrol KellyHi Aline. I used a combination of different widths. I highly recommend 1 inch when you can find it – available on Amazon http://amzn.to/2dVuPW5 and here is a link to all the available widths of Amazon in case you want some variety… http://amzn.to/2d9w7bL
Brittnican i ask what thickness of piping you used? i love how yours turned out. this seems like a perfect pre-baby project for me!!
aline[…] Shag Rug […]
10 Cozy Fall DIYs The Internet Loves | agaaraI didn’t find any colors of cotton piping like mine when I was searching for supplies for this project, Judith. But it’d be worth looking into further. Let me know if you find anything.
BrittniMy website is under construction so to speak. I love this technique. I am a knitter/crochet person and looking for new ideas to work with fiber so something similar like this.
My question is, do they sell cotton pipping in difference colors? I would love to design with multi colors.
Thanks
Judith QuateJudy
Yep, that’s exactly how you do it, Marisha. 🙂
BrittniThis looks amazing! I’m a bit confused on the procedure though. How do I weave it through the net? Do I just fold it around the net and tie with rubber band and then fluff? Thanks
marischaHi Dianne. This rug can be spot cleaned with a rug cleaner and rag. I wouldn’t recommend using rug cleaning equipment on it, however, since it’s a handmade item that is a bit more delicate than a manufactured piece. Additionally, if there is an area that is stained, the section can be easily removed and replaced with new cotton piping. Hope that helps.
Brittni-Brittni
How do you clean this rug?
DianneI’m confused…. I thought SCRATCH was something you baked with. As in my mom baked the cake from scratch.
EdHoly moly. This rug looks gorgeous! I LOVE it.
Oceana | M+M[…] wait is over brittni’s smart DIY will have you making rug for your home( holy moly its too good ) I love a good word cushion that […]
What's enthralling this Friday #9 | Enthralling gumptionThis looks superb – like walking on a (or a cauliflower!) but alas I won’t be able to make one for the home as our cats would shred this to pieces. I will link this on my craft web blog as I think my readers would be really interested in making this. Great project as I have never seen any DIY rug that looks quite like this.
Rob NesbittWanted to chime to answer questions… Joan, Sharon, Madelin, and Sue. Yes, overtime (years I believe), rubber bands do breakdown. There are two ways to solve this if you think it will be an issue. 1) Use cotton string as an alternative to the rubber bands for wrapping the pieces together. 2) Use rubber bands or string strictly on the outmost layers of the rug and keep the interior layers un-rubber banded (for lack of a better term). I tried this to be sure it was secure and the cotton piping does stay in place without rubber bands in the interior layers on its own because there are so many pieces pushing against one another. Hope this helps! Let me know if you have any other questions.
Brittni-Brittni
Please can you tell us whether the rubber bands disintegrate? Also could you wash it, or how would you clean it?
JoanYour rug looks amazing! My concern would be doing all that work and wondering how many years it would last due to the rubber bands drying out and breaking. I would have would have just looped the yarn around itself, wouldn’t that have worked and been cheaper? You wouldn’t have to buy rubber bands.
SharonWow..what a great idea! The rug looks so soft and indulgent!! I would so do this if I didn’t have two Labs!!
Debbie PearlSharing on my Facebook page:)
Debbie
It’s a great idea, however, as someone already commented, eventually rubber bands disintegrate and that would be a problem.
MadelinI wonder if the traditional rug-hooking method could be used. I also wonder what happens when the rug gets vacuumed. Does look stunning though!
Hi Sherry. I used a combination of different widths. I highly recommend 1 inch when you can find it – available on Amazon http://amzn.to/2dVuPW5 and here is a link to all the available widths of Amazon in case you want some variety… http://amzn.to/2d9w7bL
BrittniWhat size piping did you use for your rug?
SherryThis is fantastic!!!! Thanks so much for sharing. It does look easy, totally do-able! You did a wonderful job and must be so proud of your work! I sure am 🙂
SueSo excited to find your post! I purchased a giant “spool” of cording at a liquidation sale, not even knowing what to do with it, just knowing I had to have it. Now I know! Thank you~~
Patti CalandeThis came out great – I’ve always been curious about weaving my own rug, and this may just have inspired me to give it a go!
Amy (@amyventures)Hi Ann. I used a combination of various widths. I highly recommend 1 inch when you can find it – available on Amazon http://amzn.to/2dVuPW5 and here is a link to all the available widths of Amazon in case you want some variety… http://amzn.to/2d9w7bL
Brittni-Brittni
I can’t wait to try this. Did you use 1″ piping or 1/2″ piping for the rug in the tutorial?
AnnIt looks stunning and must feel lovely, too. I do just wonder about using rubber bands, through. Won’t they deteriorate/disintegrate over time (I know they do in my kitchen!)? Might it be better to knot them through the mesh? But I love the idea of using cotton piping: I’d been looking at thick wool …
SueHi Lynn and Tiki. I used a variety of widths, actually, but that’s not required by any means. You’ll still achieve the same result, whether you’re using 1 inch piping, 1/2 inch, 3/4 inch, etc BUT it will be faster if you use the widest cotton piping your can find – 1 inch just like this one is great http://amzn.to/2dVuPW5 when you can find it and here is a link to all the available widths of Amazon in case you want some variety…http://amzn.to/2d9w7bL . Hope that helps!
Brittni-Brittni
That looks amazing… I’m going to make it for my daughter. What is the thickness of cotton piping you used?
TikiThnks.
This is lovely. What width of the cotton piping did you use?
Lynn DalsingHi Jamie. Yes, it is possible. It’s a bit more tricky to dye the piping because you’ll be showing the inside of the piping when it’s finished, not the outside (outside is the easiest to dye). But yes, it is possible. 🙂 This dyeing project might help with that, if you need any instructions on dyeing: http://www.papernstitchblog.com/2016/02/24/how-to-dye-a-synthetic-material/
BrittniThis is such an amazing DIY project!!! Do you think it would be possible to dye the piping first before weaving it so that it could be more colorful???
JamieCongratulations! It’s beautiful and you have the patience of Job.
janHi Giselle. I don’t remember exactly how long it took (it was spread out over a few days) but it was somewhere around 15 hours total. It’s not a fast project, but it is easy. 🙂 Hope that helps.
Brittni-Brittni
It’s stunning. I have to ask, how long did this take?
Giselle @ The Busy SpatulaThe rug looks really nice, I just do not know if I have enough patience I just might give it a try.
Lisa OglePastel colors would look so pretty, Melissa.
BrittniThis is sooo my next diy project! I’d love to try putting a pastel color on the cotton piping ?
MelissaSo happy to hear that Bree. Hope you’ll let me know how it goes.
BrittniThis is exactly what I’ve been wanting to make! I’ve been searching all over for the perfect cozy rug but couldn’t find the right one. I will definitely be trying this one!
Bree ZHahaha. Thanks Rachel. 🙂
BrittniGirl. You made a RUG! That’s so amazing!
Rachel M SmithA smaller version would be easy as can be, Kiersten. Highly recommend giving it a try.
BrittniThis definitely looks time-consuming! But it’s such an impressive finished product. I’ve been thinking of buying a rug like this, but I might have to try a smaller version of this!
Kiersten
KierstenThanks Lex. It is the perfect activity for Netflix binging. I bet Vita could even help…it’s so easy.
BrittniB! This is amazing. I totally want to make my own now and just work on it while I binge on Netflix!
Lexy | PROPERThank you so much Marwa. I feel like cotton piping is my magic craft supply rn. Every time I use it, I love the results. 🙂
BrittniWow!! I am amazed and doesn’t even look like its been made rather bought from a high-end store!
Marwa | Enthralling GumptionThat’s a really good point, Emily. You’d be able to deconstruct parts with stains at anytime and add in new pieces to make it feel brand new again.
BrittniI love this! I’ve always wanted to go back to hardwood floors and rip out my carpet – especially after finding out my daughter is extremely allergic to dust mites. But having hard floors seems to make living rooms so much less cozy. This would be a great solution! Plus, since you made it yourself, you can easily deconstruct parts of it if red kool-aid is spilled on it. Just get more cotton piping and replace the stained portion! Genius!
EmilyIt was a lot of work, but totally worth it. Glad you like it Michelle. 🙂
BrittniWow, that must have been so much work, but it looks amazing!
Michellehttps://www.makeandmess.com/