A minimalist desk that you can make yourself!

It’s a DIY desk project! When it comes to do-it-yourself projects, I think wood is probably one of my absolute favorite materials to work with.
Admittedly, I’m far (FAR) from a wood craftsmen. But from a DIY point of view, I know my way around a handful of (the less intimidating) power tools. And have a little experience with desks specifically – anyone remember my DIY standing desk?
So, today I’m sharing how to build a minimal modern desk with storage compartments, from scratch (no design plans or anything), for under $100 and just a handful of tools / supplies.
And you can do it too! I promise. Just click through for the tutorial and you’ll be on your way in no time.

How to Build a Minimal Modern Desk
You may remember this DIY desk idea from the home office / guest room makeover I did for Invitation Homes Make It Home Show House recently.
When I shared the reveal on Instagram, I got some questions about how I made the desk, so rather than trying to explain it all on IG, I put together an in-depth tutorial here in case you want to make your own.
The end result is renter-friendly, budget-friendly, and can be completed in an afternoon!
Here’s what you need to make your own minimal modern desk…
Materials and Tools Needed
- 20 inch wide and 3/4 inch thick pine panels (that will vary in length)*
- (3) 3 inch L brackets / corner braces and screws
- (20-24) 1.5 inch L brackets / corner braces and screws
- (6) drywall anchors
- hammer
- finishing nails
- compact circular saw
- power drill (with drill bit and screwdriver attachments)
- level (which will double as a straightedge)
- trigger clamps
- 2 sawhorses
Material Notes
*You can use any type of wood you like, but I used 3/4 inch thick stain-grade pine panels (it’s this type of wood).
Each piece I bought in-store at Lowe’s was 20 inches wide and varied in length based on what they had in stock at the time.
I ended up buying 4 pieces of wood all together – one 20×72 inch / two 20×48 inch / one 20×36 – to make it work based on what was in stock at the time. BUT you can mix and match lengths depending on what is in stock at your store.
All the dimensions that the wood will be cut down to are below, so you can figure out what your other options might be for wood sizes.
Before Getting Started
I started with a quick sketch of what I was envisioning.
Originally, I wanted to do something longer with more storage cubbies underneath.
Once I started taking measurements though, I realized it would be easier to shorten the length and leave room for a larger mirror.
Then, when I got to the store to pick out the wood, I noticed there was a pre-cut piece of wood that was close(ish) to the new dimensions for the desk top I was planning – just a few inches off from what I was looking for.
So, I went with it! The less cuts the better in my mind. One less thing to have to worry about.
Then, I rounded up the other pieces that I knew I would need to cut down (for the legs and storage cubbies), grabbed a handful of L brackets and was on my way!
A DIY Desk in 4 Easy(ish) Steps
Step #1: Cut your wood.
First cut all pieces of wood down to size. I found it easier to cut everything at once so that I could switch gears into assembly, instead of going back and forth on cutting and assembling.
I used a compact circular saw (this is the one I have) because I feel like it’s much easier to use than larger / heavier saws – and a long level clamped to the board and saw horses, once I measured everything, as a straightedge / guide to keep everything perfectly straight while cutting.
Again, you can use whatever you feel comfortable with.
There are eight pieces of wood that need to be cut. Well technically one of the eight pieces you should be able to find precut to the exact dimension needed. So I guess you’d only have to cut seven pieces.
But there are eight total pieces of wood for this design.
If you want to make a desk just like mine, I have the exact dimensions below to make it easy for you.
*Keep in mind though this desk attaches to the wall on one side, so it is not freestanding. It only has legs on one side and then attaches directly to the wall on the other side.
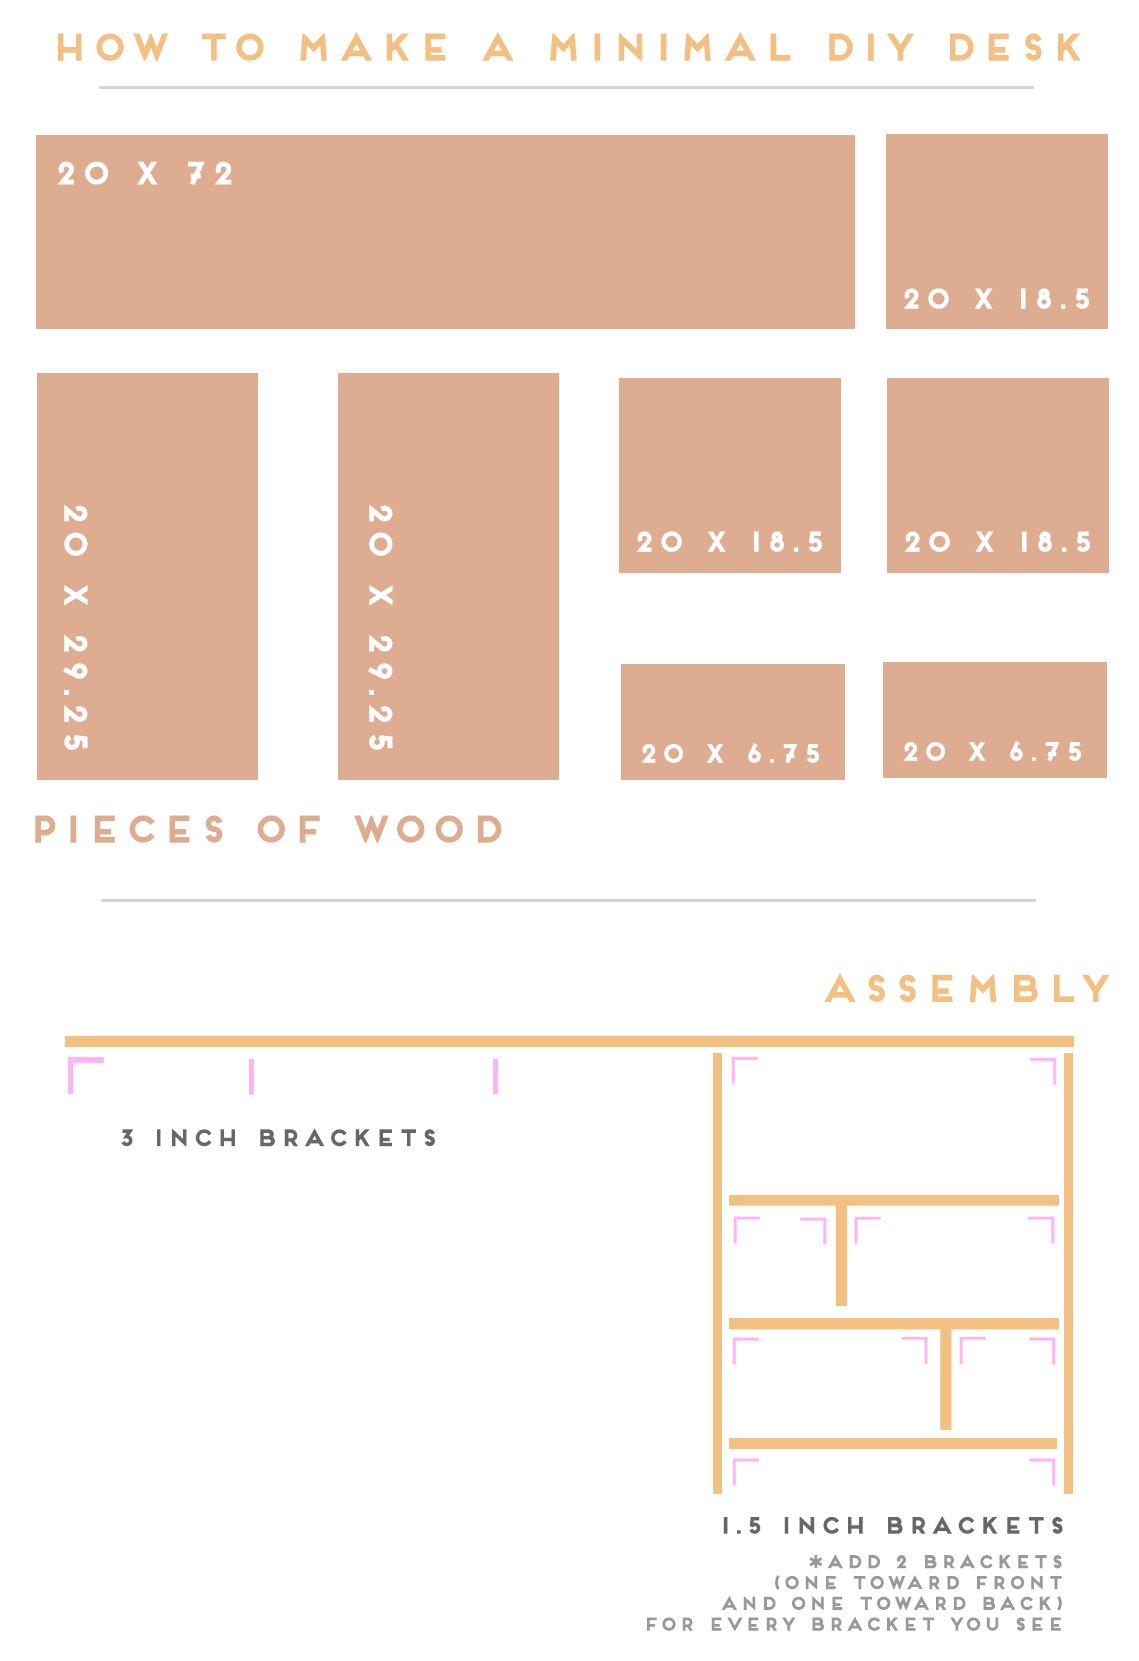
Dimensions of all the wood pieces used to make this DIY desk…
- 1 piece of wood that is 20 inch x 72 inch // This is the tabletop. And you should be able to find it in that exact dimension without having to make any cuts, but if you need to cut it down to this size, that’s another option.
- 2 pieces of wood that are 20 inch x 29.25 inches // These two pieces are the vertical side legs that create the storage compartment. *The reason why it has an extra .25 inch is because I wanted the desk to have a total height of 30 inches, which is standard desk height) and the wood I used is .75 inches thick already, so that will give you the full 30 inches when all is said and done.
- 3 pieces of wood that are 20 inches x 18.5 inches // These are the horizontal shelves created in the storage section of the desk.
- 2 pieces of wood that are 20 inches x 6.75 inches // These are the 2 vertical divider pieces that are in the bottom two cubby / shelves.
*I had to cut extra notches out of the two vertical leg pieces to accommodate for the base molding in the room, so the legs would go flush against the wall.
If that applies to your space, you’ll need to measure and cut that at the bottom back of each of those pieces as well.


Step #2: Next, assemble the storage cubby / leg side of the desk.
I found that attaching all the cubby / storage pieces to each other to form the storage leg side and THEN attaching it to the wall worked best / was the easiest.
I laid everything out on the floor to get started and worked my way up, starting with the bottom shelf brackets.
I measured 3.5 inches up from the bottom of the vertical legs (to accommodate for the molding underneath the desk, so everything would sit flush against the wall) and screwed two 1.5 inch L brackets to each of the two legs (so a total of 4 L brackets per shelf) at that 3.5 inch high line.
Then attached the top of those L brackets to the bottom of the first shelf (one of the 20 inches x 18.5 inches pieces), making sure everything was level as I went.
Next, I attached the first vertical cubby divider (one of the 20 inches x 6.75 inches pieces) to a new 20 inches x 18.5 inches shelf using L brackets.
Attach to the underneath side of the shelf where ever you want the divider to be. I did mine off center for fun.
Then, I attached the remaining vertical cubby divider to the last remaining shelf with L brackets, again underneath the shelf and again off center – but the opposite direction.
Now, you can more attach the remaining shelf pieces with dividers that you just completed to the legs. Again, using L brackets to secure and leveling as you go.
I found that securing the L brackets to the vertical legs first, then standing it up and resting the shelf on top to make sure it was level before screwing the top parts of the L brackets in was the best method for making sure everything stayed level.
And if anything isn’t level before screwing in, you can slightly bend the tops of the L brackets to accommodate

Step #3: Attach the desk top to the legs and get everything into place.
I used the same saw horses that I had used for cutting to get my desk top (approximately) into place, with a couple of pieces of scrap wood underneath to get the exact height level I needed.
And then stood up the storage legs on the other side, so the table top is resting on the legs on the right hand side and the saw horses on the other.
Make sure it’s level before moving on.
Then, I lined up the end of the desk top with the end of the legs, so they were perfectly flush and hammered in finishing nails (about 2 inches apart, all the way across) through the top of the table top into both vertical legs to quickly secure them.
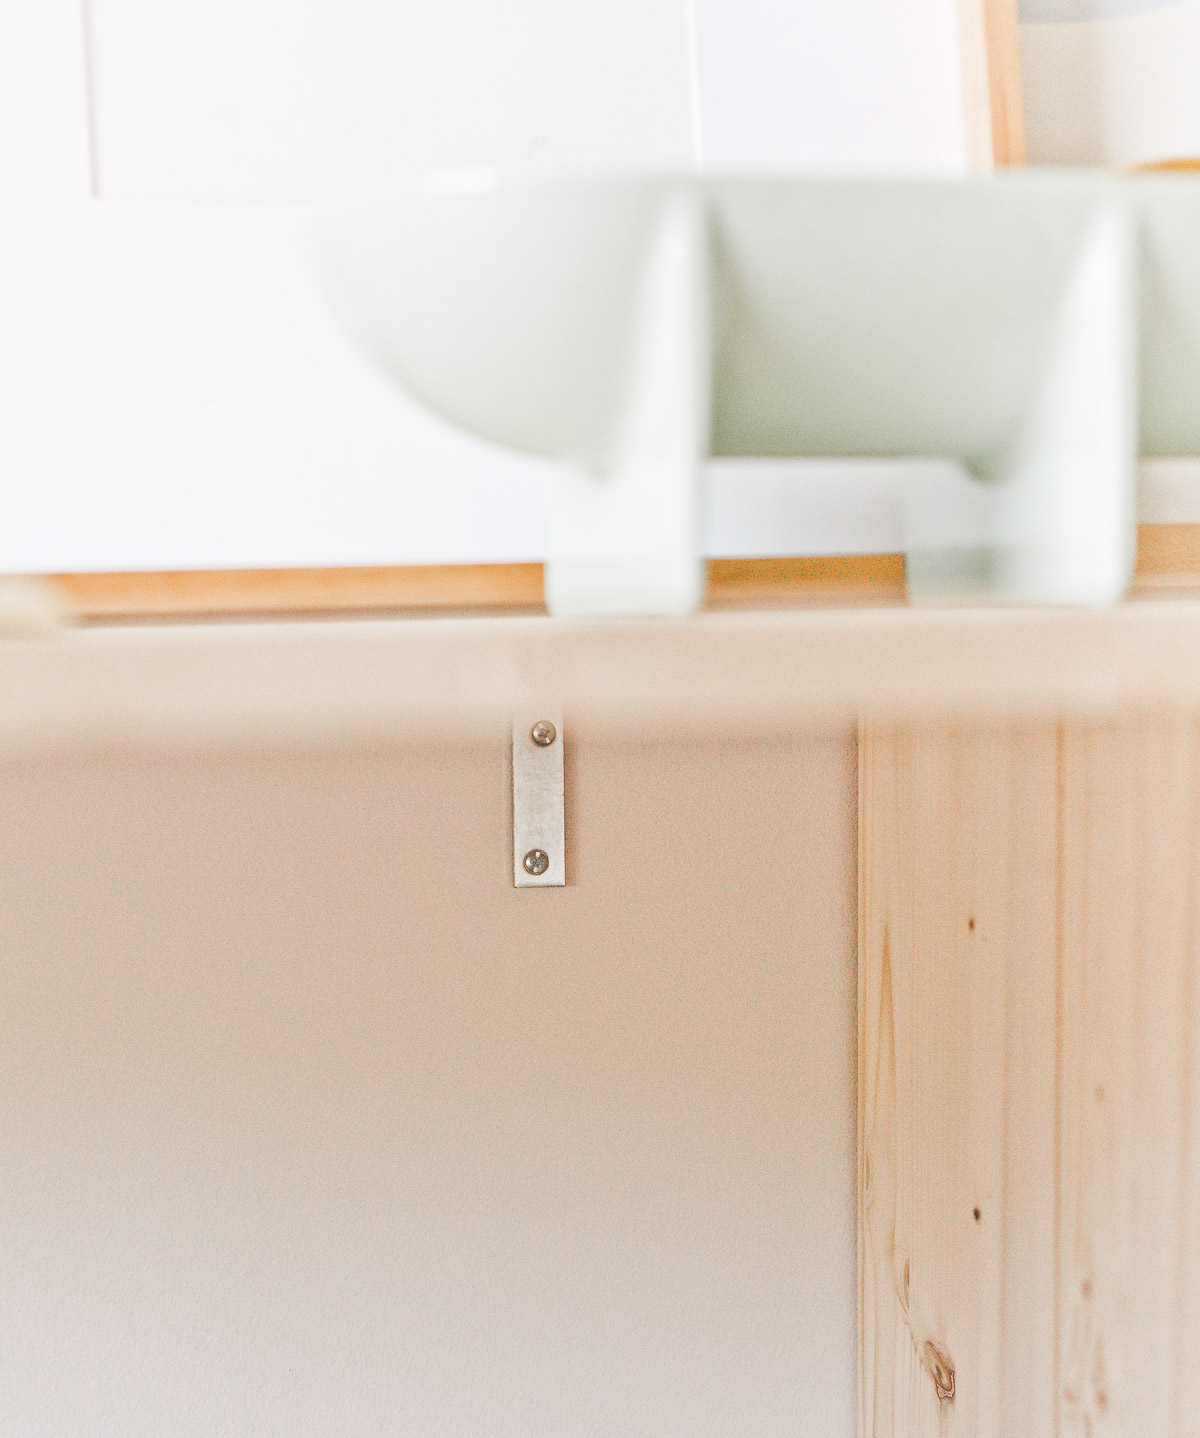
Next, I attached the the storage legs to the desk top fully with 4 more L brackets – two on each vertical leg, underneath the desk top.
Step 4: Secure the desk to the wall.
Now that the desk is generally put together, it’s time to secure the whole thing to the wall.
NOTE: This is where I used the drywall anchors as well, since I wasn’t going directly into studs with the L brackets.
You can skip the drywall anchors if you’re drilling the L brackets directly into wall studs.
Making sure that the desk table top is level, I secured three 3 inch L brackets to the wall and table top.
One 3 inch L bracket was attached to the wall and underside of the desk on the left wall to support the ‘floating’ side and then two 3 inch L brackets underneath the front of the desk, evenly spaced from each other, again attached to the desk and wall.
You can add a fourth 3 inch L bracket under the storage leg side if you find it to be necessary.
For extra security, if desired, you can also add finishing nails to the storage legs side of the desk now that everything is free standing.
I added finishing nails every two inches for each shelf that joined together to the vertical legs.
Styling your desk when its done
When the desk is complete, you can add DIY desk accessories, style a wooden peg rail above it, add some DIY artwork, and maybe even a couple of plants.
Another option (that I personally love), would be hang a wall organizer over your desk.
That way, everything you need is right there in grasp (once you fill up all that storage underneath).
Last, for the selves, I recommend adding some books and baskets. It strikes a nice balance between form and function.


Alright! We’re finally at the end of this DIY desk project. Did I miss anything? If you have any questions about this DIY desk project, let me know! Happy to answer.
10 comments | Click here to reply
Your blog posts are so thoughtful. Loved it.
NipponLove your work :)) Can I share it on my blog?? I will signed you:))
MajaI love this desk and shelf diy! It’s beautiful! Where did you get your wood from?
MiekenLove this desk! Can i ask where the peg rail is from?
LeahWould you suggest staining the wood or leaving it raw? Did you have to sand it down?
SarahLooks great! I was wondering where the chair you have is from?
CarlaAwesome Karlijn. And I love the idea of writing up a post on the art that I have. I do get asked about it relatively frequently, so that’s a great idea! 🙂 Thank you for the suggestion.
Brittni-Brittni
Next year I will hopefully move from my one room apartment to a two room apartment (fingers crossed). This will be on my to make list then, so good!
KarlijnAnd a question, can you make a blogpost about the art you have? I love all of the ones in the pictures above and would love to know where they’re from! 🙂
Amazing Chesca! Let me know how it goes.
BrittniSo excited for this tutorial! I’m thinking about building one for the kiddos homework station. 😊
Chesca