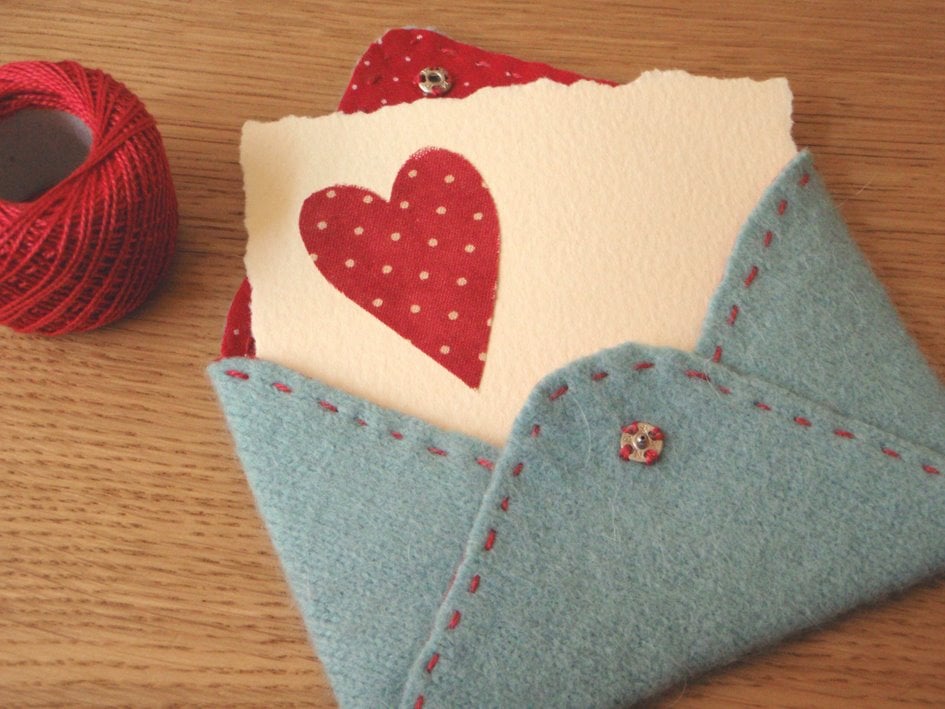
A reusable valentine that’s super cute? Yep, that’s what this cloth envelope craft is all about.
I’m a big fan of snail mail and happen to have a pretty hefty fabric collection as well. So this tutorial, from Amy of the LucyKate Crafts blog, is right up my alley. It’s a super cute DIY Valentines gift that can be made last minute and used year after year! Great for your significant other, a close friend, or family member. What’s not to love?!
Amy suggested sharing the tutorial here and I am not all that great with a sewing machine, so I said yes, absolutely! Click through for the step by step instructions.
Are you guys ready for a little Valentines Day crafty tutorial? Would you like to make a cute little love letter for your loved one?
Let’s begin, you will need…
Supplies for Making a Cloth Envelope
1. a square of felt or felted wool (mine is from a felted sweater), 16 x 16 cm
2. a square of fabric in a print of your choice, 18 x 18 cm
3. a square of bondaweb, 18 x 18 cm
4. extra bit of fabric for making a stamp and decorating the love letter
5. one snap fastener
6. a button
7. embroidery thread
8. pins, sewing needle, scissors
9. steam iron
10. sewing machine (optional!)
11. piece of card, 10 x 7 cm

How to Make a Cloth Envelope
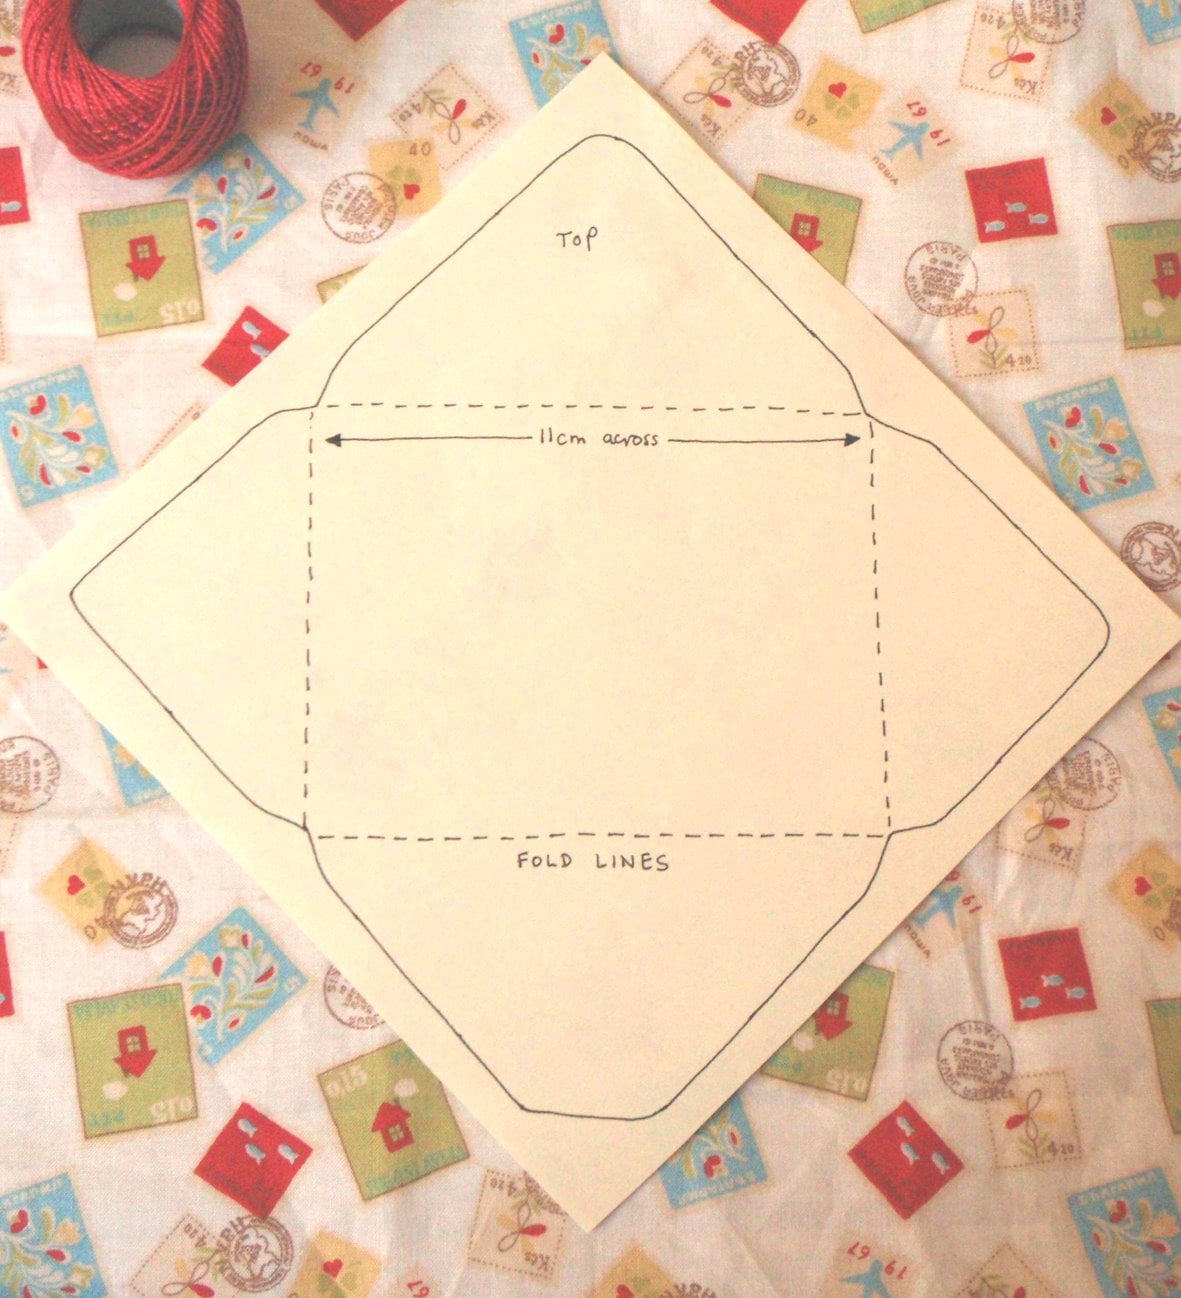
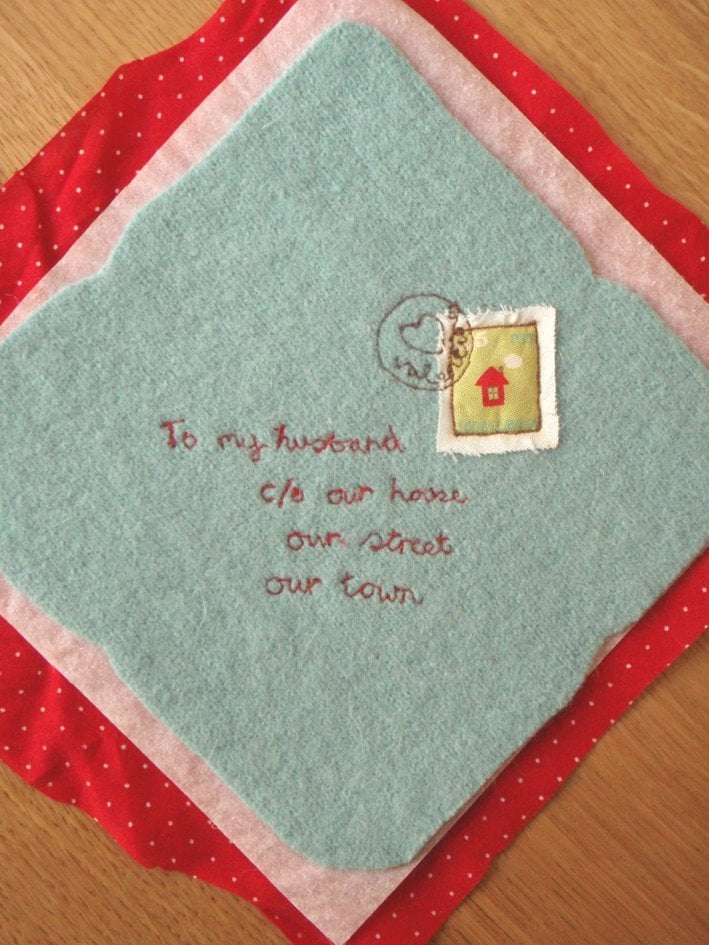
1. Print out the above template so that it is 11cm across where marked, cut out and pin to the felt and trim to match.
2. Sew a running stitch along the marked ‘fold’ lines. This will be removed later as it is just a guide for the lettering position.

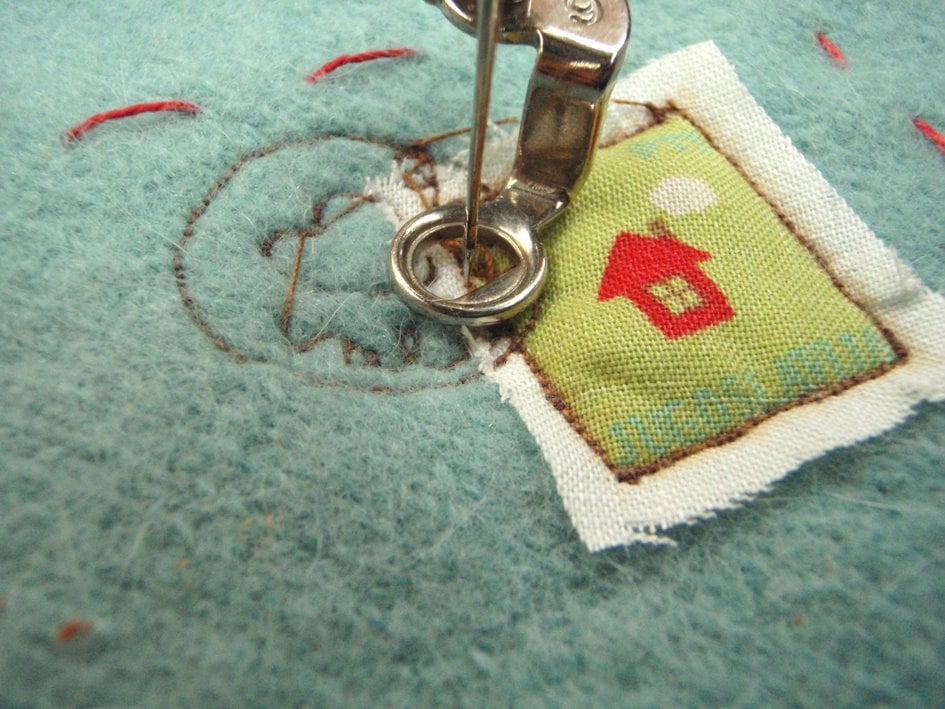
3. Place a small stamp shaped piece of fabric in the top right hand corner of the envelope front and stitch.
I’ve done this using my sewing machine, only because I feel guilty I’ve not used it much since I bought it, but you can easily do this by hand.
I also added an embroidered postmark for extra cuteness!
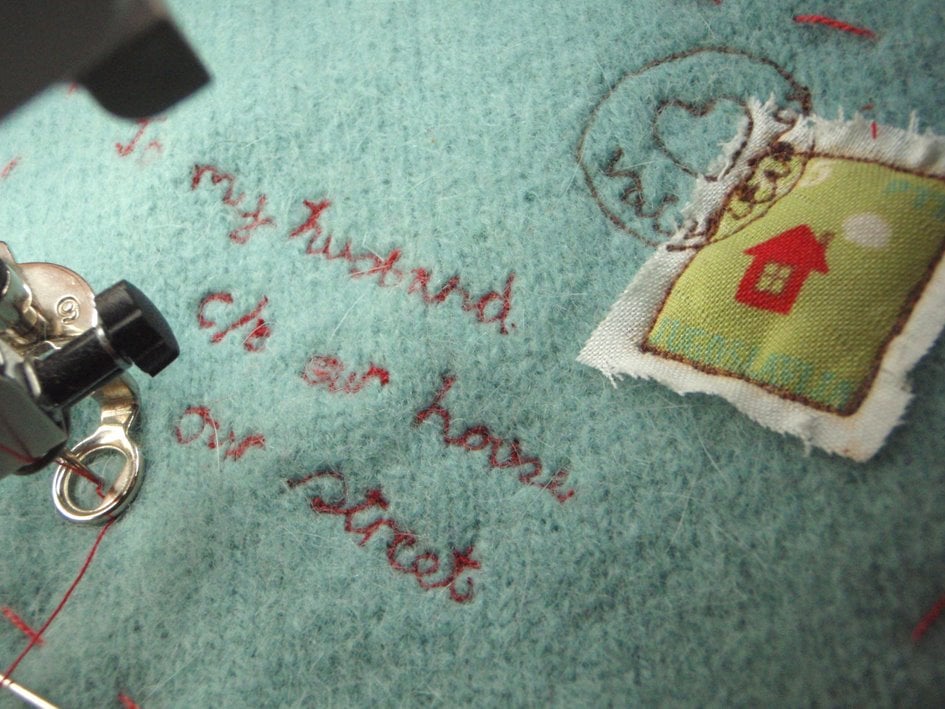
4. Next, embroider a name and address. It is obvious who mine is for, I couldn’t do anything suspicious, he reads my blog!
Once the address is complete, you can pull out the running stitch marker.
5. The next stage is to add the bondaweb, place your envelope on top of the sticky side of the bondaweb, turn both over, so the paper side is facing up and press with the steam iron.
Trim away the excess bondaweb and then peel off the backing paper.
6. Turn the envelope over again, face down, place the fabric right side up on top, and again, press with the steam iron to fix the two together.
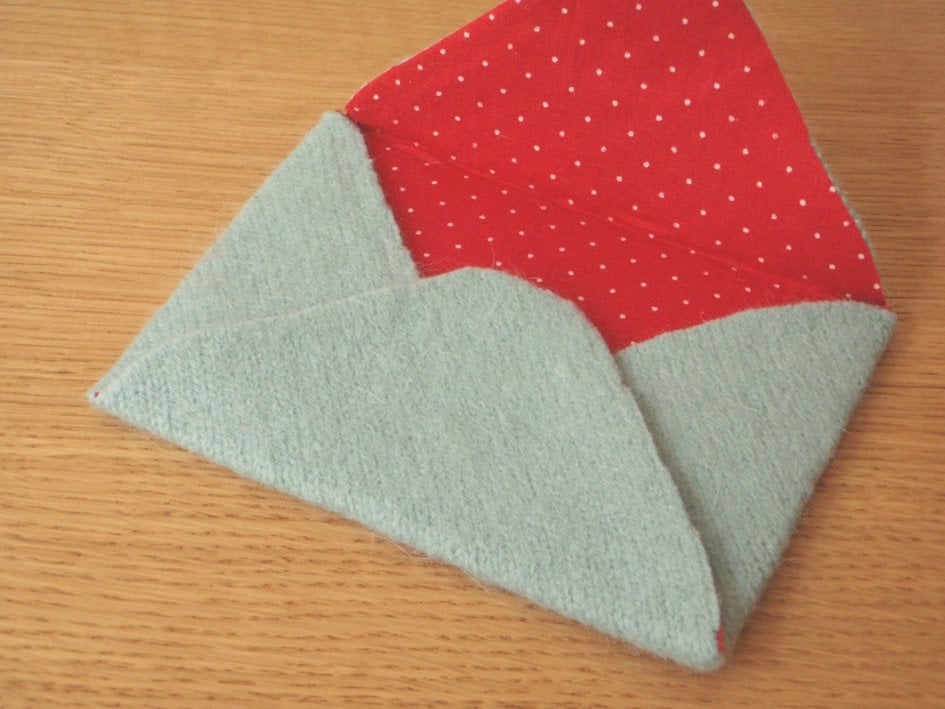
7. Trim away the excess fabric, fold the valentines day envelope as indicated on the template, and once again, press with the steam iron.
8. To assemble the envelope, stitch a running stitch around all of the edges making sure to stitch through both layers where it overlaps, adding the button,
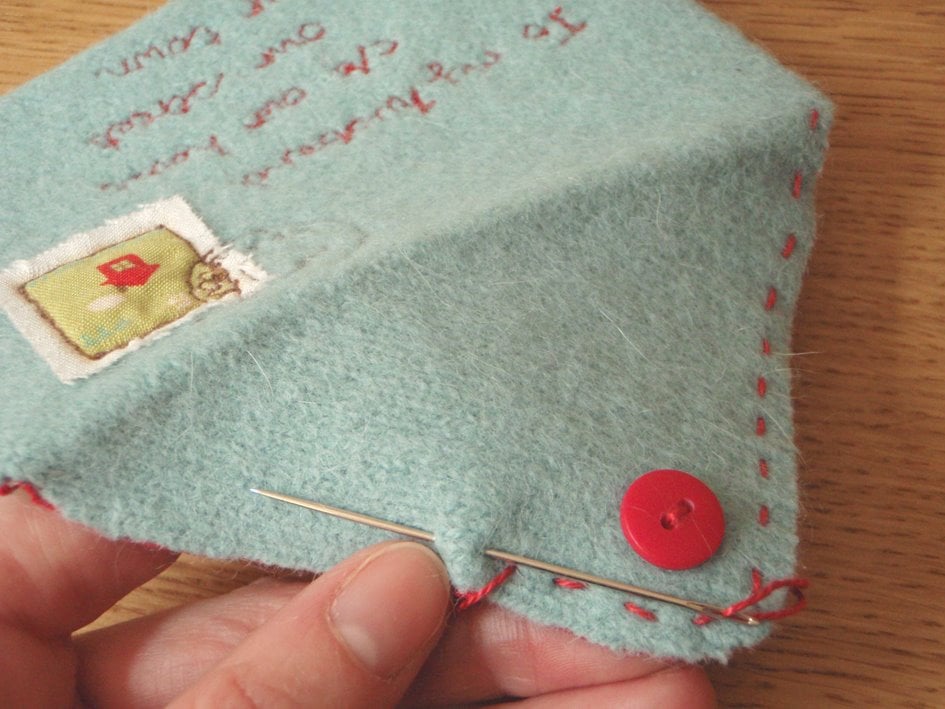
and snap fastener as you go.
9. Now you are ready to make something to go inside.
All I’ve done is given the card a torn edge, and stuck on a fabric heart. I’ll write the message later, …it’s private!
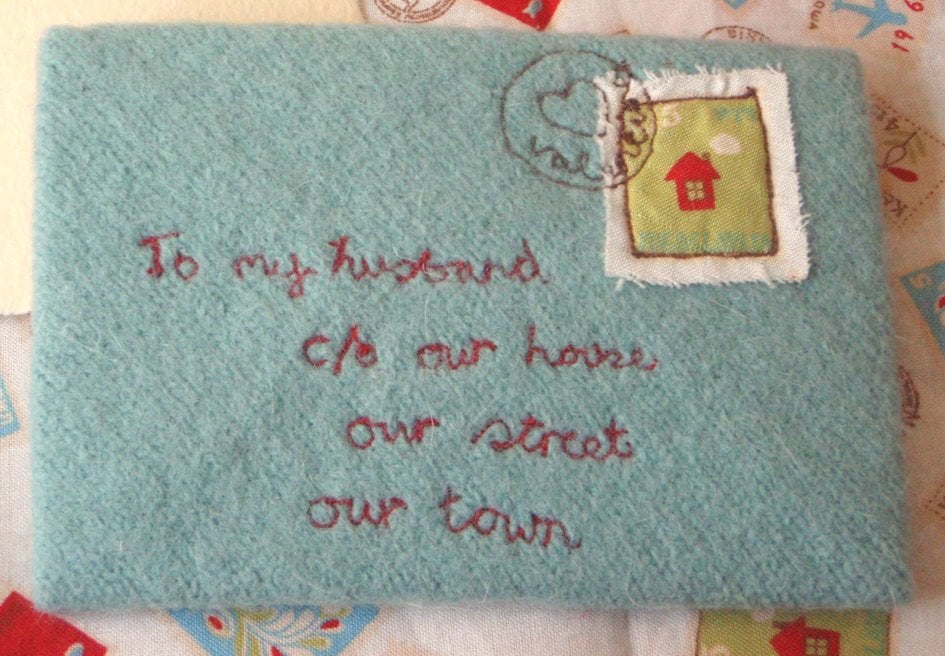
And voila, it’s done! Don’t forget to pinch it back after Valentines Day, you can use the envelope again next year!
—
Great tutorial Amy! Make sure you enter the giveaway on Amy’s blog at this link.
17 comments | Click here to reply
I love this Valentine’s Day envelope
DawnIs this a British site? I call these “spools” I clicked on “cotton reels” to see what the heck a reel was. I thought of a fishing reel at first.
Susan RamsayThat is so creative. I love the envelope, stamp, and postmark. Easy to follow directions but probably still too hard for me. Thanks for sharing
Rontrès belle idée ,j’aime vraiment beaucoup
reginaI would love to get the pin cushion, I teach high school sewing and would love to have it on my desk. I love to get little projects for the young ladies and gentlemen in my class so they can try to be creative also. I know it would inspire others. Thank you. Anita
Anita Homesley[…] 3. Felt valentine by Papernstitch […]
{DIY} Fabric Envelopes | Creative Collective[…] think this DIY for fabric envelopes is so cute and would be great for Mother’s Day! And I loveeee all of these cool ideas for […]
Pretty DIYs!, Women Haircuts 2011, Short Hiarcuts, Celebrity Haircuts, Emo HaircutsWow, this is such a cool idea! I will definitely give it a try and the steps look easy enough to follow.
Thanks
JolandieJolandie
That is about the cutest thing I have ever seen! I think many people have caught on to felting…I rarely see wool sweaters at the thrift shop anymore 🙁
Susan ReaneyMy mother in law love sewing. She’ll be happy when receive this pin cushion.
Lay Hoon[…] Fabric Love Note @ Paper n Stitch Blog […]
handmade valentine gift ideas | frugalandthriving.com.au[…] optionalcard stock, 10 x 7 cm To proceed with the project, check out this lovely tutorial on Paper n’ Stitch. Via. Don’t buy into the commercialism; show your loved ones you care with handmade […]
How to Sew a Valentine | My.BuzzCritic.com[…] part of my birthday gifts for M was a felt envelope. I found a nice tutorial on the net and thought to give it a […]
Sewing an envelope » Happy SerendipityOh I love this envelope, really so cute and clever. And which of you very lucky people above got the pin-cushion? Wish I’d seen this earlier, would have nominated my 7-year-old who has just taken up the sewing bug 😀 Really brilliant blog.
glittermummyamazing post ! I will bookmark your blog . thanks
PRANAVI found your blog on google and read a few of your other posts. I just added you to my Google News Reader. Keep up the good work. Look forward to reading more from you in the future.
Buy Sewing SuppliesI love this! Thanks for posting this-I’m wishing I had more time with all the great DIY tutorials I’ve been coming across lately!
Heather